

Criteria-Based Screening (CBS) offers an alternative, comprehensive screening workflow in Nested Knowledge that structures your screening process around question-based form instead of a list of exclusion reasons. By creating simple Yes/No questions, it allows reviewers or an AI to answer these questions in the screening process before finalizing a screening decision to encourage a more effective screening process.
Set up a screening criteria yourself or utilise Smart Config: Screening to generate one for you. This criteria can then be used for fully manual screening or paired with Smart Screener, an AI tool that assesses and answers your screening questions with annotations. This tool can speed up manual screening, or completely bypass human screening and apply screening decisions based on a threshold of correct answers.
This brings the first model to our software that enables immediate screening by AI without any human screening! See below for a video demo:
Overview #
By default, Screening in Nested Knowledge uses Criteria-Based Screening, which offers a more structured approach:
- Enable Criteria mode in Nest Settings.
- Define your inclusion criteria as Yes/No questions.
- Answer these questions for each record (abstract or full-text).
- Include/exclude based on which or how many criteria are met.
- Optionally let AI pre-fill answers via Smart Screener.
This method is ideal for protocol-driven reviews where consistency and traceability are important.
Steps for Configuring Criteria-Based Screening #
1. Navigate to Configure Screening #
On the Configure Screening page (red), the layout prompts you to name and create questions to be answered during the Screening stage.
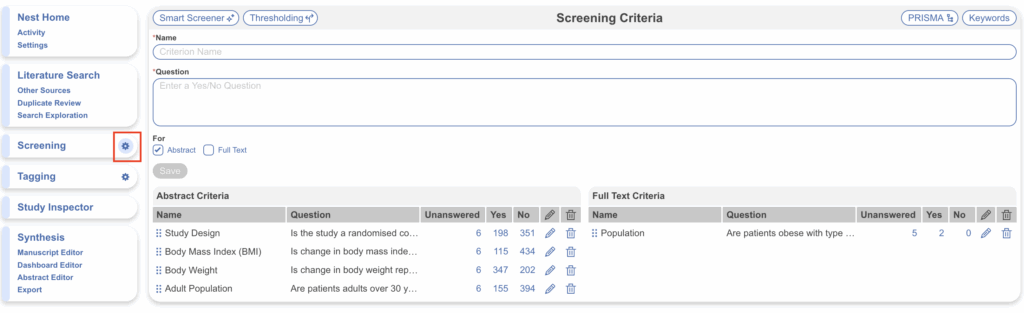
CBS is available in Single or Dual modes. Also see our Dual CBS guidance page.
2. Create Criteria/Questions manually or with Smart Config #
Based on your protocol, create yes/no questions as part of the Abstract criteria (for Abstract Screening) and Full Text criteria (for Full Text Screening). This can be done manually (continue reading) or with Smart Config based on your research question (see full instructions on Smart Config here). Questions must be created where answering yes is an indicator that the study should be included, and no is an indicator that the study should be excluded.
For example, for a review of studies only in China, you might create a question named: “Study Location”, and the question would be “Does this study take place in China?”. Since the review will only include studies in China, answering yes = inclusion, and no = exclusion.
For more complex questions, it is better to provide this detail in the question for clarity. For example, for Study Type, the question could be: “Is this an epidemiological, population-based, or observational study (cross-sectional, cohort, case-control, surveillance reports, registry study)?”. This provides more detail for what is encompassed when answering yes = inclusion, anything else would be a no = exclusion.
Ensure you provide a name, question, select Abstract or Full Text and hit Save. New questions will appear in the corresponding criteria as they’re saved. Note: as you’ll see next in the Screening stage, after the screening criteria has been assessed for each study and exclusion is determined, an exclusion reason will need to be applied. The list of reasons displays the names of criteria created here, so keep this in mind when naming criterion.
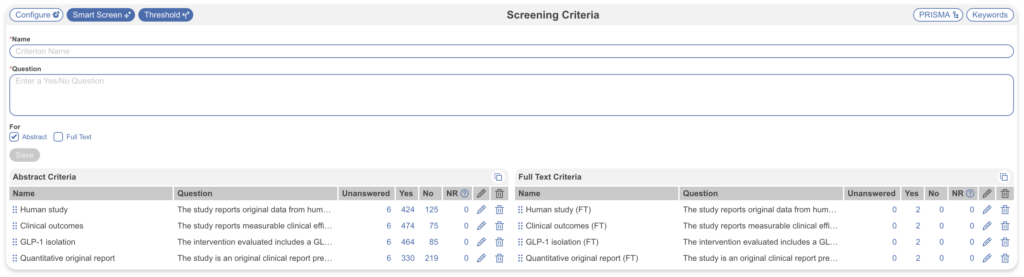
3. Editing, Ordering and Deleting Criteria #
To edit a question, select the pencil icon (red). To reorder criteria, select the 6 dots to drag and drop (blue); the order displayed here is the order shown in the form when screening. To delete a criteria, select the trash icon (pink); deleting criteria will remove any answers applied to studies as well as exclusion reasons if applied.
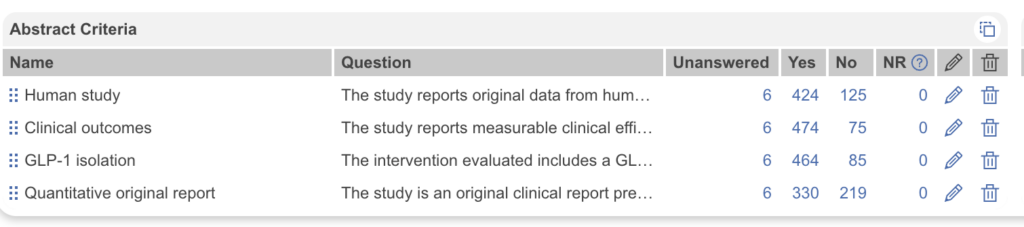
You may also wish to copy and paste a configured set of criteria from Abstract into Full Text. To do this select the Copy icon in the top right, use the copy shortcut on your keyboard, select the same icon in the Full Text Criteria box and paste.
PRISMA Settings #
By selecting PRISMA Settings (red below) you can:
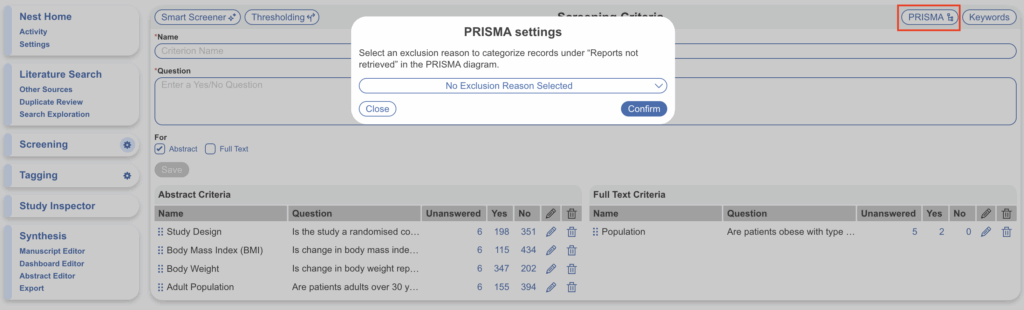
Assign an existing exclusion reason to represent “No Full Text Available” and will be reflected as such in the auto-generated PRISMA diagram.
Keywords #
To learn how to add User Keywords for Abstract Highlighting, see here. This is available in either Configure Screening mode.
Screening in Criteria-Based Mode #
After setting up your criteria, you can now screen manually (instructions below) or with the assistance of Smart Screener.
Screening Manually: Overview #
When screening manually in CBS mode:
- Each record displays your criteria questions in the right panel.
- Click Yes or No for each.
- The system will display the current criteria met count and your pre-set inclusion rule (e.g., must meet all criteria).
- Click Include or Exclude to finalize.
This structured approach makes it easier to justify decisions and maintain reviewer alignment.
Steps for Screening Manually #
1. Navigate to Screening #
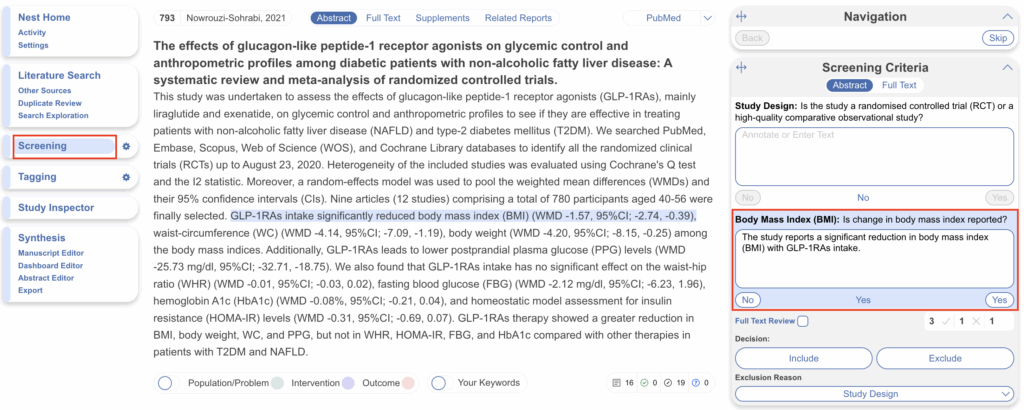
Head to the main screening page and ensure the Screening Criteria is open on the right-hand side. Your configured criteria/questions will be displayed here for Abstract and Full Text. This form is designed for a reviewer to go through one-by-one and answer each question alongside evidence from the study.
2. Answer Questions #
Go through and answer the yes/no questions and the criteria met count will keep track of the number of questions answered yes, no and unanswered, respectively.
3. Assign a Screening Decision #
Based on the criteria met count, and answers to the questions, either Include or Exclude for a specific reason. This will move you onto the next study.
Next Steps #
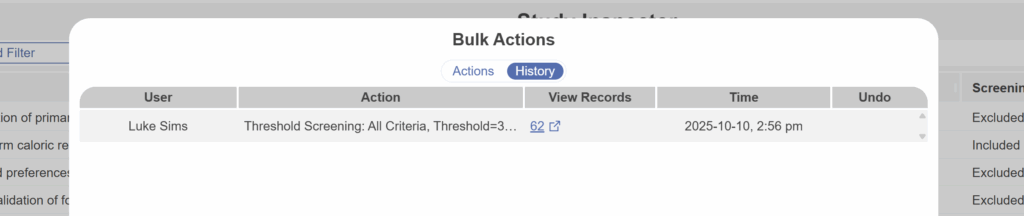
To view the studies that have been affected by applying the threshold, navigate to Study Inspector (red)–> Bulk Actions (blue)–> History (orange)–> View Records (pink):
Filtering to Screening Criteria and/or Criteria Count #
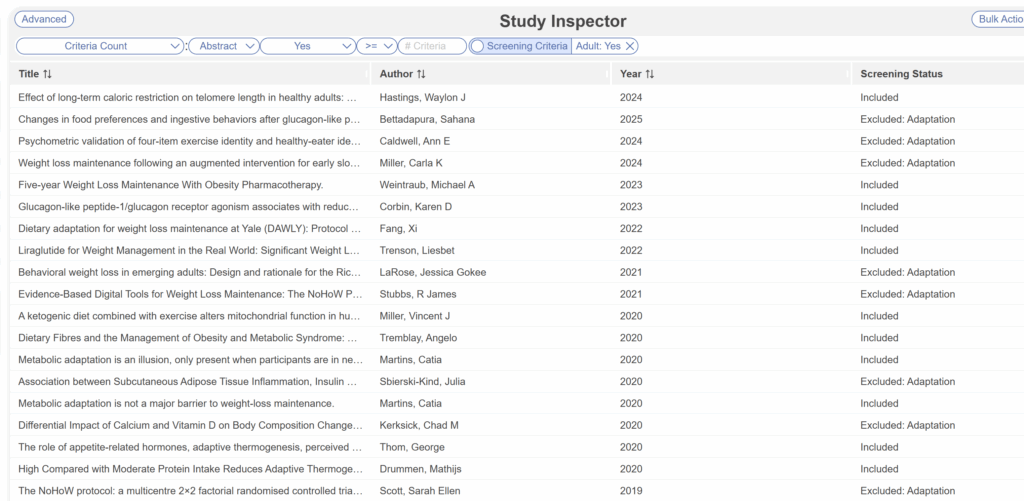
After conducting Criteria-Based Screening, you may wish to filter to and view studies with a certain Screening Criteria that have been answered Yes, No or unanswered or a Criteria Count. To do this navigate to Study Inspector, select the “Add Filter” dropdown, under Workflow there are filters for Screening Criteria and Criteria Count to utilise to view subsets of studies.
See more on how to use Study Inspector filters.
Then onto Tagging! #
After completing Screening, the next stage is Tagging your included studies. See here for more.