

Smart Config is an AI tool on the Configure Screening page that generates a complete set of Abstract and Full Text screening criteria from your research question. It removes the need to draft Yes/No criteria from scratch and is especially valuable for rapid reviews, where time spent on protocol setup directly impacts overall turnaround. Criteria generated by Smart Config are fully editable, can be combined with criteria you create manually, and pair seamlessly with Smart Screener to automate the answering of those criteria for each study.
Before you start #
Smart Config only operates within the Criteria-Based Screening (CBS) workflow. The default exclusion-reason paradigm is not compatible with Smart Config — see the Configuring Screening page for more on the difference between the two paradigms.
Step 1. Open the Smart Config modal #
On the Configure Screening page, select Smart Config (gear and sparkle icon) at the top of the page. The Smart Config modal will open.
Step 2. Confirm or refine your research question #
If you have already used another AI tool in your nest that requires a research question, the Research Question field will be pre-populated; otherwise, enter your research question directly. You can edit the question freely, or use the Refine button to have AI tighten it before generating criteria.
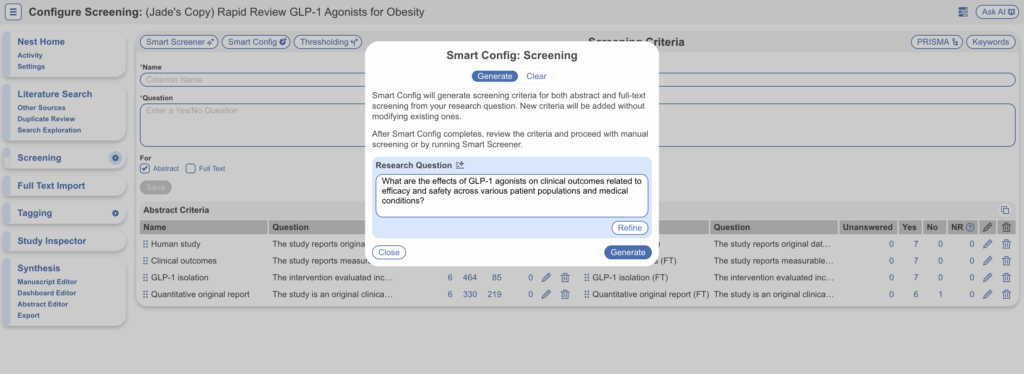
The Smart Config modal, with the research question pre-populated from earlier steps in the nest.
Step 3. Generate #
Select Generate. Smart Config produces a set of Abstract criteria and a set of Full Text criteria based on the research question. Each criterion is a Yes/No question where Yes = inclusion and No = exclusion, following the standard CBS structure.
Tip: if you re-run Smart Config later, new criteria are added without modifying anything you have already created or edited.
Step 4. Review, edit, and refine #
Generated criteria appear in two tables on the Configure Screening page — Abstract Criteria on the left and Full Text Criteria on the right. Use the pencil icon to edit a criterion (its name or its question text), and the trash icon to delete one. You can also drag criteria into a different order using the six-dot handle on the left.
The four columns alongside each criterion show, at a glance, how many studies have answered the question with Unanswered, Yes, No, or NR (not reported). Immediately after generation, and before any screening or Smart Screener run, every study will sit in the Unanswered column — these counts only shift once screening has begun.
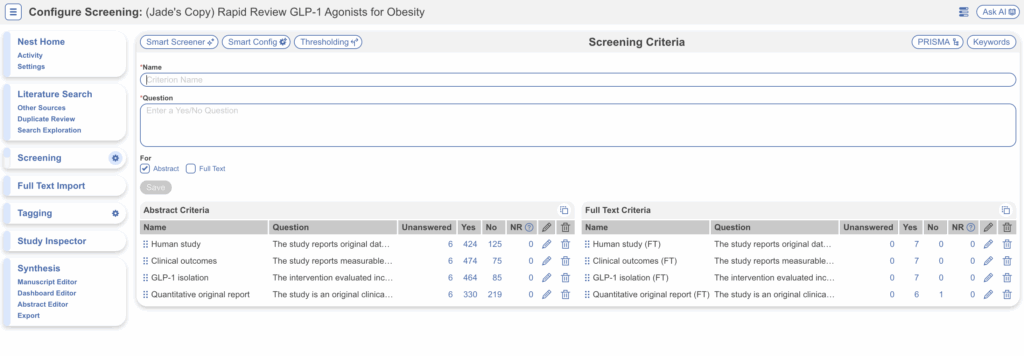
Configure Screening page after Smart Config has generated criteria. Each criterion shows live tallies of answered and unanswered studies, plus edit and delete controls.
Answering your generated criteria #
Once you are happy with your criteria, you have two routes for answering them. Either is compatible with Smart Config-generated criteria, and you can mix the two within a single nest.
Option A — Manual screening #
Open the main Screening page and work through each study one by one. Your criteria appear in the right-hand panel for each record; click Yes or No for each criterion, then assign an Include or Exclude decision. See Screen Records for the full manual screening workflow.
Option B — Smart Screener (recommended for rapid reviews) #
Smart Screener uses AI to read each study and answer your criteria for you, with annotations highlighting the supporting evidence in the abstract or full text. This is the natural pairing with Smart Config: the same research question that generated your criteria is now used to answer them at scale, taking the rapid review workflow from days to hours.
Smart Screener runs in the background. You will know it has finished because the column counts on the Configure Screening page (Unanswered / Yes / No / NR) shift away from “all unanswered” — these numbers update live as the AI works through the queue.
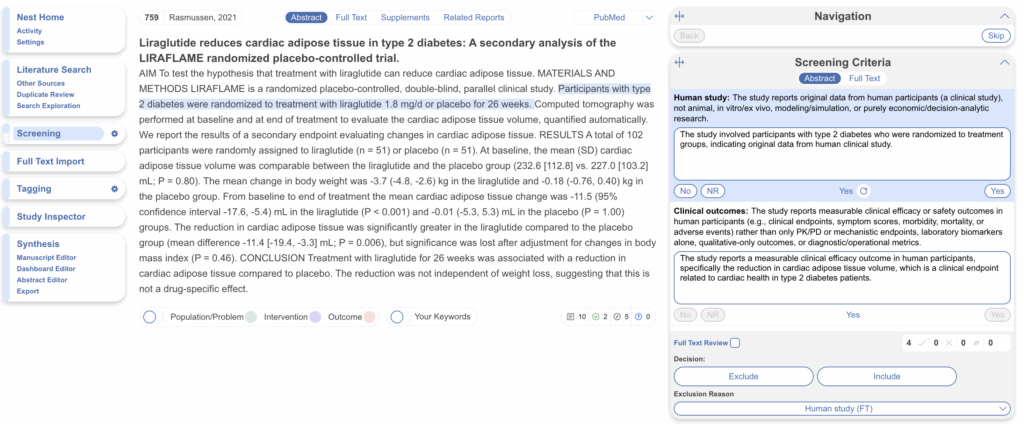
A study on the Screening page after Smart Screener has run. Each Smart Config-generated criterion has a Yes/No answer with an AI-generated annotation, ready for the reviewer to confirm or adjust.
Shortcut: jump to a filtered subset of studies #
The Yes / No / Unanswered / NR counts on the Configure Screening page are also shortcuts. Clicking a number opens Study Inspector pre-filtered to the matching subset (for example, every study answered “Yes” to the Human study criterion). From there, you can layer additional filters, edit decisions, or run bulk actions.
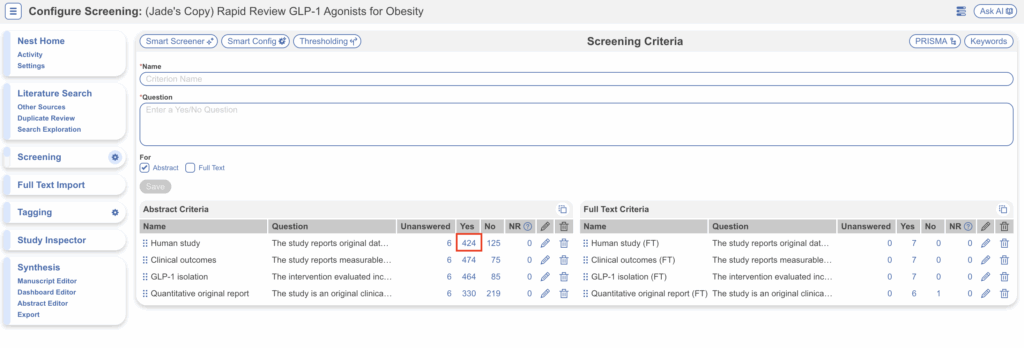
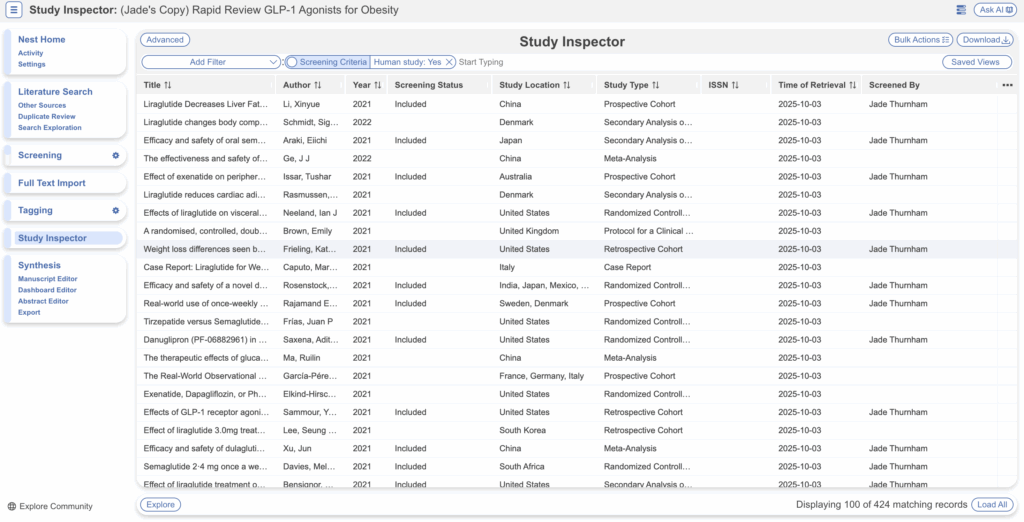
Study Inspector opened from a Smart Config column, pre-filtered to studies that answered “Yes” to the Human study criterion.
Optional: applying Thresholding #
After Smart Screener has answered your Smart Config-generated criteria, you can use Thresholding to bulk-apply screening decisions instead of reviewing each study individually. Thresholding is configured from the Configure Screening page and lets you specify, for example, “include any study that answered Yes to at least 3 criteria; exclude the rest.” This is a powerful complement to Smart Config in a rapid review setting. See the Criteria-Based Screening documentation for full Thresholding guidance.
Where decisions are recorded #
Whether you screen manually, use Smart Screener, or apply Thresholding, all screening decisions and AI-generated annotations are visible in two places: the main Screening page (study by study) and Study Inspector (sortable, filterable view across the whole nest). Decisions made via Smart Config-generated criteria are recorded the same way as any other CBS decision and feed directly into your auto-generated PRISMA diagram.
Why Smart Config matters for rapid reviews #
Configuring screening criteria is one of the most labour-intensive setup steps in any review, and rapid reviews compress the entire workflow into a fraction of the usual timeline. Smart Config front-loads this work: from a single research question, you get a draft set of Abstract and Full Text criteria in seconds, ready to refine. Pairing Smart Config with Smart Screener turns the conventional weeks-long screening phase into something measured in hours, without losing the structure and traceability of a Yes/No criteria-based protocol.