For enterprise level users only, Adaptive Smart Tags (ASTs) can be used to recommend or extract custom data from all study abstracts and/or full texts using an OpenAI Large Language Model (LLM). Employ High Fidelity Mode for extraction of Tables and Figures, in addition to Text.
See a full disclosure of what data Adaptive Smart Tags use and how it works, see the Nested Knowledge AI Disclosure.
Adaptive Smart Tags gives you the option to:
- Guide Data Extraction of individual studies by highlighting in-text evidence to review
OR
- Auto-extract individual studies for immediate outputs and export
See below for instructions on how to set up Adaptive Smart Tags, optimize tag questions and generate evidence for review or immediate export.
Setting Up Adaptive Smart Tags #
1. Ensure Smart Tags is turned on #
You can control the use of Smart Tags, Core and Adaptive, in your nest. Note: Core Smart Tags is for pre-set questions (PICOs, Study Location, Type and Size) in your review, Adaptive Smart Tags is for custom questions.
The ability to use Smart Tags is turned on in Nest Settings by default but when this setting is off, the controls to generate ASTs and CSTs will be disabled and any tag recommendations will be hidden to reviewers.

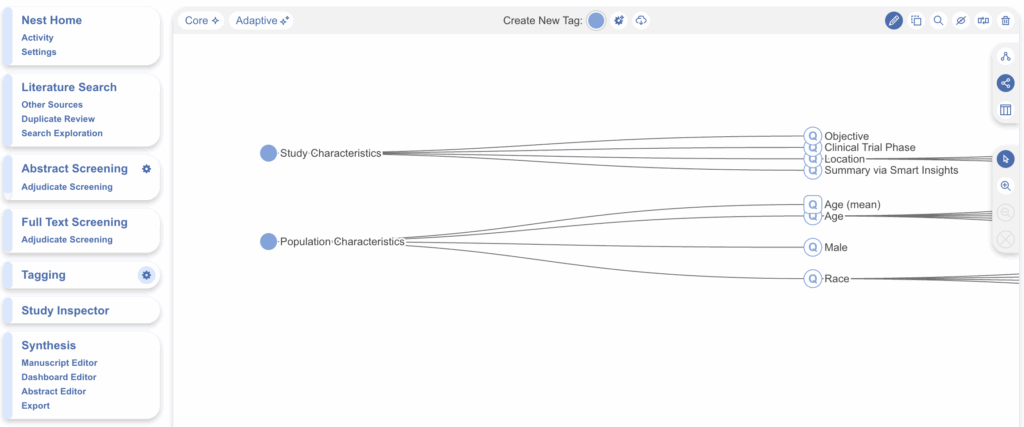
2. Set up your Tag Hierarchy #
Since Adaptive Smart Tags use the tag questions you configure in the hierarchy to extract data from your studies, you need create some questions of interest relevant to your review. We recommend using Form-based Tagging mode for best results. View how to configure your tag hierarchy as well as our guidelines on how to optimise your questions. We recommend having a comprehensive set configured before you generate ASTs, as to not decrease your generation limit too quickly! Or simply use the Smart Config tool to generate a set of questions based on your research question!
3. Ensure your studies are ready for Extraction #
You’ll have the choice of generating ASTs for study abstracts or full texts, as well as the option to generate for included studies only. As a result, ensure you have met the below requirements:
For Abstracts
- Upload applicable literature and ensure all studies have an abstract by checking bibliographic data on each study or applying a bulk action to Sync Bibliographic data if missing.
For Full Texts
- Upload applicable literature and ensure all necessary studies have a full text, and studies are included as appropriate prior to generation.
4. Generate Adaptive Smart Tags #
When the above requirements are met, navigate to the Tag Hierarchy and select “Adaptive”. Here you can toggle your desired settings:
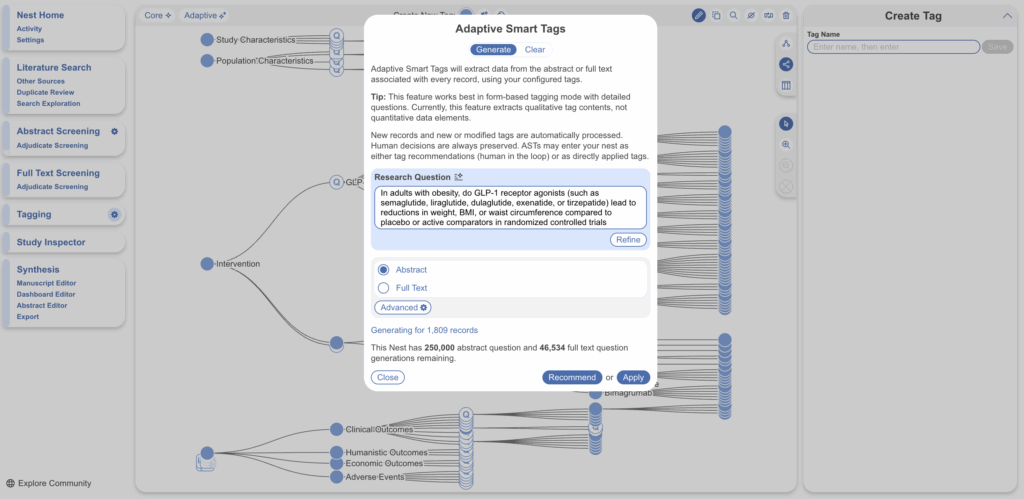
- As with Smart Search, Smart Screener and Core Smart Tags, a box for input of a research question is available and will be auto-filled if any of the aforementioned tools have previously been used. Refine as necessary.
- Generate ASTs for all study Abstracts or Full Texts in your nest
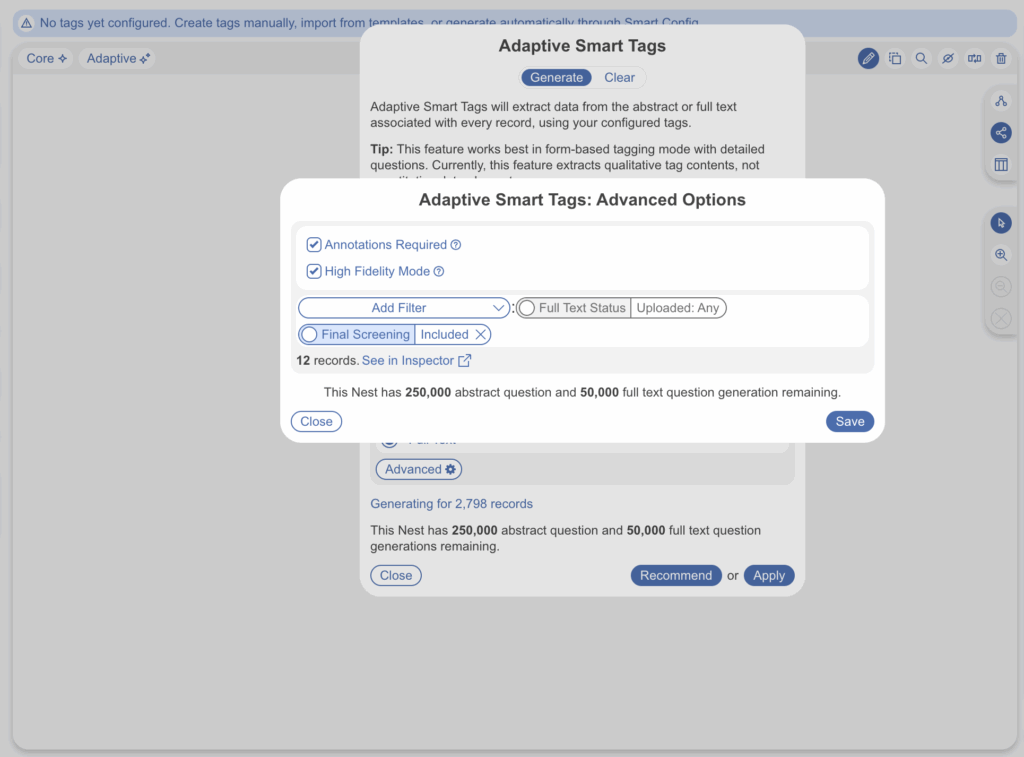
- Select “Advanced” for:
- Filters to limit the number of records ASTs are generated for e.g. Final Screening –> Included
- Annotations required: this means each recommendation will have an associated annotation within the abstract or full text for source confirmation. You may wish to leave this unchecked for more summary-like responses where a single, direct annotation is less necessary.
- High Fidelity Mode allows you to pull from pulls data directly from full-text tables and figures, and can also read information from within diagrams and images, it is only available for Full Text ASTs. You can expect the processing time to be higher when this is switched on.
- The number of records ASTs will generate for will be displayed.
- The generation limit is based on tag questions and not the number of studies. For all nests 250,000 abstract questions and 50,000 full text questions is the limit.
You can then choose to Recommend or Apply.
- Selecting Recommend requires human input, generating recommendations for you to review in Tagging, alongside the question and you must accept or reject each suggestion
- Selecting Apply requires no human input, auto-extracting data without review in Tagging, and you may go straight to the outputs to view extracted data
This currently takes around 1-5 minutes per study, longer if High Fidelity mode is on, so it can take some time for recommendations to be generated if you have a large number of included studies.
5. Review Recommendations #
If you select “Recommend”, the next step is to view these recommendations in Tagging.
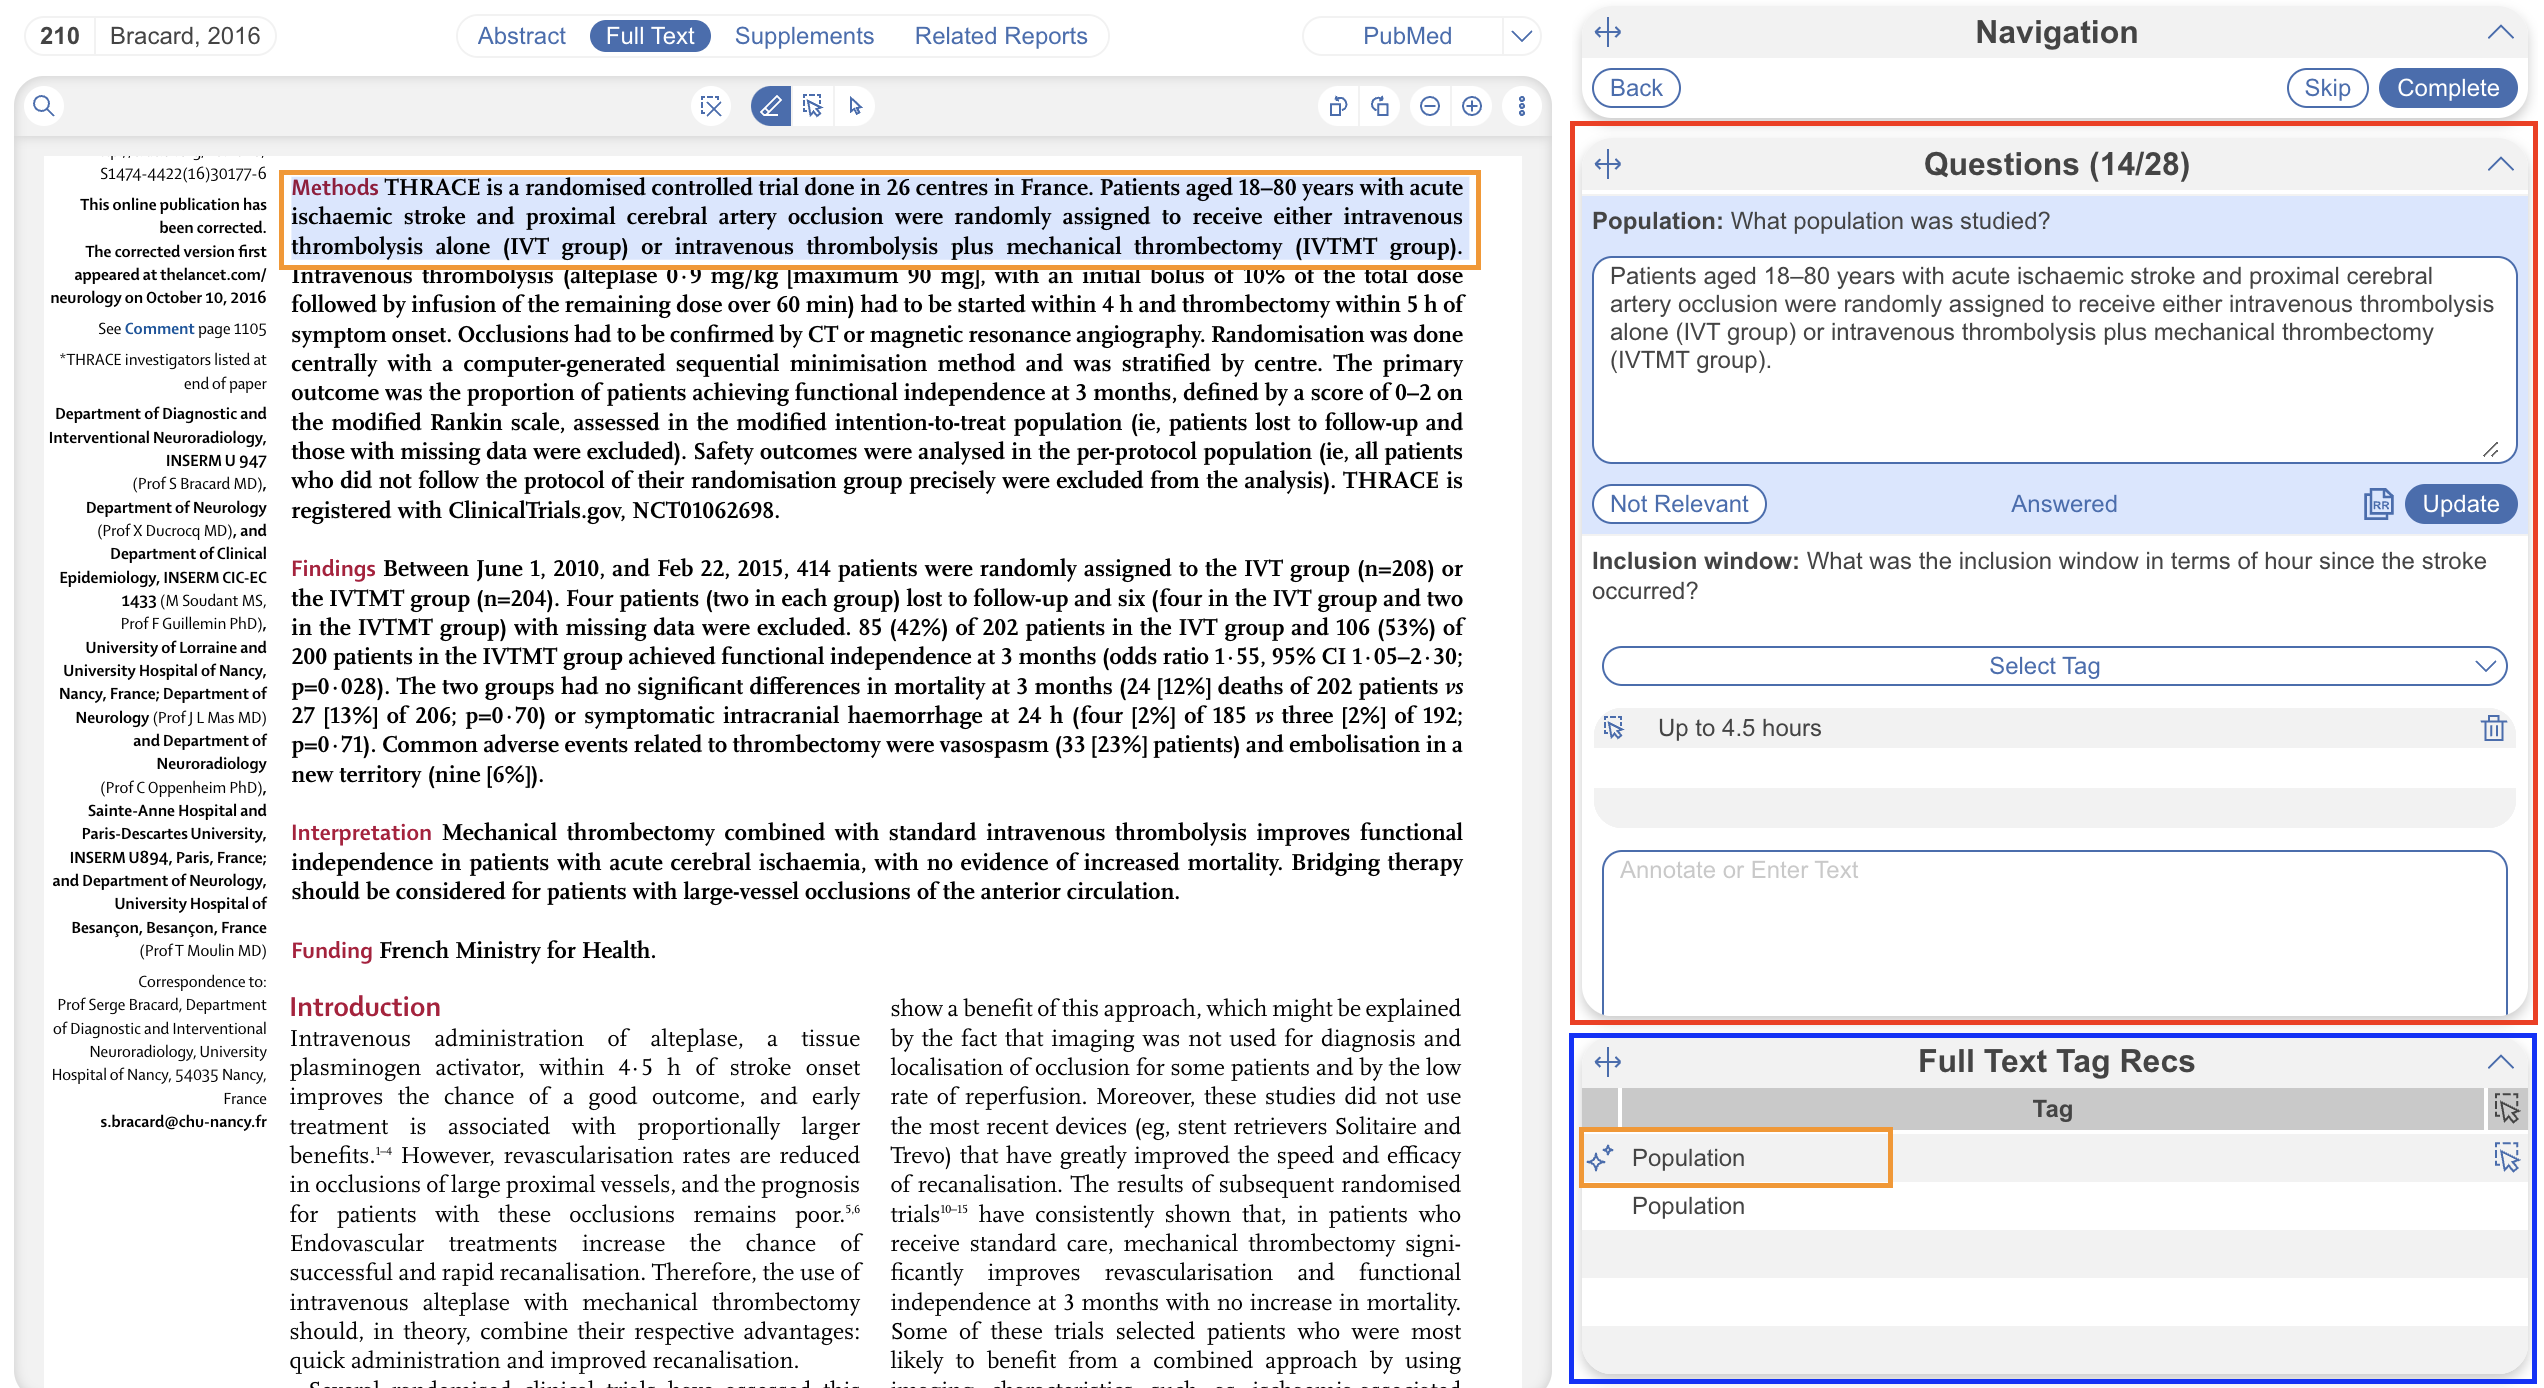
Tag recommendations are displayed in the tab below Questions on the right-hand side (red). In Full Text view, it’s titled “Full Text Tag Recs” ; in Abstract view, it’s titled “Abstract Tag Recs”. Adaptive Smart Tags are distinguishable to Standard Tag Recommendations by a sparkle icon to the left (orange in below screenshot).
To view them in either the Abstract or Full Text views, the Questions tab (red) and the Tag Recs tab (blue) must both be open, and a question must be selected (light blue background) for recommendations to be displayed (orange). Select the recommendations to be taken to the corresponding area of the PDF (orange) where you may review the recommendation, edit and/or clear as appropriate before applying the tag.
6. View Auto-extracted data #
Explore from the Tag Hierarchy #
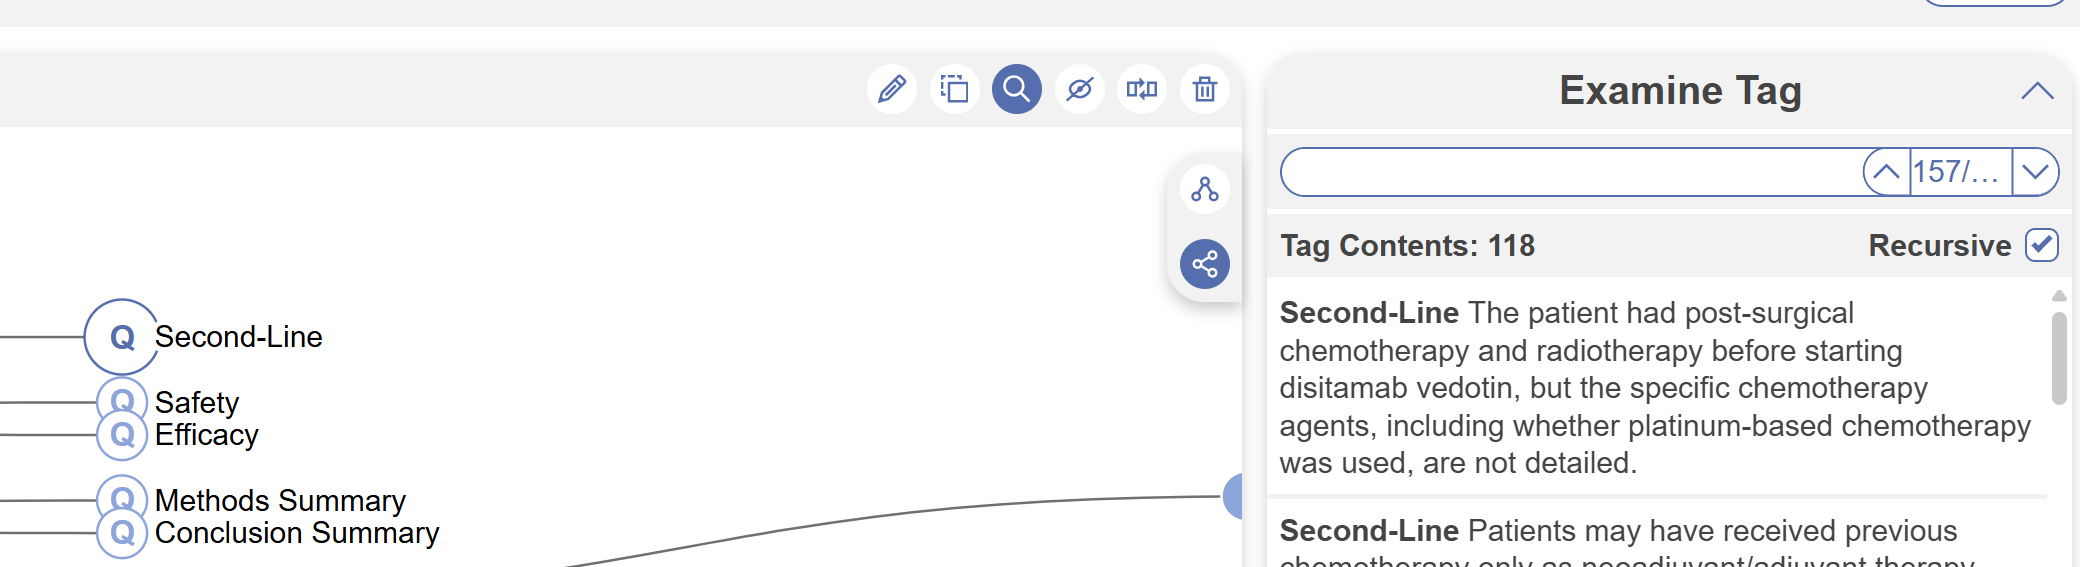
From the Tag Hierarchy, you can view applied tag contents and studies reported at a glance. From the Configure Tag Hierarchy page, select the “Examine” icon (red). Then select a tag from the hierarchy or begin typing in the text box (blue). Excerpts will be listed for you to explore and make edits.
You’ll recognize this format from Study Inspector, and this tool allows you to “View in Inspector” (bottom right), which is a shortcut to Study Inspector where the tag filter is auto-applied. This can be a helpful workflow for reviewing applied tags.
Explore Outputs #
Whether your generated ASTs as applied tags or recommendations, you can view the extracted data immediately via Qualitative Synthesis, download the complete spreadsheets via Study Inspector and/or build out custom updatable tables ready for download in Dashboard.
Refreshing Adaptive Smart Tags #
If you make changes or add more tags to the hierarchy after previously generating ASTs, or you’ve uploaded more studies to your nest you may wish to re-run them. To do so, simply navigate back to the Configure Tag Hierarchy page, select “Adaptive”, select the appropriate settings and either Recommend or Apply. ASTs will not re-run on unedited tags in existing studies or override the existing extracted data. ASTs will run on any new studies (added since last AST generation) with all tags.
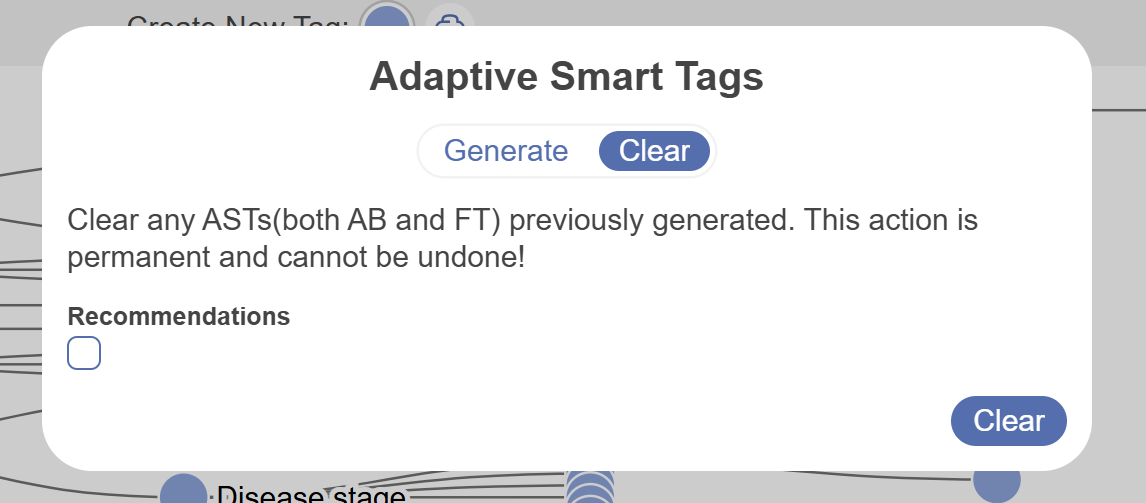
Clearing Adaptive Smart Tags #
After running ASTs, you may wish to clear the recommendations generated or the auto-applied tags to start from scratch. To do this, navigate back to the Configure Tag Hierarchy page, select “Adaptive” and toggle the “Clear” tab at the top of the modal instead of “Generate”.
This action will clear all ASTs generated from all abstracts and full texts permanently. You may choose to select if you’d like to clear recommendations or ASTs-applied tags from studies. Note: if you choose to clear recommendations, this will not clear the tags you as the user have applied based on these recommendations. If you choose to clear applied tags, these are only the tags that Adaptive Smart Tags has applied when “Apply” was selected in the Generate tab.