Your Tag Hierarchy is the schema for everything you extract during Tagging, and your Qualitative Synthesis and Dashboards are built directly on top of it. How well you design it — around your research question and the outputs you intend to produce — is the single biggest factor in how smoothly tagging goes and how clean your synthesis ends up.
One principle to keep in mind before you build anything: the fewer tags you create, the easier tagging becomes. Every question in your hierarchy is put to every study (during Tagging, and optionally during Screening), so build only what your synthesis genuinely needs.
There are a few ways to build a hierarchy, and you can combine and refine them at any point. To filter and triage records early — even before screening is finished — Core Smart Tags builds and extracts a standard PICO hierarchy across every record’s abstract. For the extraction hierarchy you apply to your included studies, build it manually, import a template, or generate a custom one with Smart Config: Tagging. This page covers each, then the editing tools you’ll use as your project evolves.
Looking for the methodological “why” — how to design a hierarchy that produces good synthesis? See Best Practices for Tagging.
Choosing a Tagging Mode #
Form-based vs Standard mode
Before you configure anything, decide how your tags should be presented to reviewers. Your nest defaults to Form-based mode, where tags are configured as questions and answers and completed as a form — the structured option, supports richer data capture and is best suited for AI prompting. Standard mode is less structured: concepts are extracted via a list of dropdown tags. Tags would still be organized the same way as in Form-based, but without the question-answer structure. This can be switched in Settings.
Switching between modes results in no loss of data, so you can change your mind later. The rest of this page assumes Form-based mode.
How the hierarchy is structured #
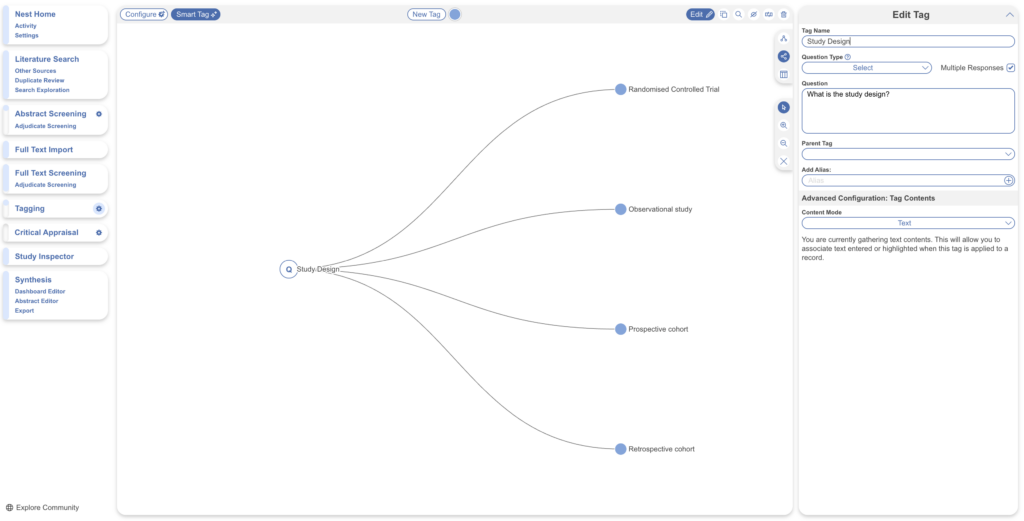
Tags sit in three roles. Root tags are the highest level and have no parent — your most overarching concepts of interest. Parent tags have child tags beneath them. Child tags are the most specific. For example, “Study Design” is a parent tag to “Randomized Controlled Trial,” which is one of its child tags.
In Form-based mode, a parent tag can serve one of two purposes. Often it’s a question, with its child tags as the answers — “What is the Study Design?” as the parent, and “Randomized Controlled Trial” and “Prospective Cohort Study” as its children. See below example.
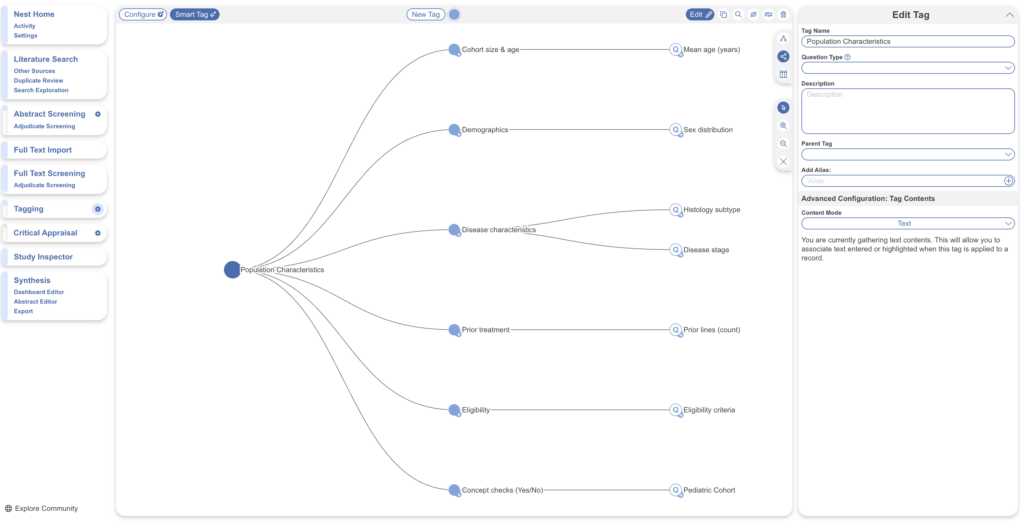
But a parent (or Root) tag can equally act as an organisational grouping with no question of its own, used to gather several separate questions under a shared heading — for example, a “Population Characteristics” tag holding distinct questions on age, sex, and comorbidities. Both uses are valid and can be mixed freely, which is what makes the hierarchy flexible. There is no limit on the number of tags or layers of specificity you can create.
Opening the Configure Tag Hierarchy page #
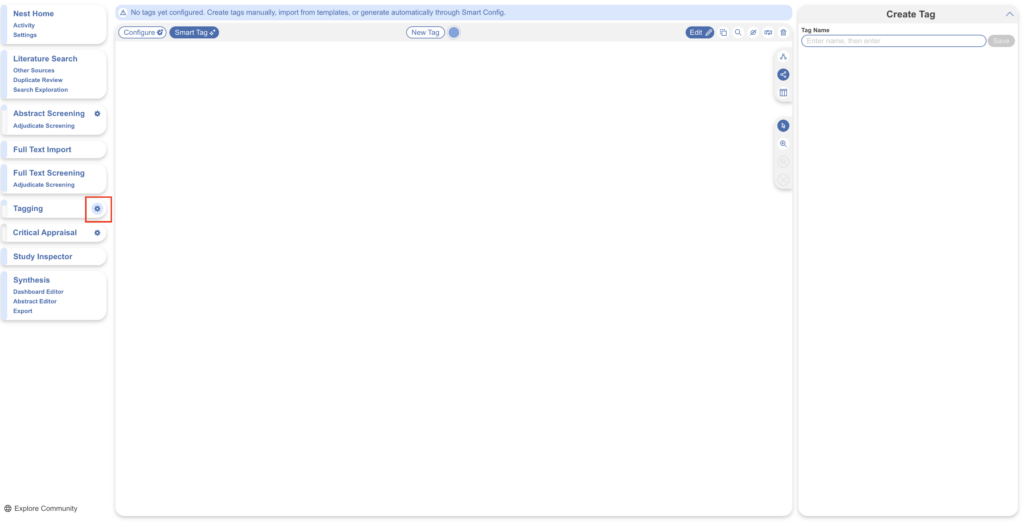
Click the gear icon next to Tagging in the left-hand menu to open the Configure Tagging page. It will be blank until you add tags.
Before building, it helps to know the layout of the editor.
Icons across the top
- Configure — your hierarchy-building tools live here: Core Smart Tags, Smart Config: Tagging, and Templates (for importing a hierarchy).
- Smart Tag — runs Adaptive Smart Tags to extract tags from your studies once your hierarchy exists.
- New Tag — adds a tag to the hierarchy.
- Edit (the pencil icon) — the mode for creating and editing tags. It’s usually selected by default; most actions on this page require it to be on.
Icons in top right
Alongside these sits a cluster of editing tools for maintaining the hierarchy once it’s built — each covered in full under maintaining the hierarchy, below:
- Copy & Paste — reuse tags within a nest or between nests, using keyboard shortcuts.
- Examine — inspect a tag alongside its extracted contents, and jump to Study Inspector with its filter already applied (handy after Smart Tags have run).
- Hide — keep a tag out of Synthesis (e.g. admin or organisational tags) without deleting it; non-destructive.
- Merge — combine duplicate or related tags into a single tag.
- Delete — remove a tag from the hierarchy and from every study it’s applied to; this cannot be undone.
Icons down right-hand side
Down the right-hand side are view and navigation controls:
- Zoom controls sit just beneath these. Select a parent tag and zoom to focus on its children — particularly helpful on large hierarchies. You can also pinch-to-zoom on a trackpad and click-and-drag to pan around the canvas.
- Orientation toggles lay the hierarchy out left-to-right (the default, which best displays tag names) or top-to-bottom. Toggling between them doesn’t affect your data.
- Tagging QA opens a list view of every tag with completion counts with clickable shortcuts into Study Inspector — useful for tracking what’s been answered and what’s outstanding.
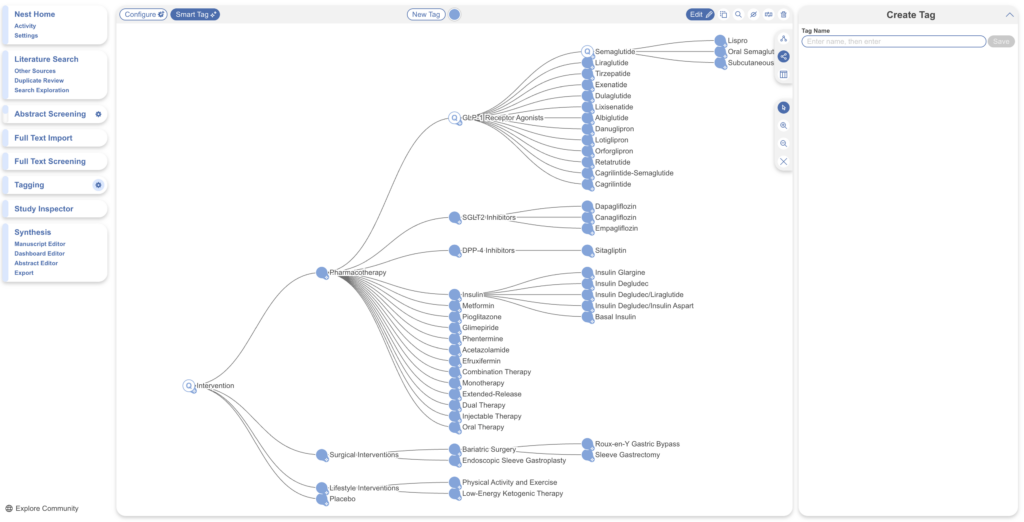
Using AI: Build and Extract a PICO hierarchy with Core Smart Tags #
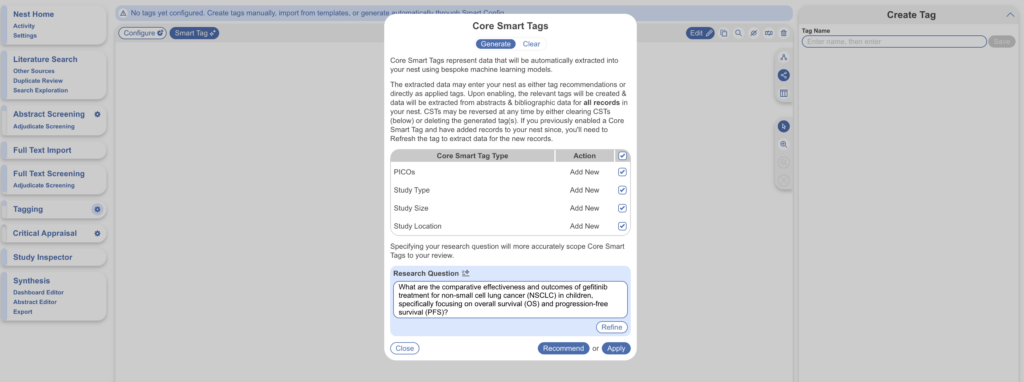
For immediate filtering of PICOs, Study Type, Study Location, and Study Size across all studies — regardless of screening decision — run Core Smart Tags. It builds a hierarchy and extracts that data from every record’s abstract in your nest, which makes it useful early: you can triage and prioritise records before screening is even finished.
With Edit on, open Core Smart Tags from Configure. Input and refine your research question, and uncheck anything you don’t want generated. You can have the results applied as recommendations (which you review) or applied automatically (no review required). Select Recommend or Apply, a progress bar appears, and you can click out of the modal since it runs in the background. When it finishes, your hierarchy is generated, fully editable and ready to filter.
Telling AI-made tags from custom tags
Tags created by Smart Tags carry a small marker in the corner, so at a glance you can distinguish what was AI-generated from what you built by hand.
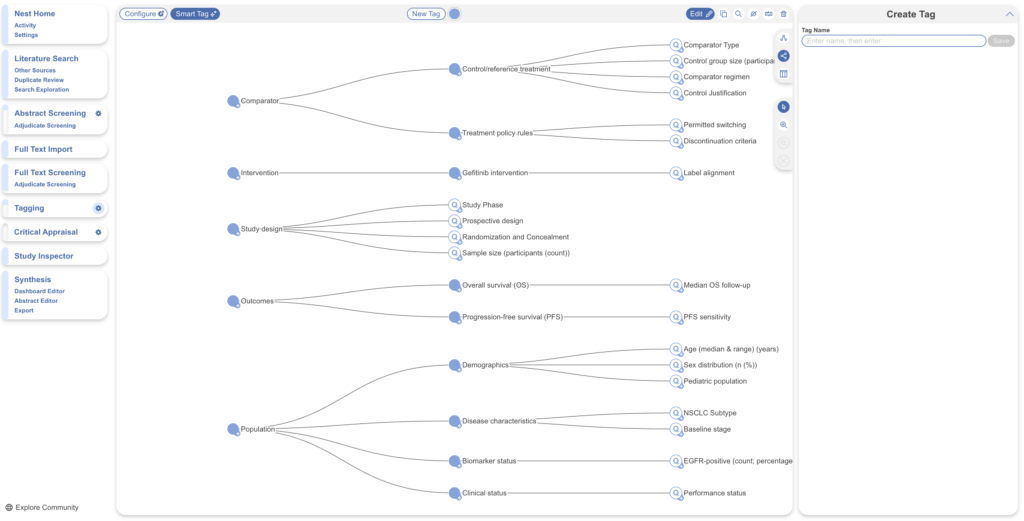
Using AI: Build a hierarchy with Smart Config: Tagging #
Once your included studies are settled, Smart Config: Tagging generates a fully custom, multi-level extraction hierarchy from your research question — root concepts such as Study Design, Outcomes, and Intervention, each configured as a Single Apply question. Where Core Smart Tags runs across every record for filtering, Smart Config is built for the studies you’ve included: it produces the framework you’ll extract against, and because its tags are Single Apply, the result feeds cleanly into Smart Insights.
It builds the framework only — you review and refine it, then extract the data by running Adaptive Smart Tags. This is the recommended starting point when building an extraction hierarchy from scratch, and especially valuable for rapid and scoping reviews, where it compresses days of template-building into a single prompt.
With Edit on, open Smart Config: Tagging from Configure. Confirm or refine your research question, then generate. New tags are added without disturbing anything you’ve already built or imported, so you can combine it with a template or manual tags and run it more than once. Generation runs in the background, and the hierarchy is fully editable once it finishes.
Build a hierarchy from scratch #
For your review you may already have a data-extraction template in mind and the easiest way to picture a Tag Hierarchy is as that spreadsheet. The questions you configure are your column headers; the answer to each question is the value populated for every study, one study per row. Building a hierarchy comes down to deciding what your columns are and what kind of answer each one collects.
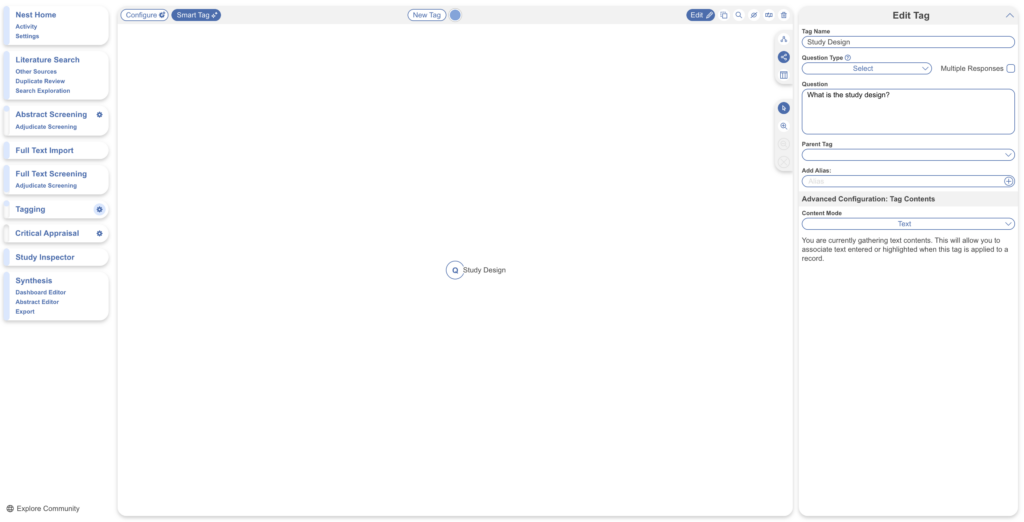
Create a question. With Edit on, either select New Tag or simply start typing a tag name on the right-hand side while nothing is selected, then Save. Enter the tag name — for example, “Study Design” — input is saved automatically.
Set the question type and question. With the tag selected, choose a Question Type and write a descriptive question. For those looking to use Smart Tags for AI Extraction, make sure to view our advice on framing your AI prompt for the best data extraction. Once a type is set, the tag’s icon switches to a Q. You can leave Parent Tag blank for now, and add aliases if the question is topic-specific.
Question Types
Once you know your questions, the answer format follows from one distinction:
- Open-ended answer — read off the study and recorded in the reviewer’s own words → Single Apply (a text box; answering applies the tag). Tick Multiple Responses when the tag can be applied multiple times to the same study.
- Answer chosen from a fixed set of options → Select, with the options configured as child tags. Tick Multiple Responses when more than one option can apply to the same study.
- e.g. For “Study Design” make this the tag name, it’s a Select question type with a single response and the question is: What is the Study Design?
Note: for a fixed list where each option needn’t be its own reportable tag, use a Single Apply tag with the Text Options content mode instead of a Select question — it records only which option was chosen, with nothing attached. See Advanced: Content Mode for when to choose it over a Select.
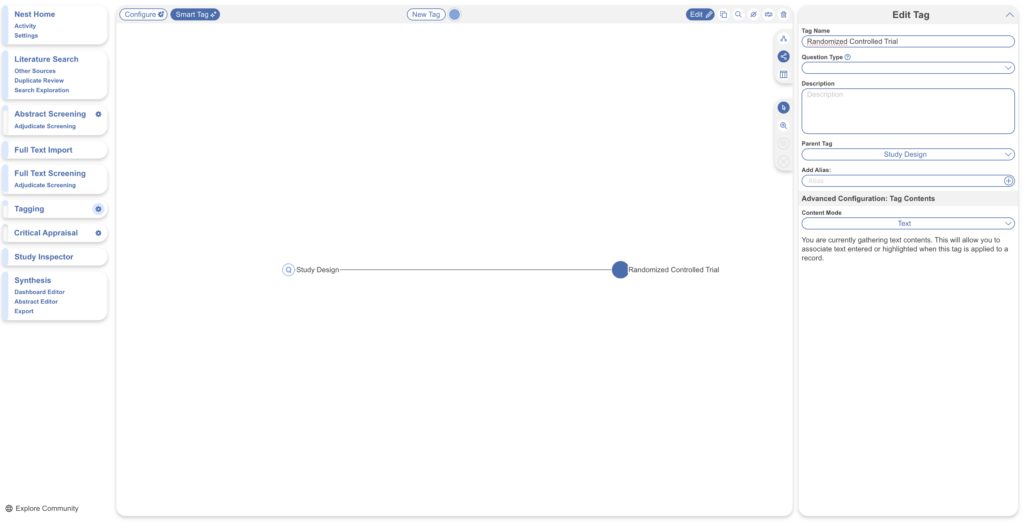
Add answers (child tags). Select questions need child tags as their options; Single Apply questions don’t, since their answer is recorded directly. To create a child tag, drag the New Tag icon next to the parent tag you want it under (or select the parent so it pre-fills), then enter the answer as the tag name and leave the question type blank. You can drag and drop tags to reorder at any time.
Examples of Tags
- Select (single response) — Study Type → “What was the Study Type?” → child tags: Randomized Controlled Trial, Prospective Cohort Study, Retrospective Study
- Select with Multiple Responses — Comorbidities → “What comorbidities were reported in the patient population?” → child tags: Diabetes, Hypertension, Chronic Kidney Disease
- Single Apply, Text — Study Objective → “What was the study objective reported?” → recorded as a text excerpt, with no child tags; absence of an answer means the tag isn’t present
- Single Apply, Index Tables — Safety → “Extract the safety outcomes data, stratified by Study ID and intervention arm” → an index table whose fixed columns key the data by study and arm, with sub-tables of the reported safety outcomes
- See below for Advanced Configuration: Table Contents
Build a hierarchy from a template #
For extracting custom data, rather than starting from scratch, you can import an existing structure and adapt it — a faster way to get a sensible hierarchy in place. Under Configure → Templates, you can import:
- From your organization’s configured templates, or
- From Nested Knowledge’s public templates.
Importing a template
If you aren’t yet part of an organization, the organization tab is disabled, but public templates remain available. You can import an entire hierarchy (select a template such as “General PICO,” preview it, and click Import) or just a single Root Tag and its children (select the Root Tag and click Import from Root Tag). There’s no limit on how many templates, or parts of templates, you import.
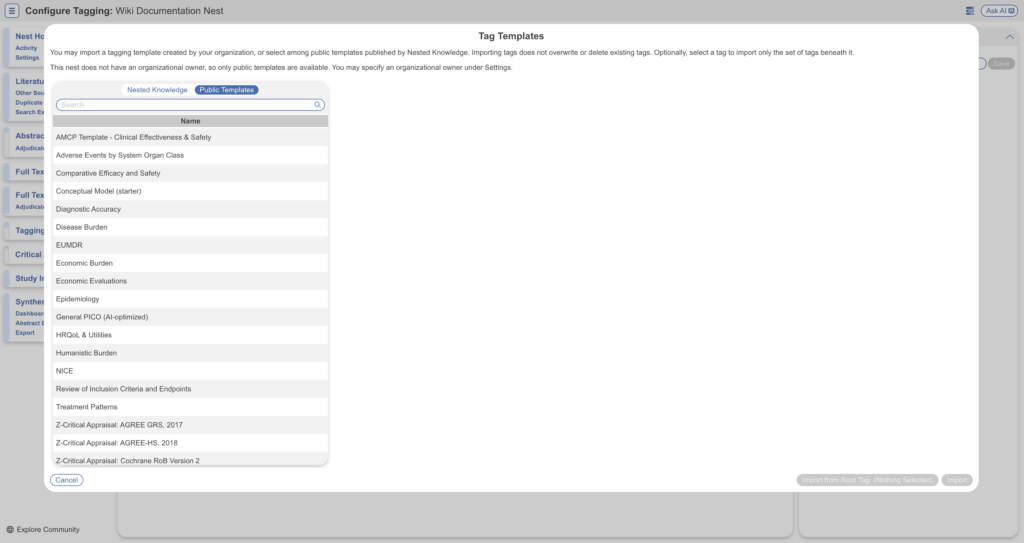
If tags are already present in your hierarchy, the imported tags are added below your existing Root Tags. See the step-by-step on importing tag templates and building templates for your organization.
Edit tags #
After you’ve begun tagging, you’ll often want to adjust the hierarchy. The tools below are all available on the Configure Tagging page.
Tag Details
With Edit on, select the tag you want to change. Its details appear on the right, where you can edit the Tag Name, Question Type, Question/description, Parent Tag, and Aliases. Changes are auto-saved and applied across every study in the nest that carries the tag.
Reorder Tags
To reposition a tag, drag and drop it to its new location, or select it and choose a new Parent Tag from the dropdown. Ordering flows through to the Tagging form (the order questions are shown in), Exports, and Synthesis — so reordering is a quick way to organise both your outputs and the reviewer experience.
Advanced Configuration: Tag Contents #
Beyond its question type, every tag has a content mode that sets the shape of the answer it records when applied directly. The default is Text, which suits most tags — you only need to change it when a tag collects something other than free text. The five modes, in brief:
- Text — free text in the reviewer’s own words (the default).
- Text Options — a fixed list of pre-configured options, selected with nothing else attached (this sits on a Single Apply tag).
- Tables — a structured grid with columns you configure, for when one value won’t do.
- Numeric — a single number, digits only, such as total sample size or mean age.
- Index Tables — a separate mode with index columns that stay fixed (e.g. Study ID, Intervention Arm) and sub-tables collected alongside them; built for intricate, stratified extraction such as efficacy or safety data.
Learn more about configuring Tag Tables and configuring Text Options.
Maintaining the hierarchy #
As you build and tag, a set of tools on the toolbar help you keep the hierarchy clean and accurate. Each has a specific job.
Copy and paste tags
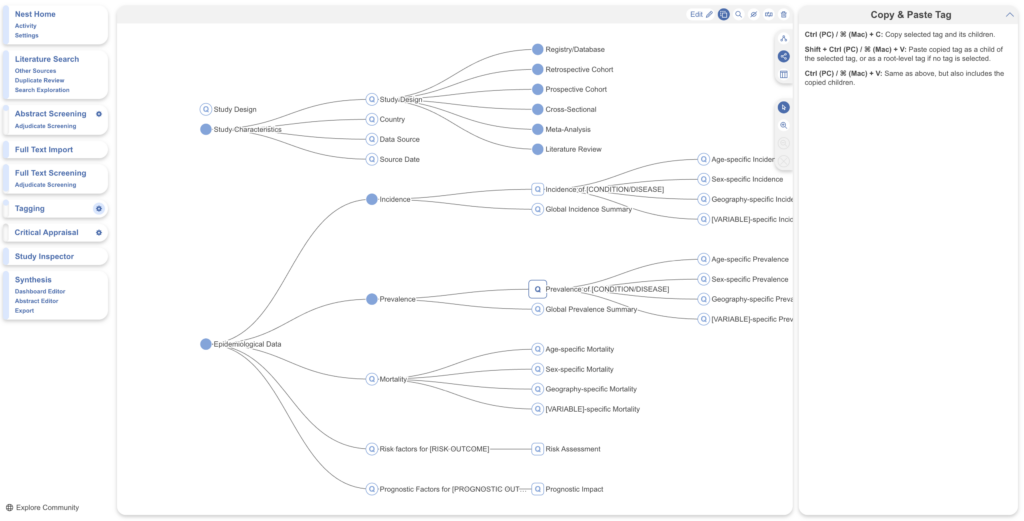
Reuse tags within a nest or between nests. Select the copy and paste icon first (this is required, especially when copying across nests), then use keyboard shortcuts:
Ctrl / ⌘ + V — paste the copied tag and its children.
Ctrl (PC) / ⌘ (Mac) + C — copy the selected tag and its children.
Shift + Ctrl / ⌘ + V — paste the copied tag only (no children) as a child of the selected tag, or as a root-level tag if nothing is selected.
Examine tags
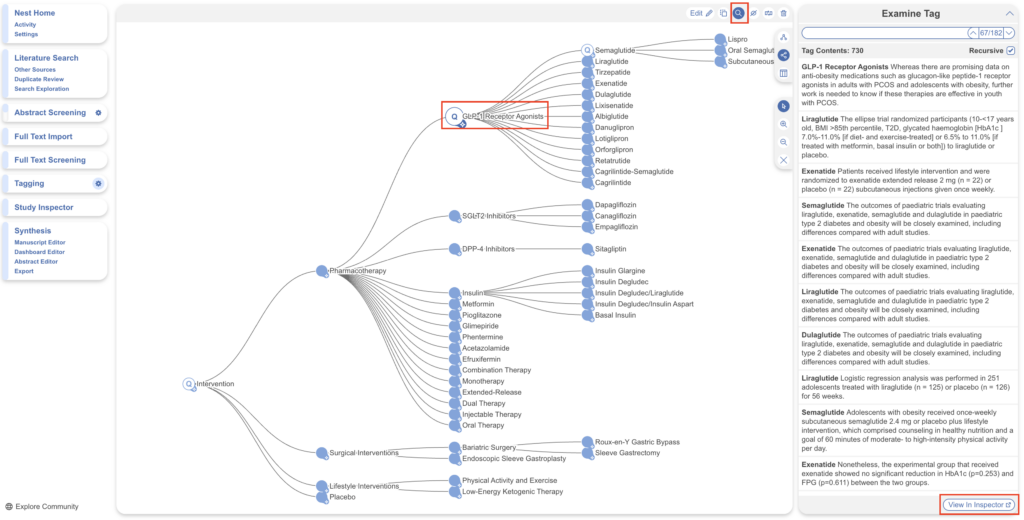
To inspect a tag alongside its extracted contents, select the Examine icon — most useful after Core Smart Tags or Adaptive Smart Tags have run, so you can review what was captured straight from the hierarchy. Select a tag, start typing a tag name, or step through tags with the arrows.
A selected tag shows a snapshot of the studies reporting it. By default the recursive option is on, so the contents include the tag and any child tags (most relevant for tags higher up the hierarchy). A shortcut to Study Inspector is provided with the tag filter already applied, and selecting an individual tag’s contents opens that study for editing.
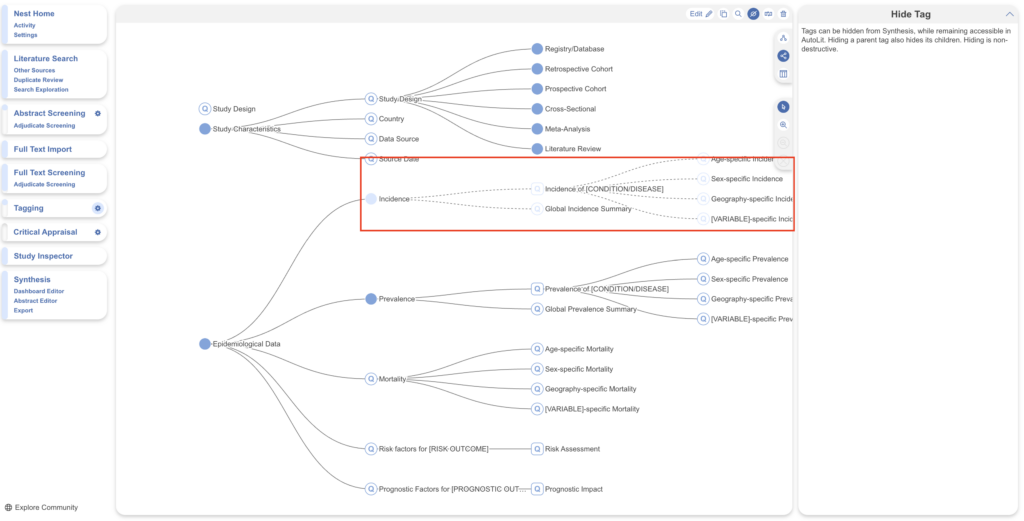
Hide tags
If your hierarchy contains tags you don’t want shown in Synthesis — admin or organisational tags, say — you can hide them. They’re hidden only in Synthesis and remain usable everywhere else in AutoLit. Select the Hide icon and click the tag; selecting a parent hides its children too, and you can hide multiple tags at once. Hiding only changes the tag’s shape (to distinguish hidden from shown), and toggling back is non-destructive.
Merge tags
To combine multiple tags into one — whether they’re duplicates or concepts you want to consolidate — select the Merge icon and use the two dropdowns on the right to choose your tags. The Source tag is merged into the Target tag, so the Target’s position is kept. (For example, data collected for “Mean Age” might be merged into a general “Age” tag.)

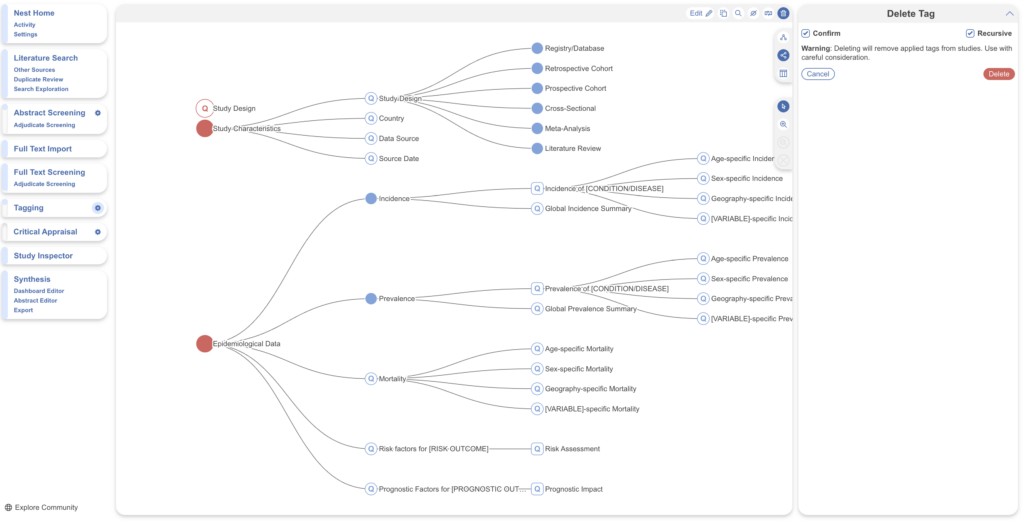
Delete tags
Select the Bin icon, choose the tags to delete (they turn red), then check Confirm and Delete. The recursive option deletes a tag together with all its children. If you’re bulk deleting tags by selecting parent tags, make sure you select recursive! Otherwise, orphaned child tags makes for a tedious select and delete process.
Deleting a tag removes it from the hierarchy and from every study it’s been applied to, and it cannot be undone — so don’t delete a tag unless you’re certain you won’t need it. Take particular care deleting a parent tag on its own: its child tags revert to Root Tags and move to the bottom of the hierarchy.
Add tags on the fly
Forgot to configure a tag before tagging began? You can add tags to the hierarchy mid-process — see adding tags on the fly.
Optimise your tags for Adaptive Smart Tags #
If you plan to use Adaptive Smart Tags to extract data from your studies, the way you phrase your tag questions matters — the question text is part of what the tool reads. Learn how to optimise your tag questions for Adaptive Smart Tags.
Next: tag your studies #
With your hierarchy configured, head to the Tagging module to begin extracting data.