The Settings page allows you to manage who can access the nest, what outputs are displayed on Synthesis, turn on and configure modes for each module, blinding certain data, and copy, rename & delete nests.
Only the Owner and Admins of a nest can view its Settings page. If you are unable to access Nest Settings and wish to, contact the owner or an admin of the nest to assign you as an admin in the nest.
Navigate to the Settings Page #
The Settings page is found in the top left of the page, underneath Nest Home and Activity. This link will only appear to the Owner and Admins in the nest; Settings are hidden from Users.
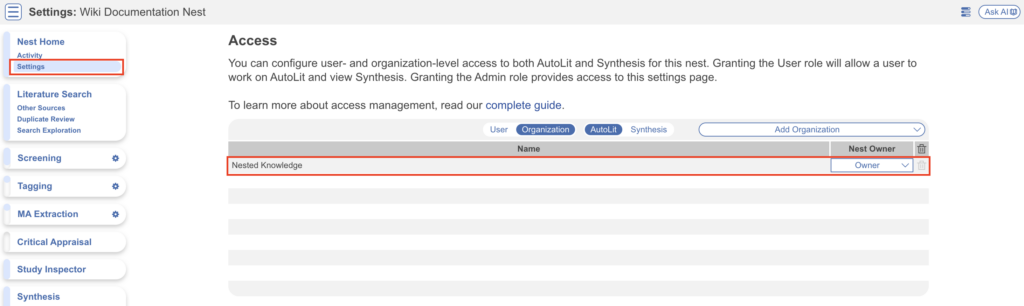
1. Add and Manage Admins, Users, and Organizations #
Add or remove User and/or Admin privileges for individuals and access and/or Ownership for Organizations in your specific nest. You may input multiple emails to invite multiple users at once.
To learn how to do so for individuals or organizations, see the Manage Access page. Note: Nest-level Admin functions are separate from Organization-level Admin functions.
- For Organization-level Admin functions, see Manage Organizations.
- Exception: if you are giving an Organization access to or ownership of a nest, that is a Nest-level Admin function; see the Manage Access page.
If you are part of an Organization, it will automatically assign the org as the owner of any newly created nests. If you are not part of an Organization, it will assign you, the individual, as the owner when you toggle “User”.
2. Synthesis #
Outputs Displayed #
From the Synthesis section, you can toggle ‘on’ or ‘off’ any Synthesis page: Qualitative Synthesis (QLS), Quantitative Synthesis (QNS), Manuscript, Dashboard, Critical Appraisal, or PRISMA.

By default:
- QLS and PRISMA outputs are toggled on
- QNS and Critical Appraisal are disabled (this is because QNS is generated from the Meta-Analytical Extraction module, and Critical Appraisal outputs are generated from the Critical Appraisal module, which are both off by default; if you’d like to toggle these on in Synthesis, first turn on and complete MA Extraction and/or Critical Appraisal further down the Settings page, then return to toggle these on in Synthesis)
- Manuscript and Dashboard are toggled off (currently, only Manuscript or Dashboard can be toggled on at the same time but all work is saved when toggled between; the corresponding Manuscript Editor or Dashboard Editor will then be displayed under the left-hand Synthesis menu item)

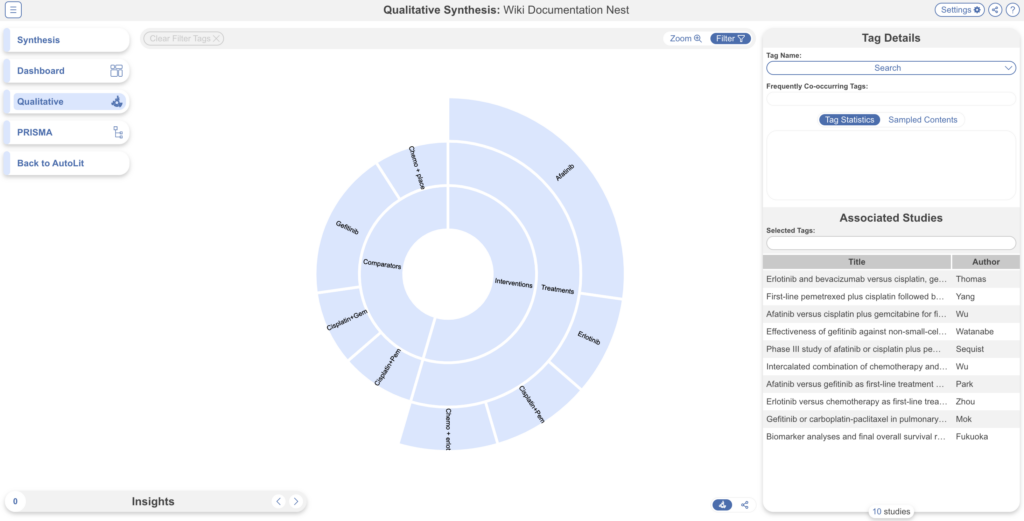
Default QLS Display Type #
Choose which QLS diagram is displayed when you open the Synthesis page: Sunburst or Dendrogram.

By default, the Sunburst diagram is selected and displayed in Synthesis:
But if the Dendrogram is selected, it will be displayed in Synthesis:
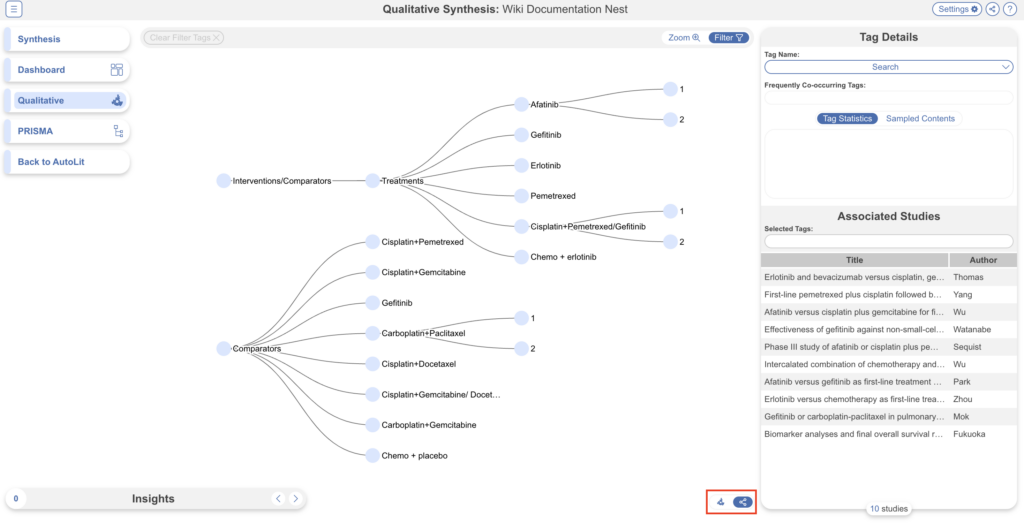
Note: both diagrams may still be accessed at anytime (circled in red) but this Setting decides which is shown by default.
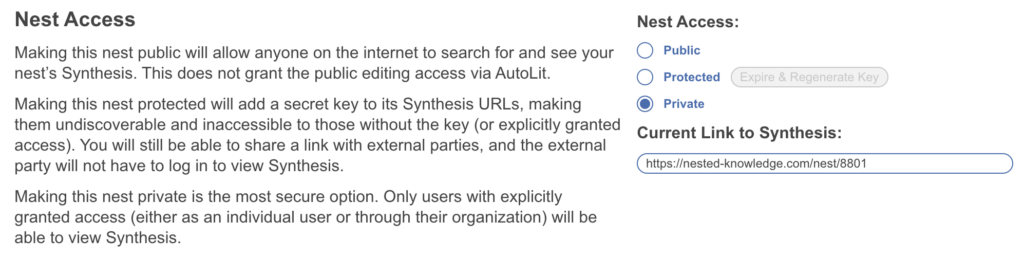
Nest Access #
Adjust the privacy/publicity of your Synthesis page to be Public, Protected, or Private:
- Make a nest public. Toggle this on to make the link to your Synthesis page (and all sub-pages) publicly viewable.
- Make a nest protected. Toggle this on to make the link to Synthesis undiscoverable and inaccessible to those without the key (or explicitly granted access). You will still be able to share a link with external parties, and the external party does not require an account to view Synthesis. In this mode, you may also choose to hide the ability to share the outputs from the Synthesis for any users viewing it including yourself.
- Make a nest private. Toggle this on for the most protection (default setting). Only those explicitly granted access with a NK account will be able to view the Synthesis.
Show Full Texts #
Abstracts are automatically shown alongside records displayed in Synthesis. If you wish to also display Full Texts, toggle this on here. Due to copyright reasons, this cannot be turned on if your nest is public, only protected or private (see above).

White Labeling: Enterprise Only #
By default, Synthesis pages have Nested Knowledge branding and coloring. To add your own brand select “Replace” to upload a logo from your device. To change the coloring, hover over “blue” and select another colour. If there is a colour you’d like to implement, let us know!

Static Manuscript #
Upload a pdf to be shown in Synthesis when Manuscript is toggled on and empty.

Manuscript in Synthesis will then display the pdf as such:
3. Allocation #
Available to Business & Enterprise tiers, Allocation allows you to assign work in specific modules to various members of your team. Learn more about Allocation.
4. Screening #
Screening Modes #
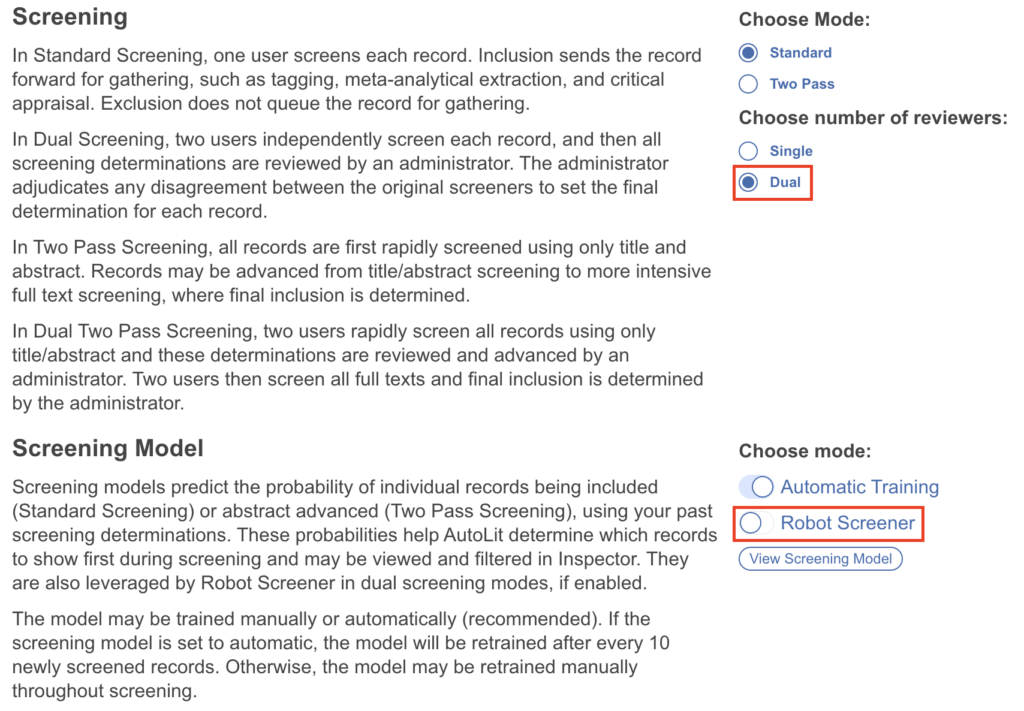
As an Admin, and prior to starting the Screening process, you can configure the Screening Mode to be:
- Standard (default),
- Dual Screening,
- Two-Pass Screening,
- Dual Two-Pass Screening
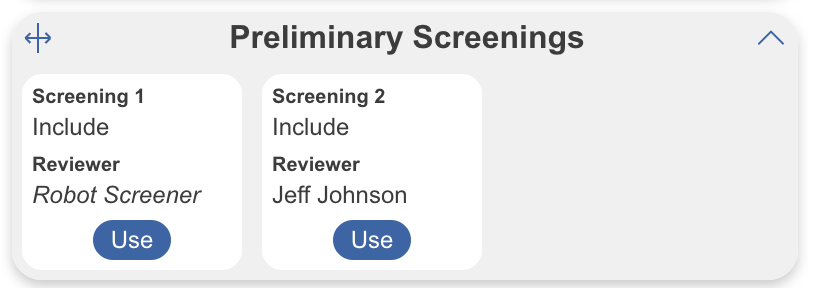
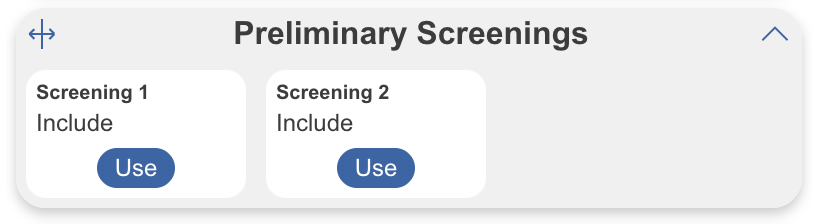
Note: if you use one of the Dual Modes, you can also employ Robot Screener!
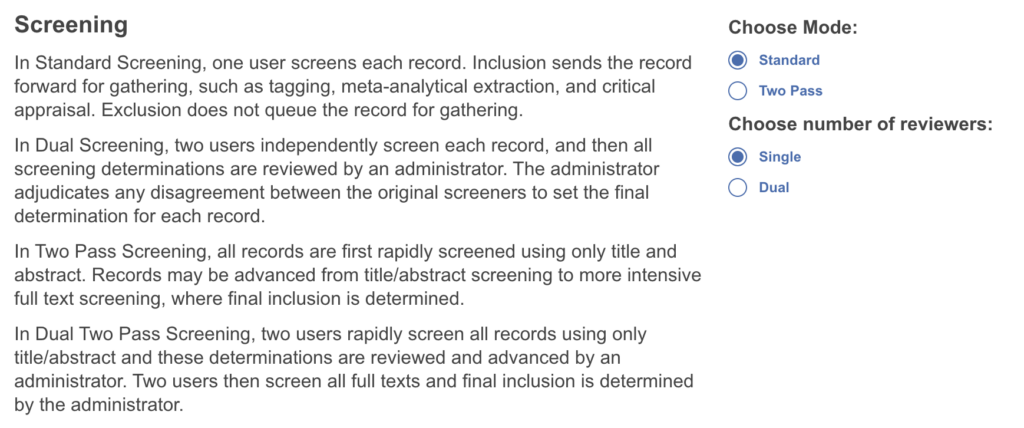
Standard Single Screening means that each record will be screened by one user in a single session. The user will have the option of designating “Full Text Review”, but there is no separate Full Text step. The left-hand menu will have one “Screening” module displayed.
Standard Dual Screening means that each record will be screened by two different users and adjudicated by a third. The left-hand menu will have one “Dual Screening” module displayed, with an “Adjudicate Screening” page underneath accessible by admins.
Two-Pass Single Screening means that each record will be screened at the Abstract level by one user, and advanced to a second, then a separate Full Text screening step, where the record must have a full text PDF uploaded and a final Screening decision made by a single user. The left-hand menu will have an “Abstract Screening” module displayed and a “Full Text Screening” module displayed as separate steps.
Dual Two-Pass Screening combines these functions, meaning each record is screened by two different users and adjudicated at the Abstract step, and then two users must screen at the Full Text step followed by adjudication. The left-hand menu will have an “Abstract Screening” module displayed and a “Full Text Screening” module displayed as separate steps, with “Adjudicate Screening” pages underneath each for admins.
Toggling between Standard, Two-Pass, and Dual Screening (see image) can lead to loss of data, as only the final Inclusion and Exclusion decisions will be saved if you switch between Screening Modes!
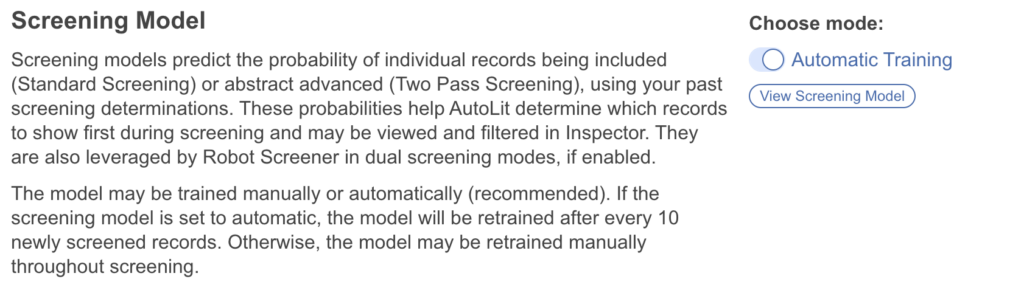
Screening Model #
The screening model can be used to predict the probability of individual records being included in Standard Screening modes or abstract advanced in Two Pass Screening modes (currently unavailable for the additional Full Text Screening step), using your past screening determinations.
You may use the screening model in two ways:
- Generate inclusion probabilities to be displayed on records and assist in your own manual screening.
- Dual modes only: Turn on Robot Screener to replace an expert reviewer, which makes decisions based on these probabilities.
Manual vs. Automatic Training #
By default, and regardless of Screening mode, the Screening Model will be on manual training, meaning that it will only run when a user selects Train Screening Model during the Screening process.
For Automatic Training, head to Nest Settings–> Screening Model, toggle on Automatic Training. This will cause the Model to run as soon as a sufficient number of studies are screened (50 total decisions and 10 inclusions), and this Model will be re-run automatically as more screening occurs.
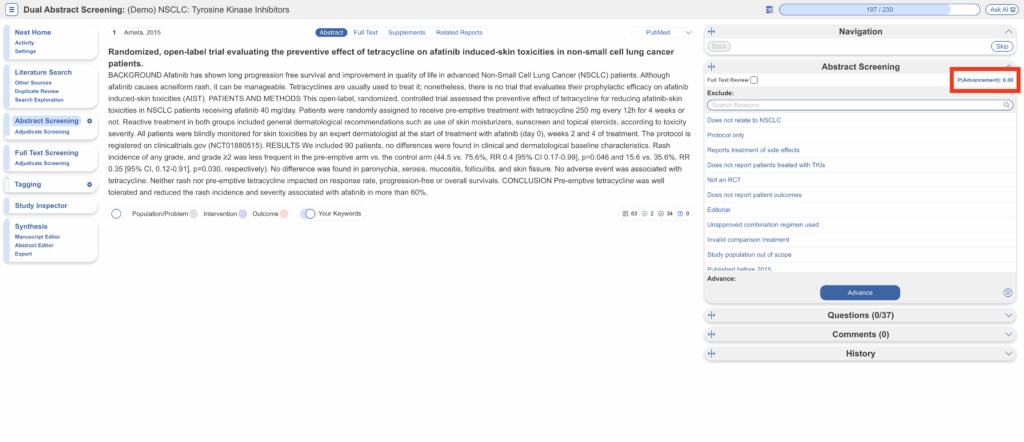
Briefly, as probabilities are generated, they are displayed in place of the “Train Screening Model” text in the Screening module, in the below case it is “P(Inclusion): 0.87”. The closer the value to 1, the higher the likelihood of inclusion. You may view the Screening Model performance anytime by selecting this value during Screening, or on the Settings page: View Screening Model. Learn more about how to use the Screening model here.
Robot Screener #
The option to toggle on Robot Screener is only shown when a Dual mode has been toggled on. You must also meet the minimum requirements to train the Screening model, before Robot Screener can be toggled on. Learn more about how to use Robot Screener.
Import Existing Screening Decisions #
If there are screening decisions from a previous nest that are relevant to your current nest, you can import existing screening decisions for any record already in your nest by uploading a spreadsheet. To do this, under Screening on the Settings page, selecting “Begin” under Import.
5. Tagging #
Tagging, by default, is in Form-based mode (Q&A format) or you can turn on Standard mode (open-ended list).

In Form-based Tagging mode, once you have configured questions & answers, on the Tagging page, you may wish to view your questions as one single form, or view them grouped by their root/highest order tag for ease of finding and answering questions. Toggling between any of these modes results in no loss of data, it is merely a preference of data presentation.
Smart Tags #
Nested Knowledge offers Core Smart Tags (preset data types) and Adaptive Smart Tags (custom data extraction) as AI tools for data extraction. Here they can be toggled on or off. They are on by default and available to use on the Configure Tag Hierarchy page. If you toggle them off, they will be disabled and users will not be able to use them.

Import Existing Tags #
If there are tags from a previous nest that are relevant to your current nest, you can import existing tags for any record already in your nest by uploading a spreadsheet. To do this, under Tagging on the Settings page, selecting “Begin” under Import.
6. Meta-Analytical Extraction #
Meta-Analytical Extraction is an optional module and off by default. Toggling it on will add an “MA Extraction” module to the left-hand menu.
MA Extraction Modes: Standard vs. Dual #
As an Admin, you can configure the Meta-Analytical Extraction Mode to be:
- Standard (default)
- Dual MA Extraction
Standard MA Extraction means that each record will be extracted for quantitative data only once.
Dual MA Extraction means that each record will be extracted by two different users and adjudicated by a third. To toggle Dual MA Extraction ‘on’, select it in the Admin page. This will change the left-hand menu item to “Dual MA Extraction” with an additional “Adjudicate MA Extraction” page for admins.

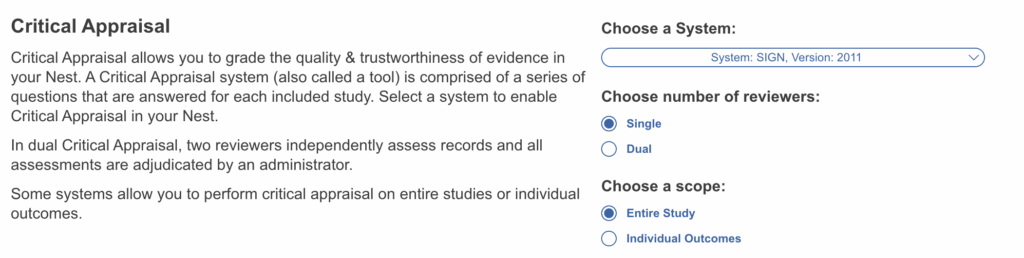
7. Critical Appraisal #
Critical Appraisal is an optional module and off by default. Choosing a system will add a “Critical Appraisal” module to the left-hand menu. Learn more about Configuring Critical Appraisal.
8. Blinding #
To avoid bias in your review where multiple reviewers are participating, you may want to consider blinding certain aspects of the process. The Blinding settings allow you turn off or hide features.
Blind Adjudication #
Reviewers’ identities are shown to adjudicators by default. You can hide these identities for each adjudication decision as to not influence the ultimate decision. To do this, toggle on “Blind Adjudication”:

For example:
Adjudicate Screening before Blinding:
After Blinding:
Queue Ordering #
By default, records shown in the screening queue to reviewers is in order of Ref ID. You may wish to randomize the studies shown to avoid bias or order them by inclusion probability after the model is trained. Selecting the queue order affects the remainder of studies left in the screening queue. You now have the option to update reference ID que.

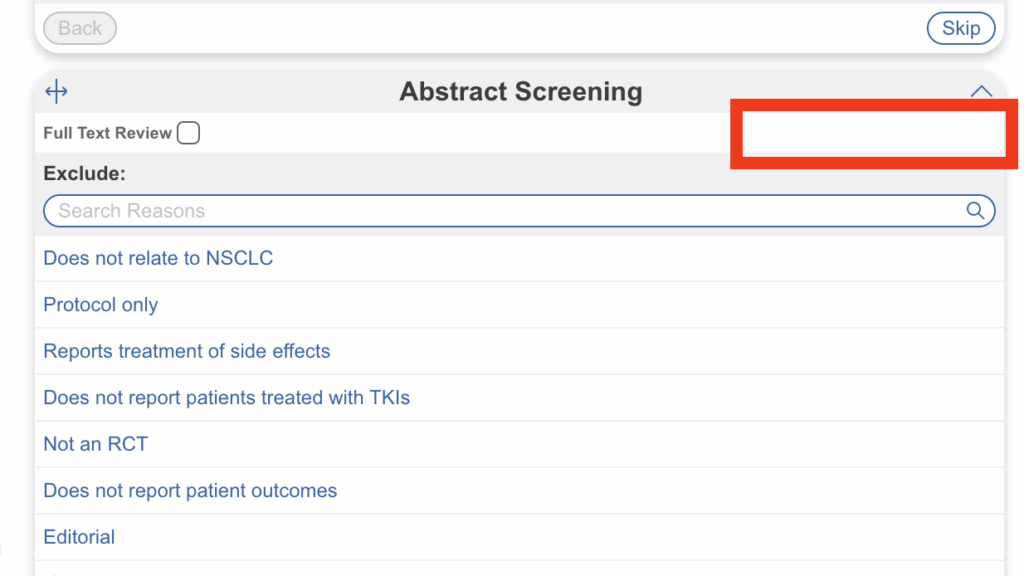
Hide Probabilities #
When you have trained a Screening Model either manually or via automatic training these values are displayed in Screening. To avoid bias, you may wish to hide these probabilities. You can hide these probabilities in Nest Settings. This allows you to remove the advancement or inclusion probabilities for each study if turned on, so the reviewer can make a completely independent decision.
Note: Advancement probabilities are shown in Two-Pass Screening at the Abstract level, and Inclusion probabilities are shown in Standard Screening in the singular round of screening.
Screening before hiding probabilities:
After hiding probabilities:
If Robot Screener is on, these probabilities are automatically removed.
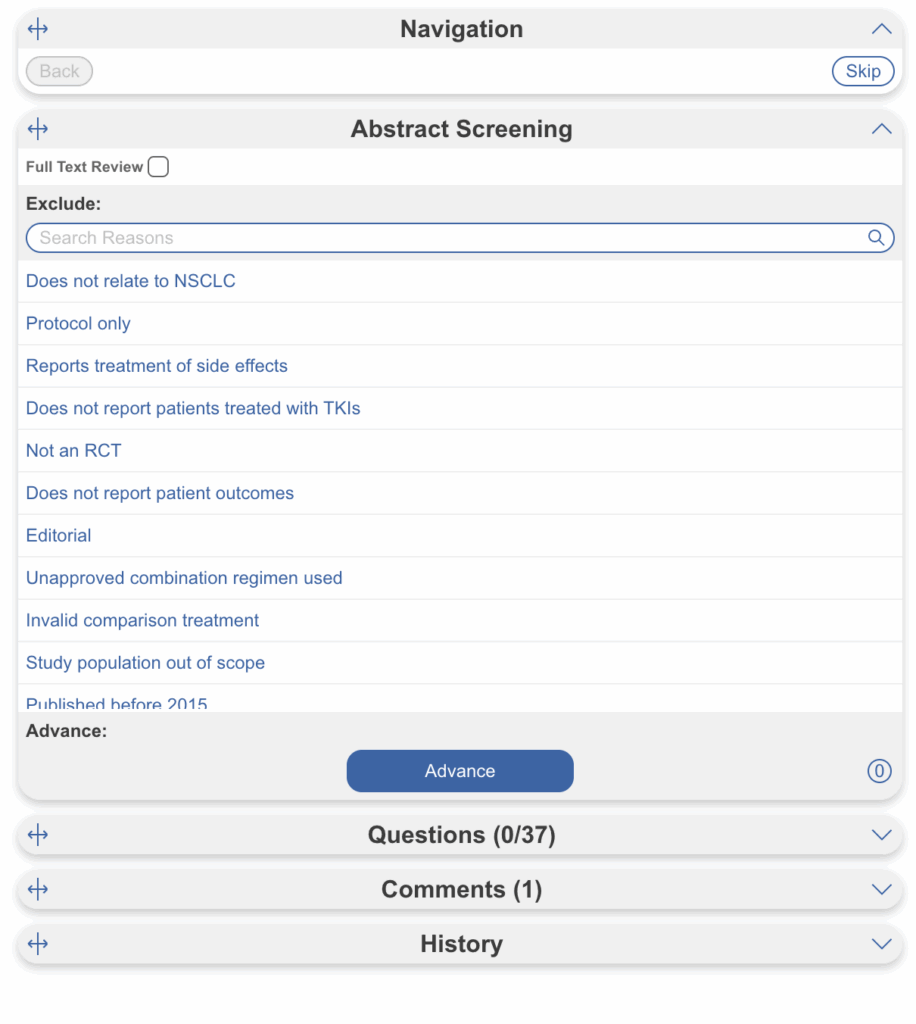
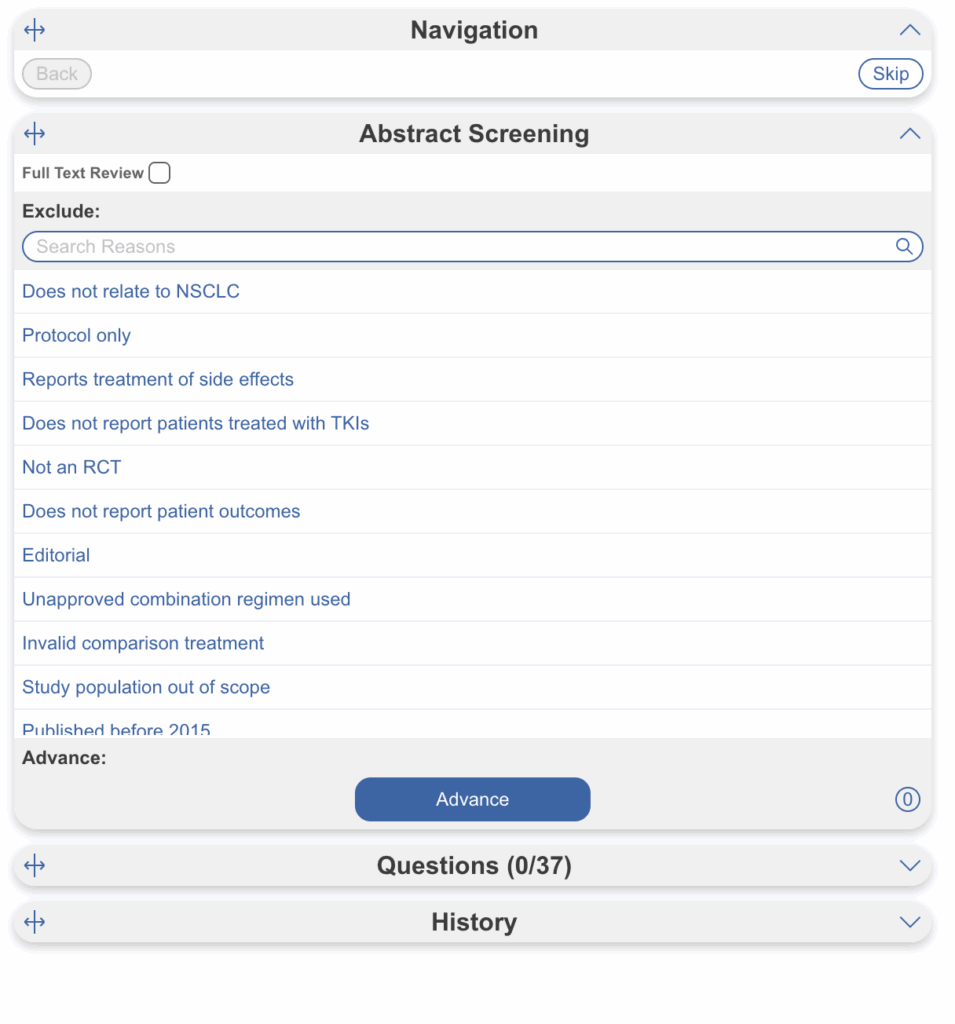
Hide Comments #
This removes the right-hand Comments tab in the workflow modules (Screening, Tagging, MA Extraction, Critical Appraisal), allowing you to hide any comments made on studies when viewing them. As a result comments can’t directly be made as they appear in the queue but can be made and seen when the study is accessed in Study Inspector.
Right hand side tabs before hiding comments:
After hiding comments:
Hide Tagging #
During Screening you may remove the Tagging tab available as you screen. We offer the ability to Tag during screening to be able to apply preliminary tags, but similarly it also exposes users to bias after a previous reviewer has screened and tagged. The before and after mirrors the above Comments removal but for the Tagging tab instead in Screening alone.
9. Nest Versions #
Nest Versions allow you to manually save up a version of your nest at a specific date and time. Learn more about Nest Versions.
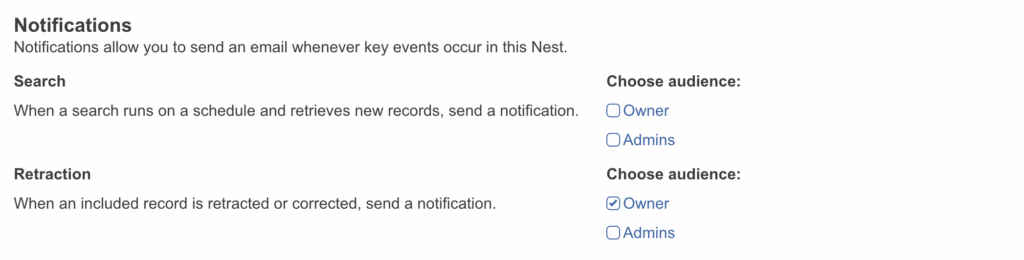
10. Notifications #
Notifications allow the Nest Owner and/or Admins to receive an email when a search updates and retrieves new records, and when included studies have been retracted or corrected.
For automatic Literature Searches, notifications are off for all searches by default. Here you can toggle on/off Owner and/or Admins to receive email updates for all automatic searches on a schedule.
For included studies, notifications are on for the Nest Owner only. Here you can toggle on/off Owner and/or Admins to receive email updates when an included study is retracted or corrected.
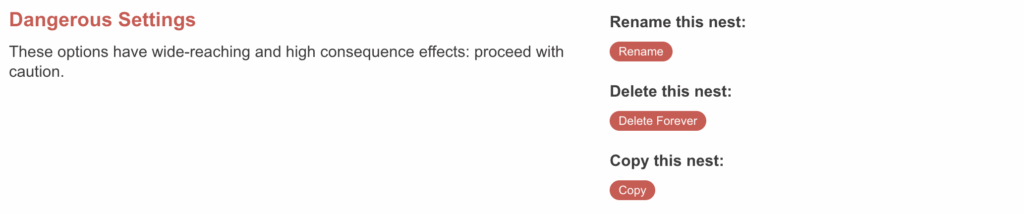
11. Copying, Renaming, or Deleting a Nest #
Copying a nest will copy the data and configurations, such as the search terms, references, exclusion reasons, the tagging hierarchy, applied tags, data elements, full-text PDFs, Critical Appraisal systems, the protocol and manuscript, and other configurations. The copied nest is entirely independent of the original nest. Access privileges will not be copied from the old nest and must be configured.
Only Owners have the right to delete a nest. “Delete” can be found next to “Rename”; deleting a nest is irreversible and will completely delete all data related to the project in question!
Deleting a nest has wide-reaching and irreversible effects, including loss of all nest data. Proceed with caution!