After selecting a Screening mode in Nest Settings, the next step in the Screening process is configuring the inclusion/exclusion criteria.
At this stage, you may choose to:
- Configure Exclusion Reasons (default): list all reasons that a record would be excluded from your nest according to your protocol, then reviewers screen studies and either Advance/Include or Exclude for a listed reason.
- Criteria-Based Screening (CBS): create yes/no questions for reviewers to answer as they screen, where yes = inclusion, no = exclusion, before selecting whether to include or exclude the study. This is a more comprehensive means of screening.
- Use Smart Config: Screening to generate a set of screening criteria based on your research question.
- Criteria-Based Screening can also be paired with Smart Screener, which will use AI to assess your questions against the study abstract and answer them for you. After this, the reviewer can either go through each study, review the AI-extracted answers and make individual screening decisions to Advance/Include/Exclude for a reason OR assign a threshold for the number of correct answers and automatically screen. See the link above for more.
- Note: CBS is not currently available for Dual modes, only Single modes in Standard or Two Pass. Additionally, this means it cannot be paired with Robot Screener at this time.
This page will detail how to configure screening using the default method of creating exclusion reasons. See the Criteria-based Screening information page for more details on how to configure screening using this method.
See our below video for general advice on Configuring Screening for your nest:
Configuring Exclusion Reasons #
1. Navigate to Configure Screening #
Once you are in a nest, hover over the left-hand menu and click on the gear icon next to Screening menu. If no exclusion reasons are configured, you will also see a warning message to ensure you have set up your screening mode correctly in Nest Settings. This means selecting a mode (standard or two-pass) and number of reviewers (single or dual) to ensure you do not start screening in the incorrect mode.
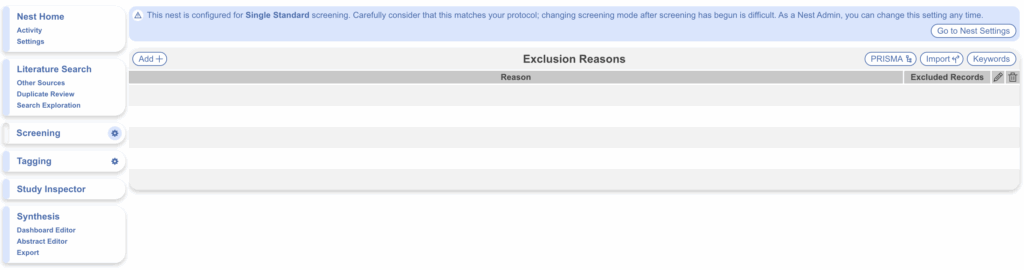
2. Add Exclusion Reasons #
Click “Add” (top left) and type your Exclusion Reason in the free text field. Hit Enter on your keyboard or “Add” to add the reason to the bottom of the list. The software does not restrict what reasons you create, but you should ensure that these Exclusion Reasons reflect the inclusion and exclusion criteria for your study design.
3. Editing, Ordering and Deleting Exclusion Reasons #
To edit an Exclusion Reason, click on the pencil icon (right of reason). If you edit the text of an exclusion reason, your edits will also be reflected on studies to which that reason has already been applied.

To order your list of exclusion reasons and determine how they are displayed in Screening, click the 6 dots icon (left of reason) and drag and drop in your desired order. To order your exclusion reasons in a hierarchical fashion, use the arrows to indent reasons beneath others (left of reason). In the below example, “Excluded: No Outcome of Interest” is placed beneath “Outcomes”. You can customize this according to your study design and exclusion criteria. The format will be displayed the same in the screening workflow.
To delete an Exclusion reason, click the trash icon (right of reason). Deleting an exclusion reason will permanently remove it from the system and will also remove it from studies to which it has been applied. These studies will be returned to the screening queue and will need to be screened again.

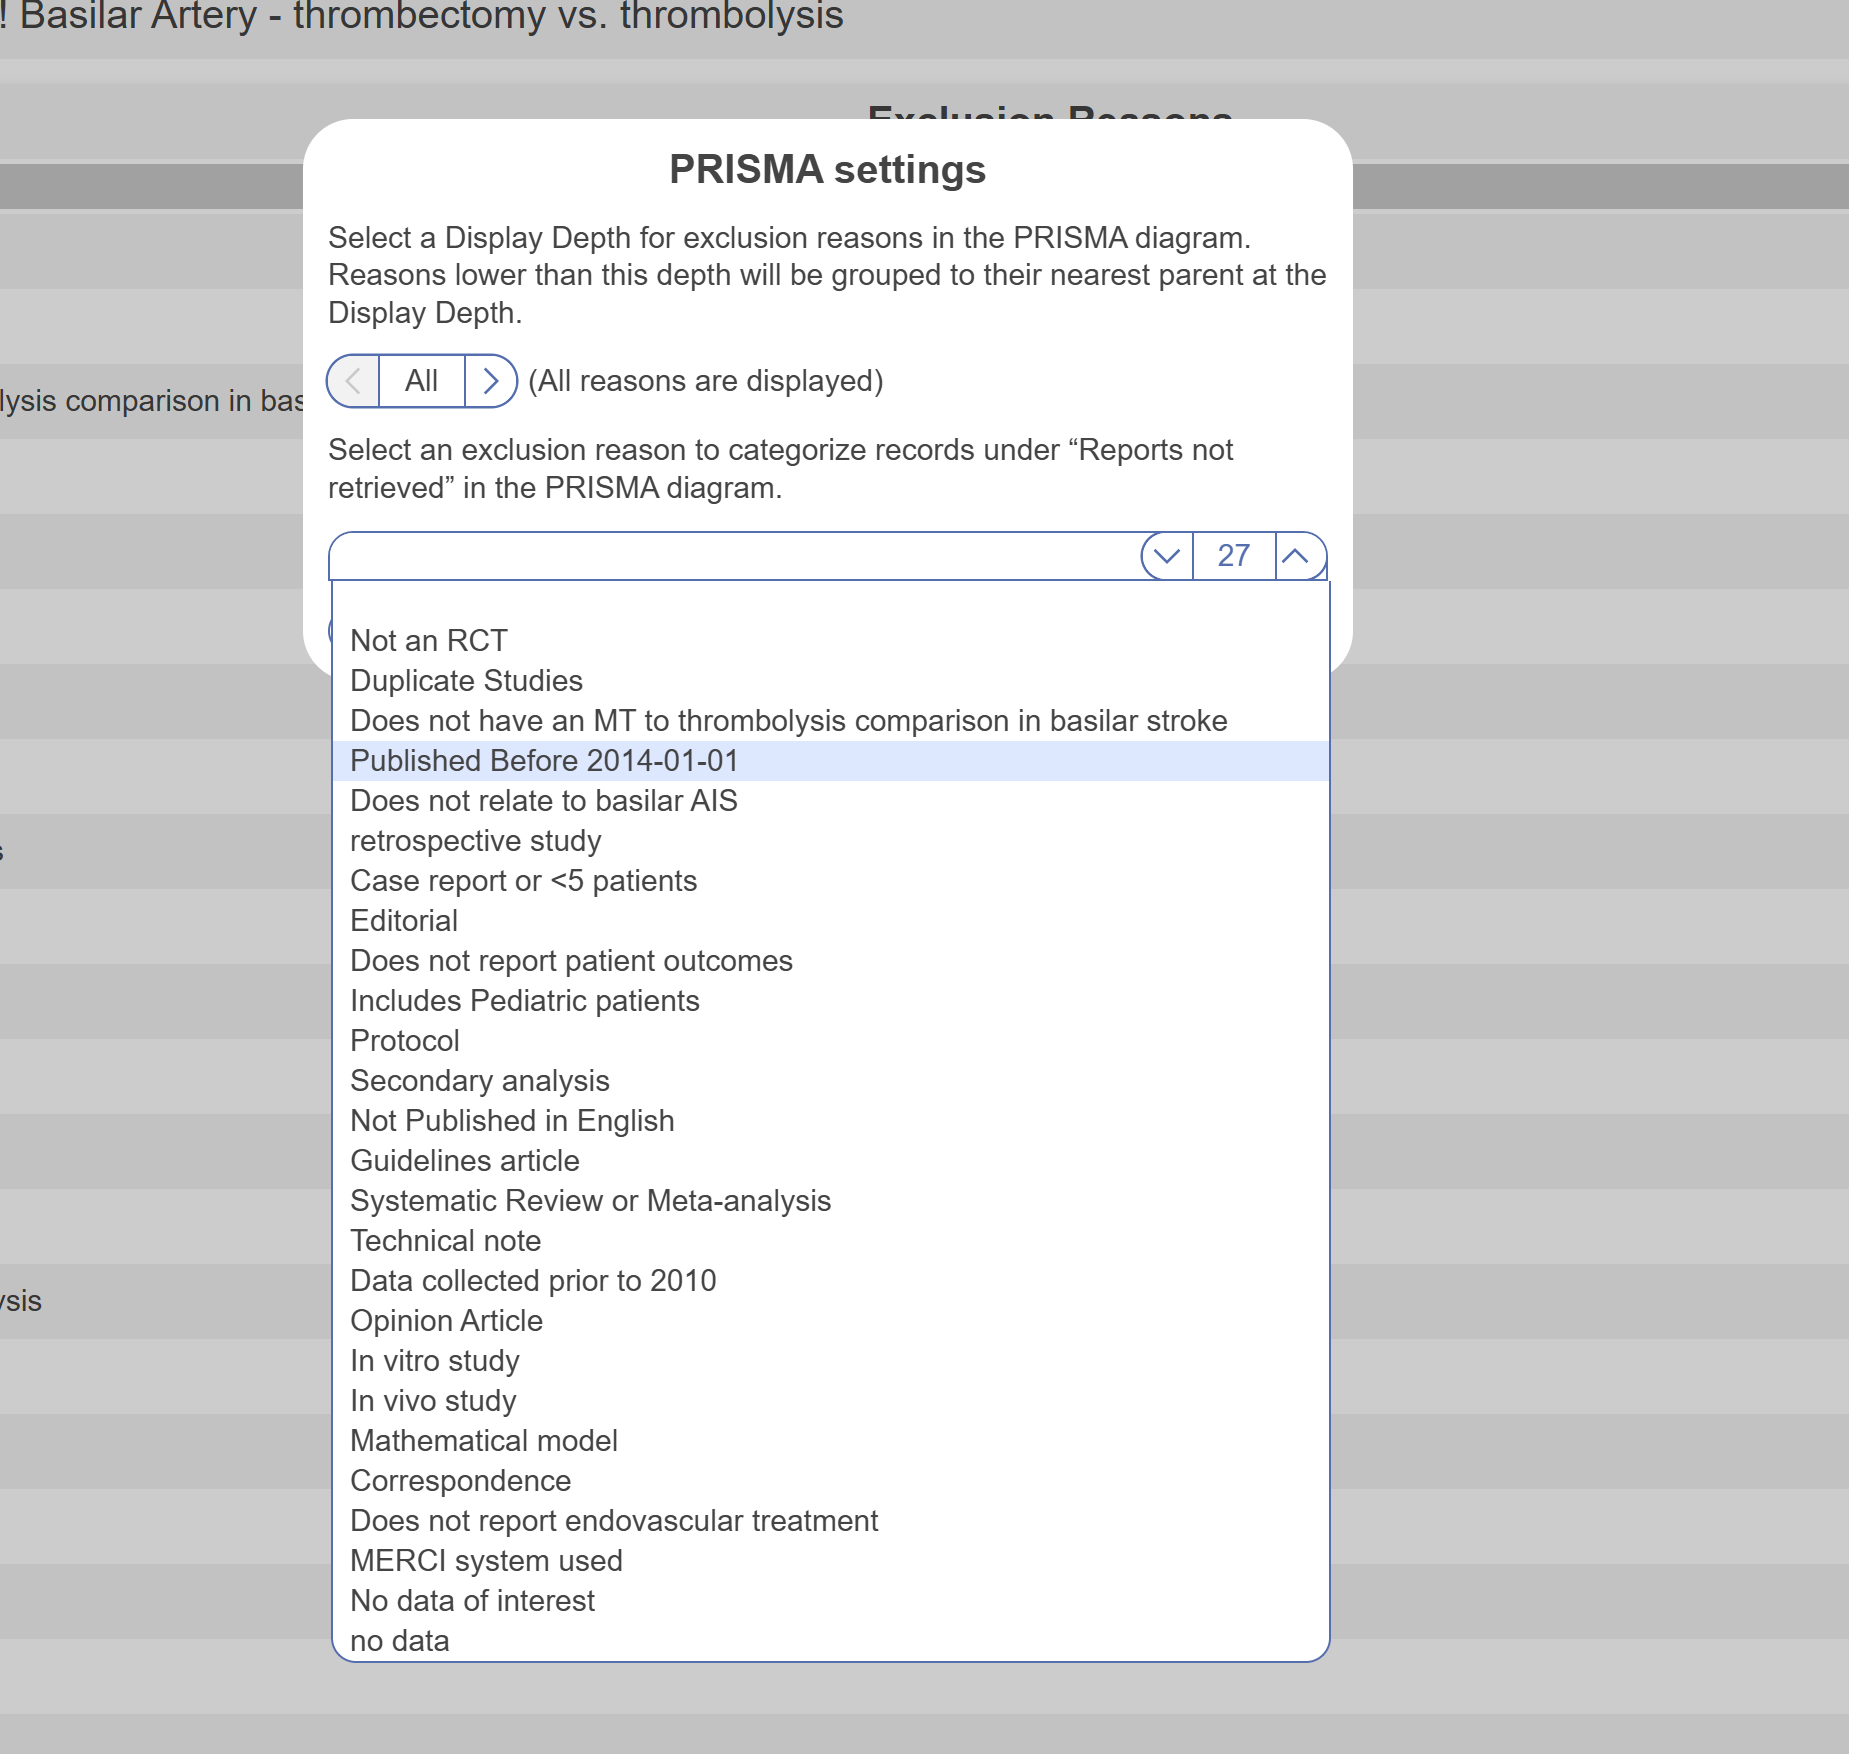
PRISMA Settings #
By selecting PRISMA Settings (red below) you can:
- Group exclusion reasons shown in the auto-generated PRISMA diagram. If you have created hierarchical exclusion reasons, you can choose to display all reasons (i.e. both specific and root/parent reasons) or root reasons (the first set of grouping), and so on.
- Assign an existing exclusion reason to represent “No Full Text Available” and will be reflected as such in the auto-generated PRISMA diagram.
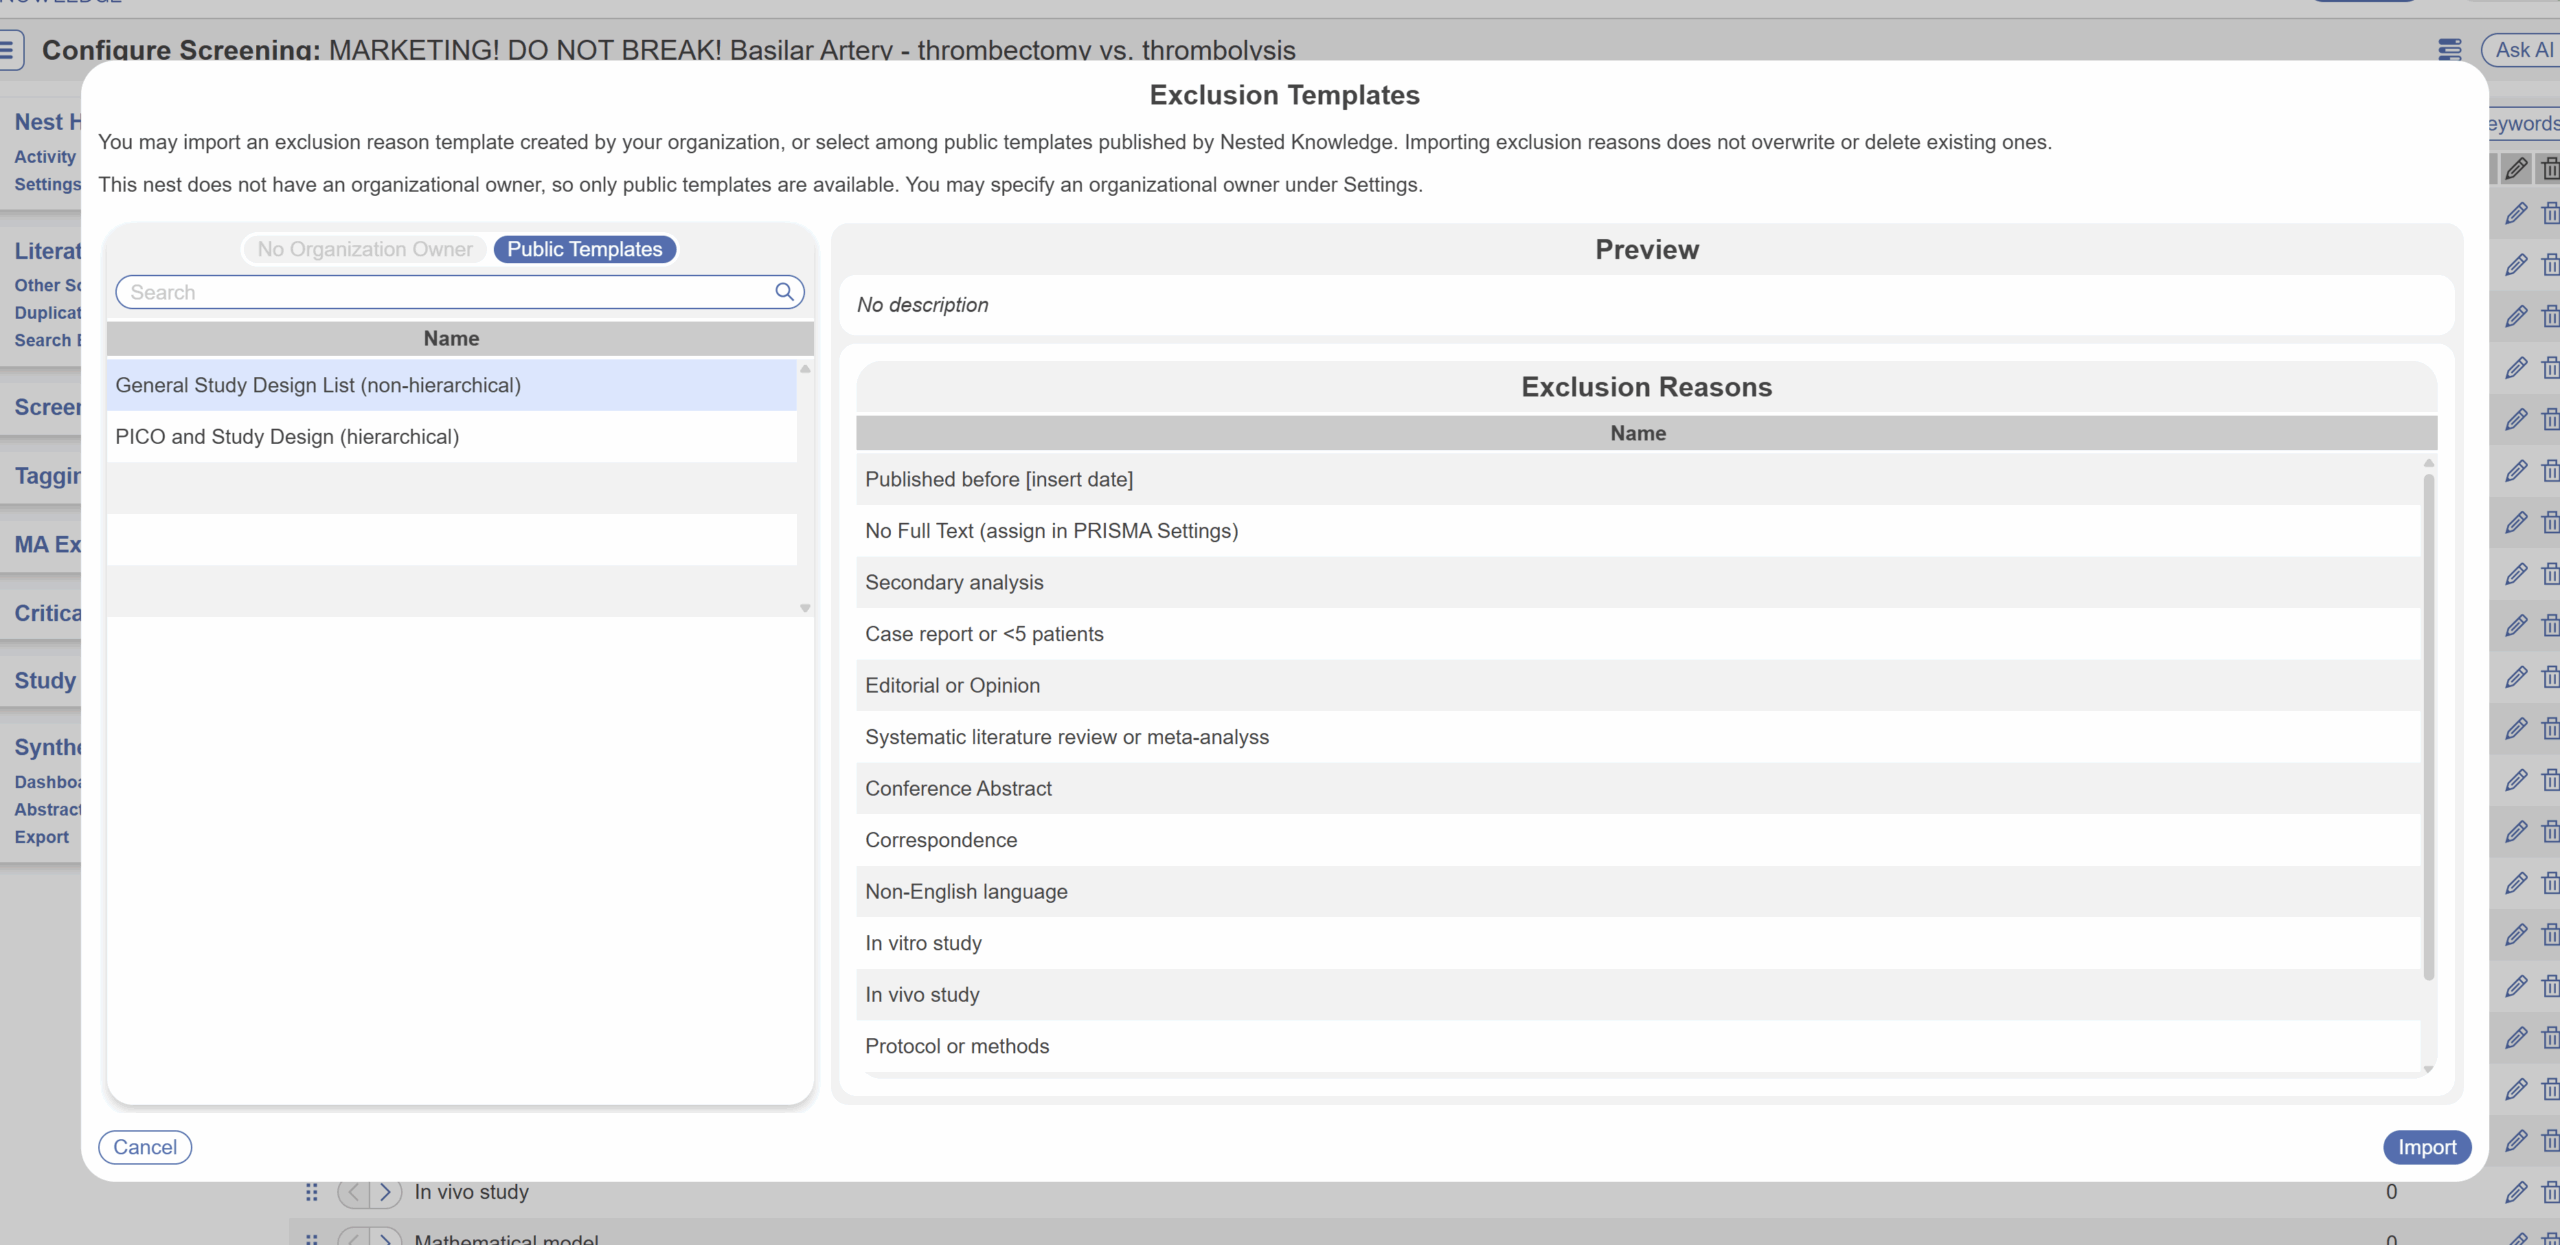
Import an Exclusion Reason Set #
If you don’t want to start from scratch, you can import an exclusion reason template via “Import Set”. We offer public templates and this is where you would also import your Organizational templates. Importing a Set will add all the Exclusion Reasons in the Set and add them on top of your existing reasons, ready for any edits/deletion. For more information, see Organizational Templates.
Keywords #
To learn how to add User Keywords from the Configure Screening page, click here.
Related Information #
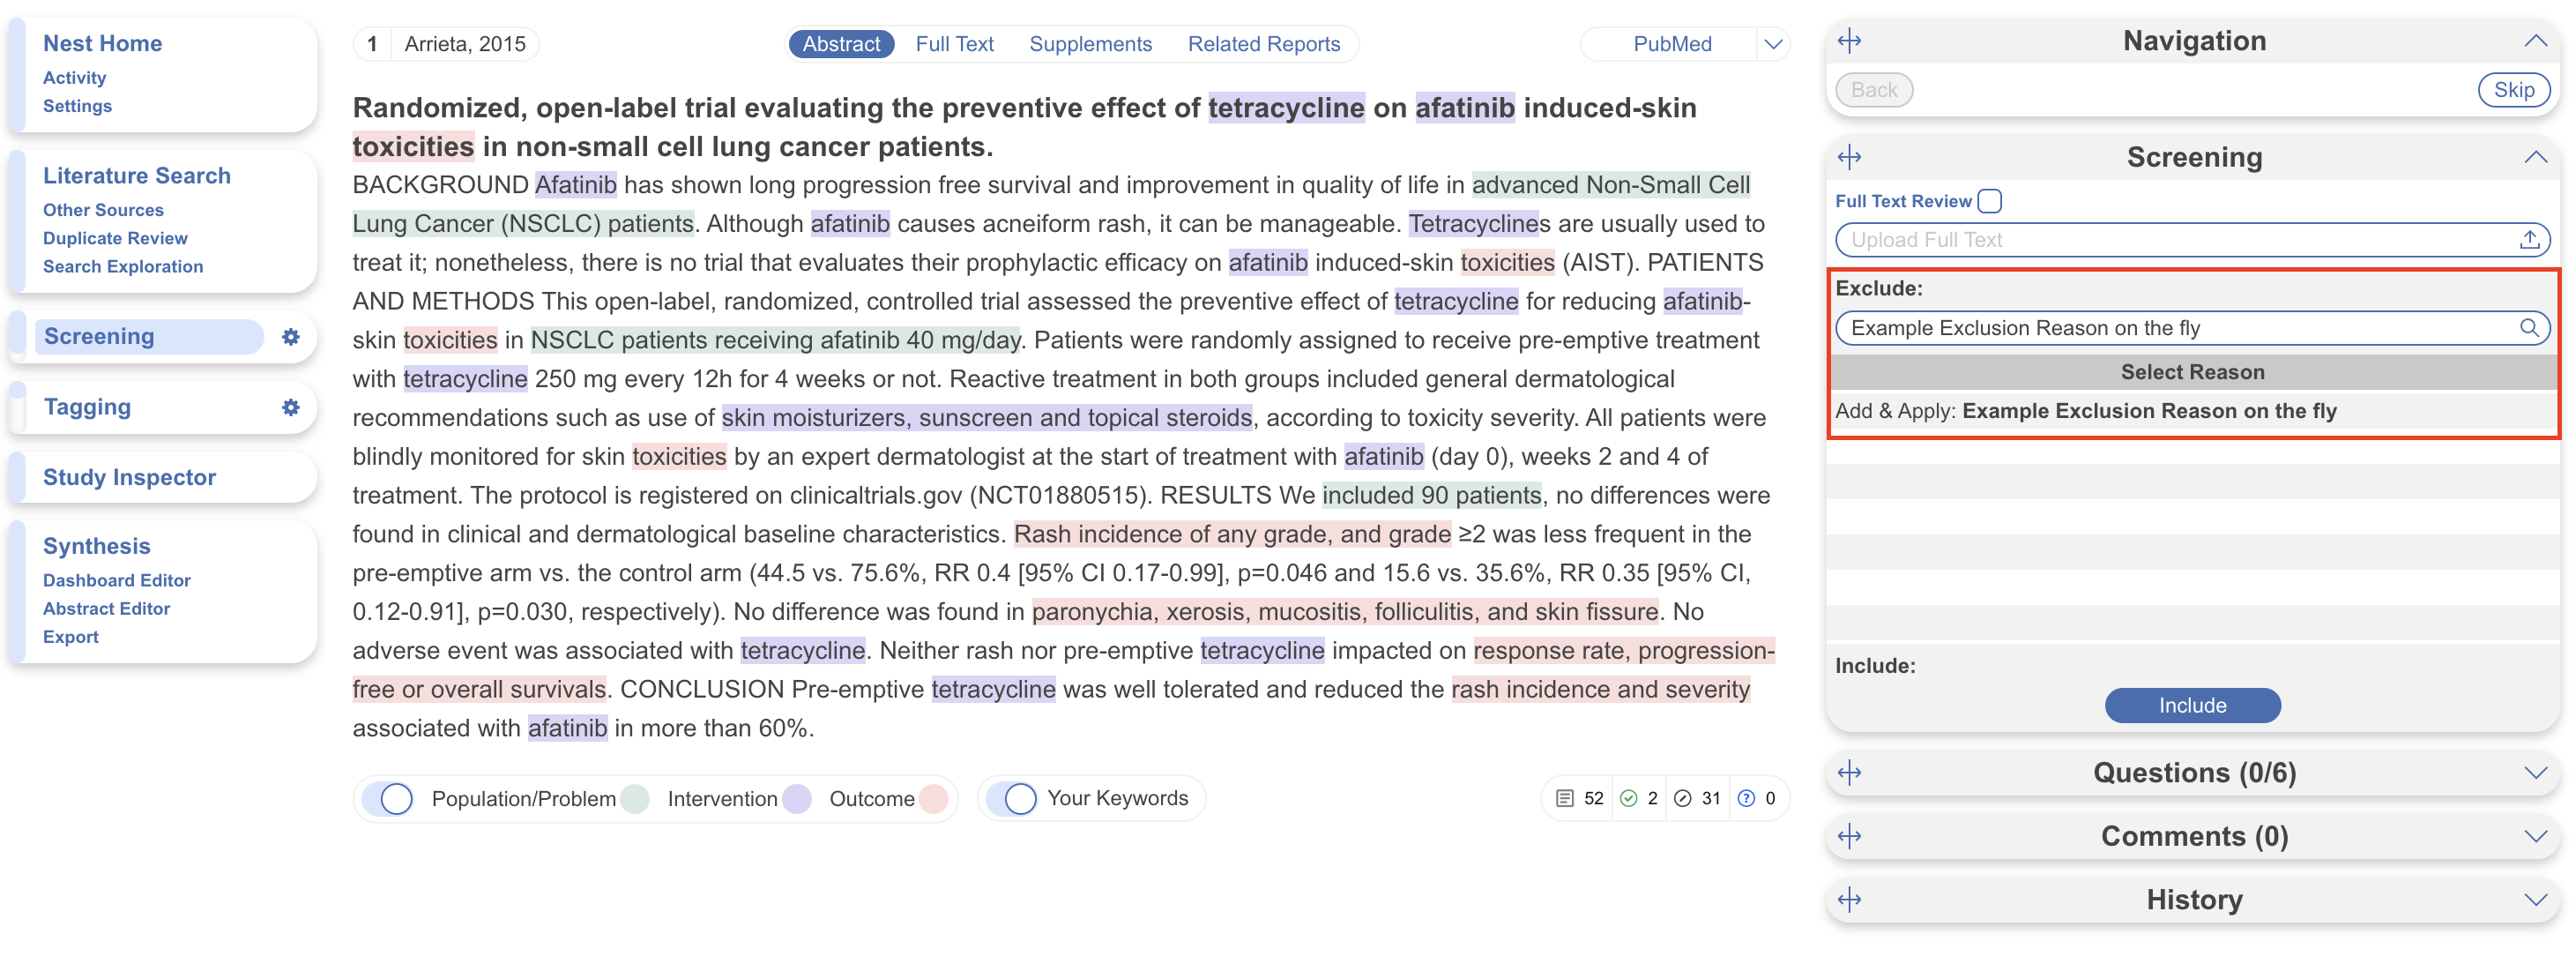
Add Exclusion Reasons on the Fly #
You can add Exclusions Reasons as you screen. To do so, in the Screening module, begin typing in an Exclusion Reason. If the reason of interest has not yet been configured, you will be presented with the ability to “Add Option.” Select this option, and write out your full Exclusion Reason. Once you have added it, it will be added to the Exclusion Reason drop-down and the Configure Exclusion Reasons page, and will be automatically applied to the study you are currently screening. To confirm that the new reason should be applied, select “Exclude”.
Be careful, once you select “Add and Apply” it excludes the study and takes you to the next one in the queue. You undo, you can go “Back” in the navigation panel, or head to Study Inspector to filter to that exclusion reason to alter it.
Next Steps #
Now you’re all set up to start screening studies. Head over to the main Screening page to begin.