Two-Pass Screening is a sequential screening process where users first review only the title and abstract and then complete a more in-depth, full-text review on any record that is advanced after the title and abstract review. Note, this is different than dual screening where two users screen the same articles. You can, however, perform dual two-pass screening in our software.
Configure Exclusion Reasons #
You will need to Configuring Exclusion Reasons before screening underlying studies.
Configure Two-Pass Screening #
To configure Two-Pass Screening in a nest, click on the “Settings” link in the Nest Home menu. Once here, scroll down to the Screening section. Then, click on the “Two-Pass” option.

Once this is complete, modules for “Abstract Screening” and “Full Text Screening” will appear in the Nest Menu.
Note: Toggling back from Two-Pass Screening to Standard Screening (or switching to Dual Screening) will ONLY save final screening decisions, so all records that are Advanced from Abstract to Full Text Screening, but that do not have a final Inclusion/Exclusion decision will be reverted to Unscreened and all data associated with individual users’ decisions will be lost!
Two-Pass Screening Steps #
1. Screen each study by title and abstract #
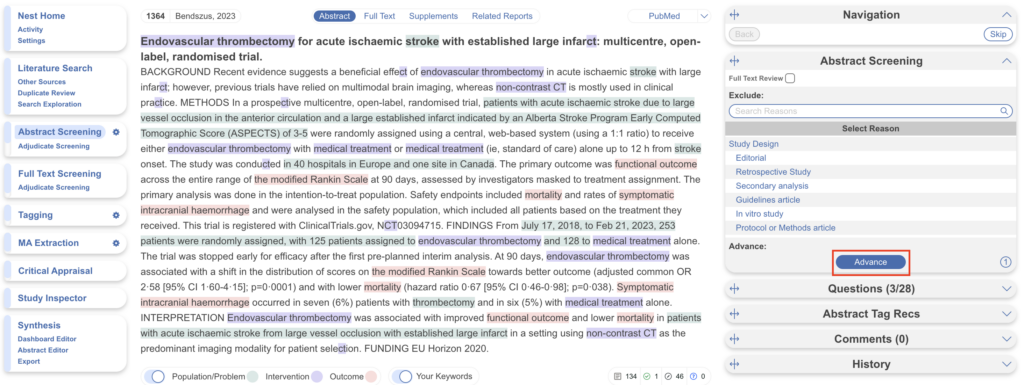
Before Full Text Screening can take place, a user will need to screen each underlying study using the same approach as Standard Screening Mode.
Advance vs. Include #
The only major difference in this process will be that, instead of choosing to Include or Exclude, users select to either Advance or Exclude a study. All Excluded studies are treated the same way as in Standard Screening; however, studies that are Advanced are not Included but instead queued for Full Text Screening.

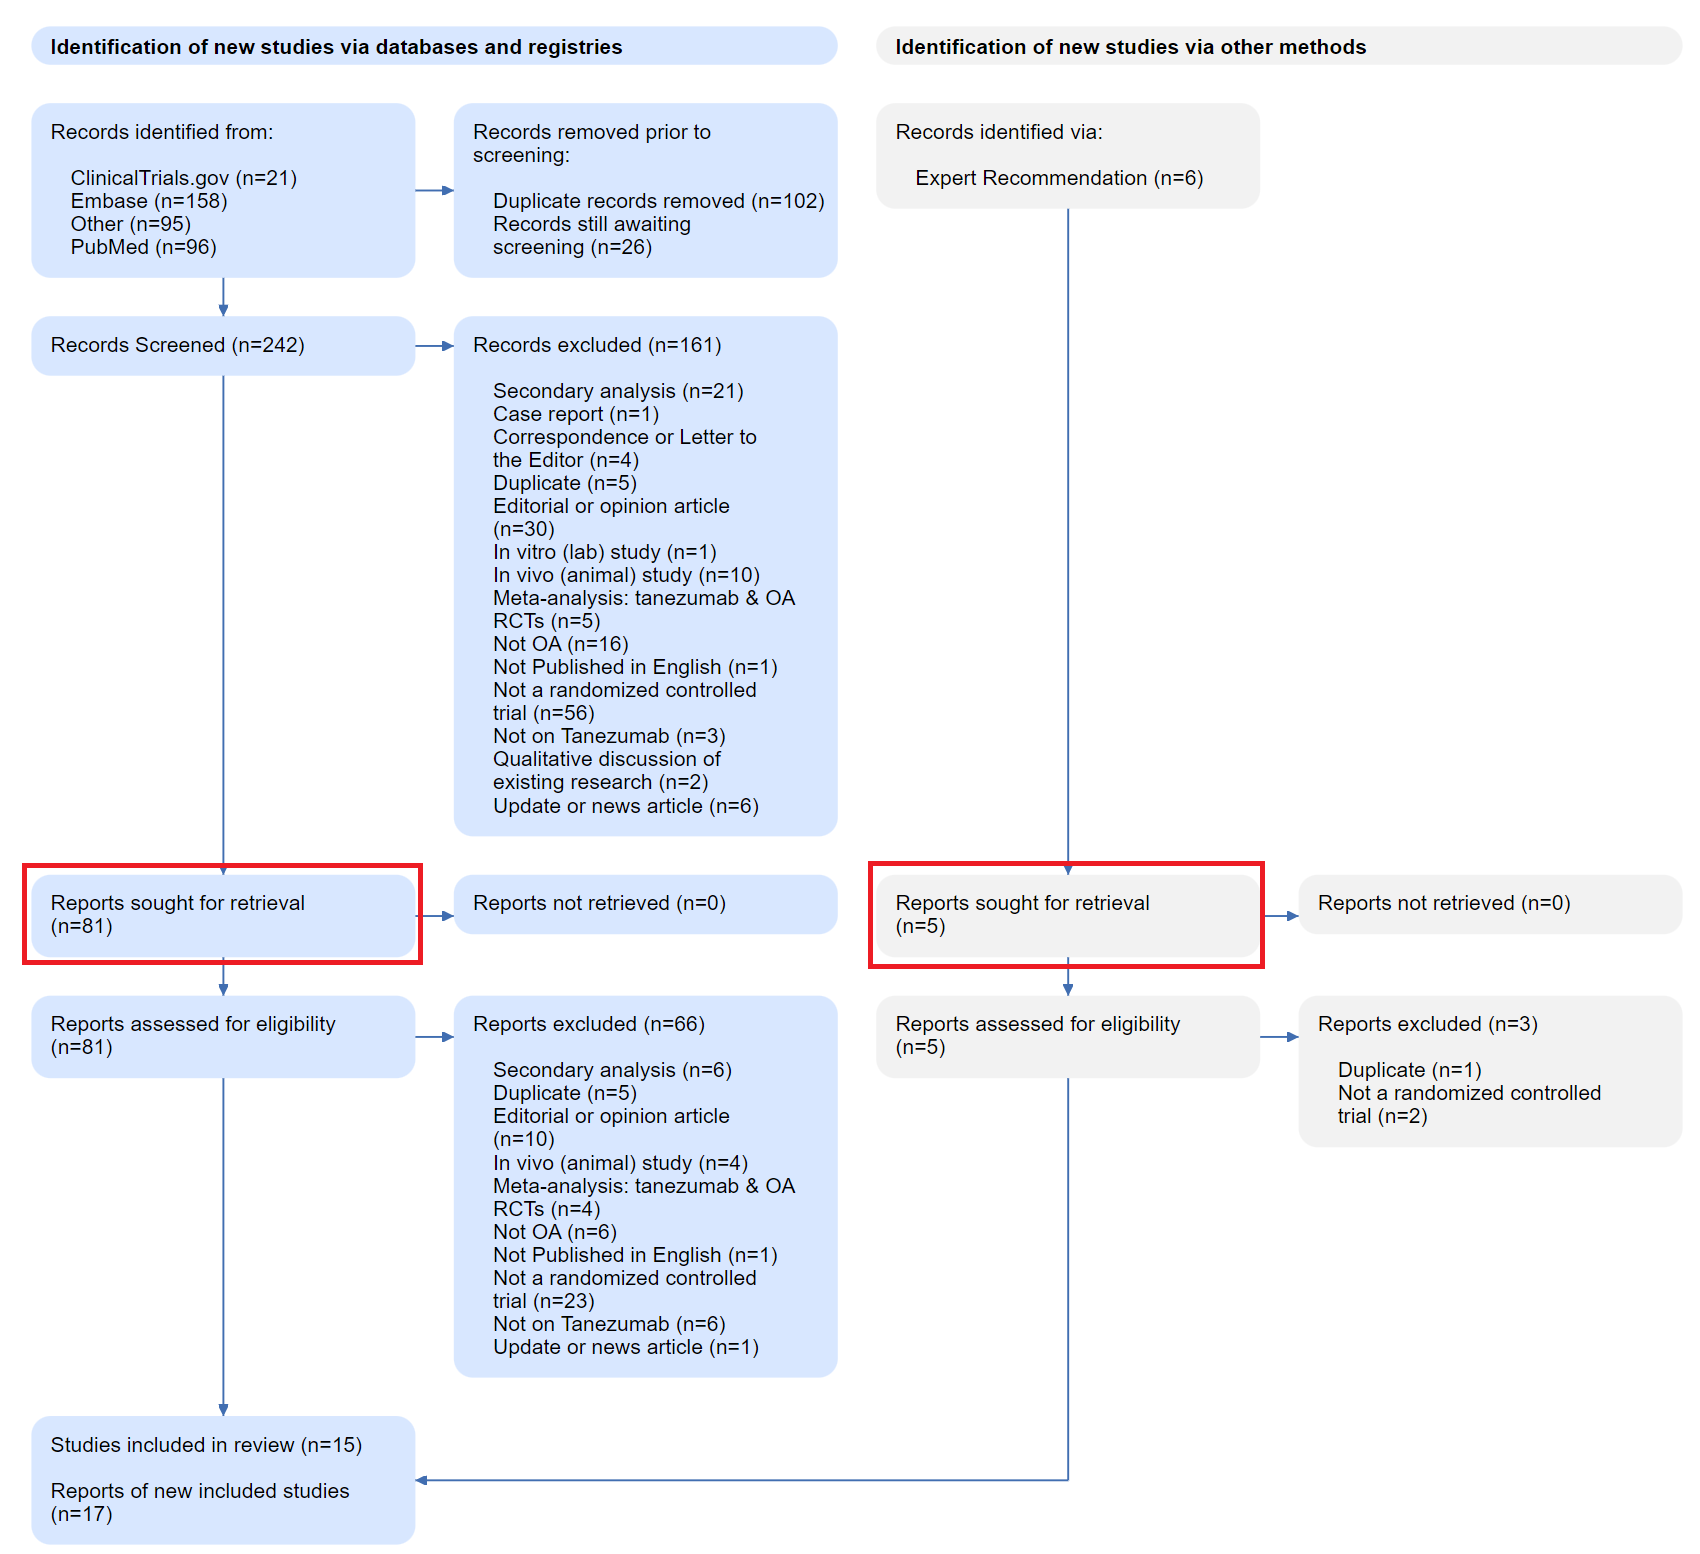
Studies that are Advanced will be automatically queued under the Full Text Screening tab. Note that altering Screening Mode will revert studies that have been Advanced to “Unscreened”, and that while a study is Advanced but not yet Included or Excluded, it will remain at the “Reports sought for retrieval” stage of your PRISMA Diagram:

Upload Full Text #
When a study is Advanced, a Full Text should be uploaded. To learn how, see here.
If a full text cannot be retrieved, ensure that you mark the record using a “No Full Text” reason, as explained here. Any record marked with this reason will be reflected under “Reports not retrieved” (see image above).
2. Screen each study by Full Text #
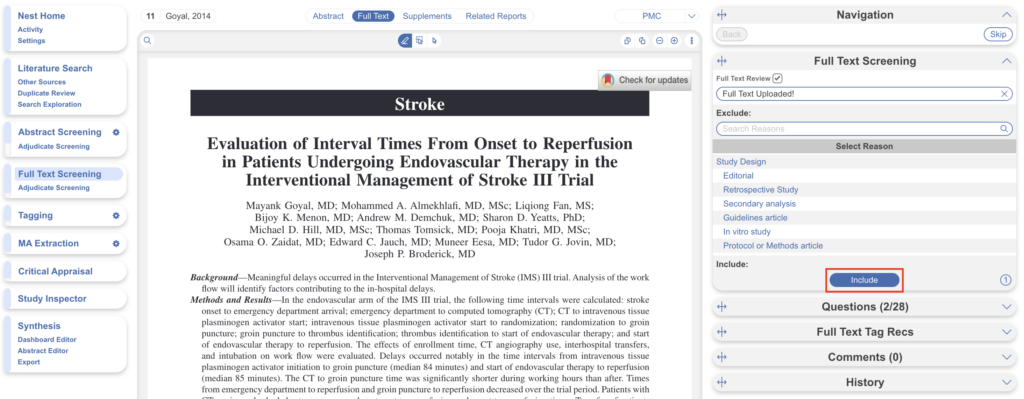
Select the “Full Text Screening” option from the menu.
All studies that have undergone title/abstract screening and that were Advanced will be queued here, and the full text PDF of each should have been uploaded as part of the previous step.
Examine the full text of the study under review, and choose whether to Include or Exclude (with an appropriate Exclusion Reason). Each study that is Included will be sent forward to Tagging, and each study that is Excluded will be reflected in the second (lower) “Reports Excluded” section of PRISMA.

