The Search Exploration page allows you to input concepts, explore the literature and generate a search query to finalize in your nest. Enter your Population, Interventions (and Comparators), and Outcomes (PICO) to generate a Boolean query that can be used on PubMed, and explore potential search results’ abstracts, key terminology, and topics of interest to help construct your final search strategy.
How to Begin Search Exploring #
1. Navigate to Search Exploration #

2. Enter concepts of interest: #
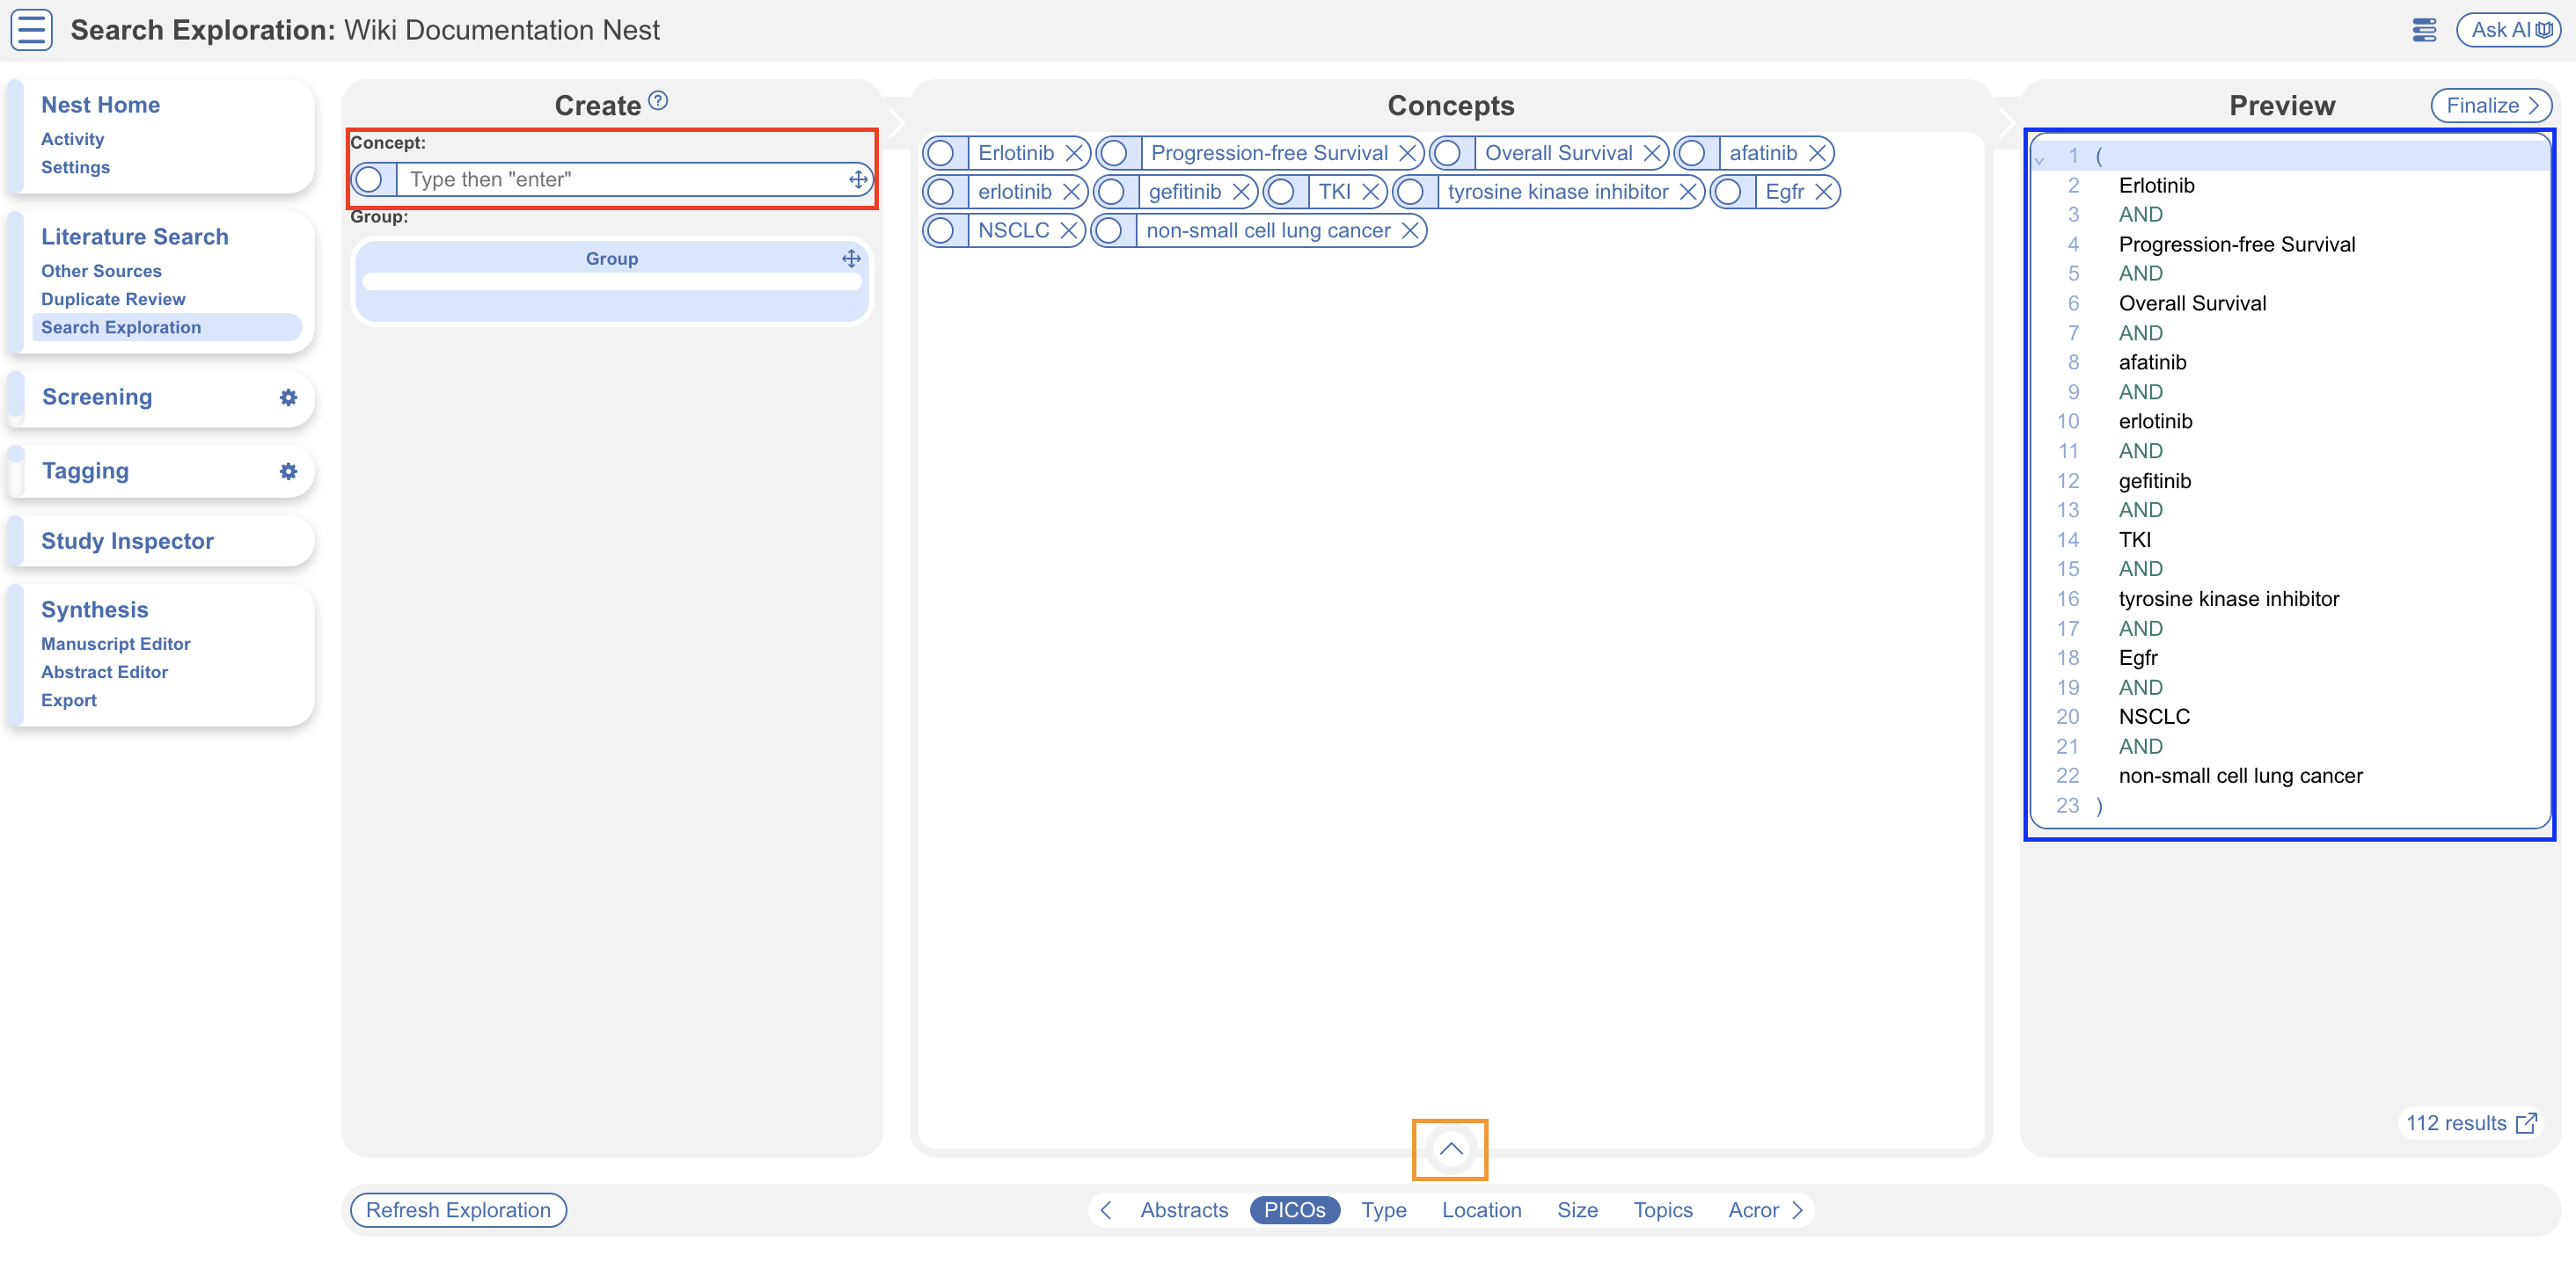
You may add in any concepts of interest, but it can often be helpful to add and group specific PICOs. Add individual terms into the concept box (red) and then hit Enter on your keyboard. This will add the terms into the central concept box.
As terms are added they are automatically building a search query whose Preview is shown on the right hand side (blue). Per a typical Boolean Query, you’ll notice they are “AND”ed together. To expand/minimise the page select the up arrow at the bottom of the concepts box (orange).
You can group concepts together by dragging in the Group box icon (red), then dragging each relevant concept into a group (blue) and naming each group if you wish (orange).
By default, concepts are “OR”ed together. You’ll notice the right-hand query preview has now “OR”ed the grouped concepts.
You also have the option to “AND” terms in a group, in addition to “OR” (red). The query will update on the right as expected. Below is an example of grouping to “OR” terms and associated query section as well as grouping to “AND” terms and the associated query section (blue).
Advanced: You may also wish to group terms within a group. Do this by dragging the group icon within an existing group instead of the general concepts box space.
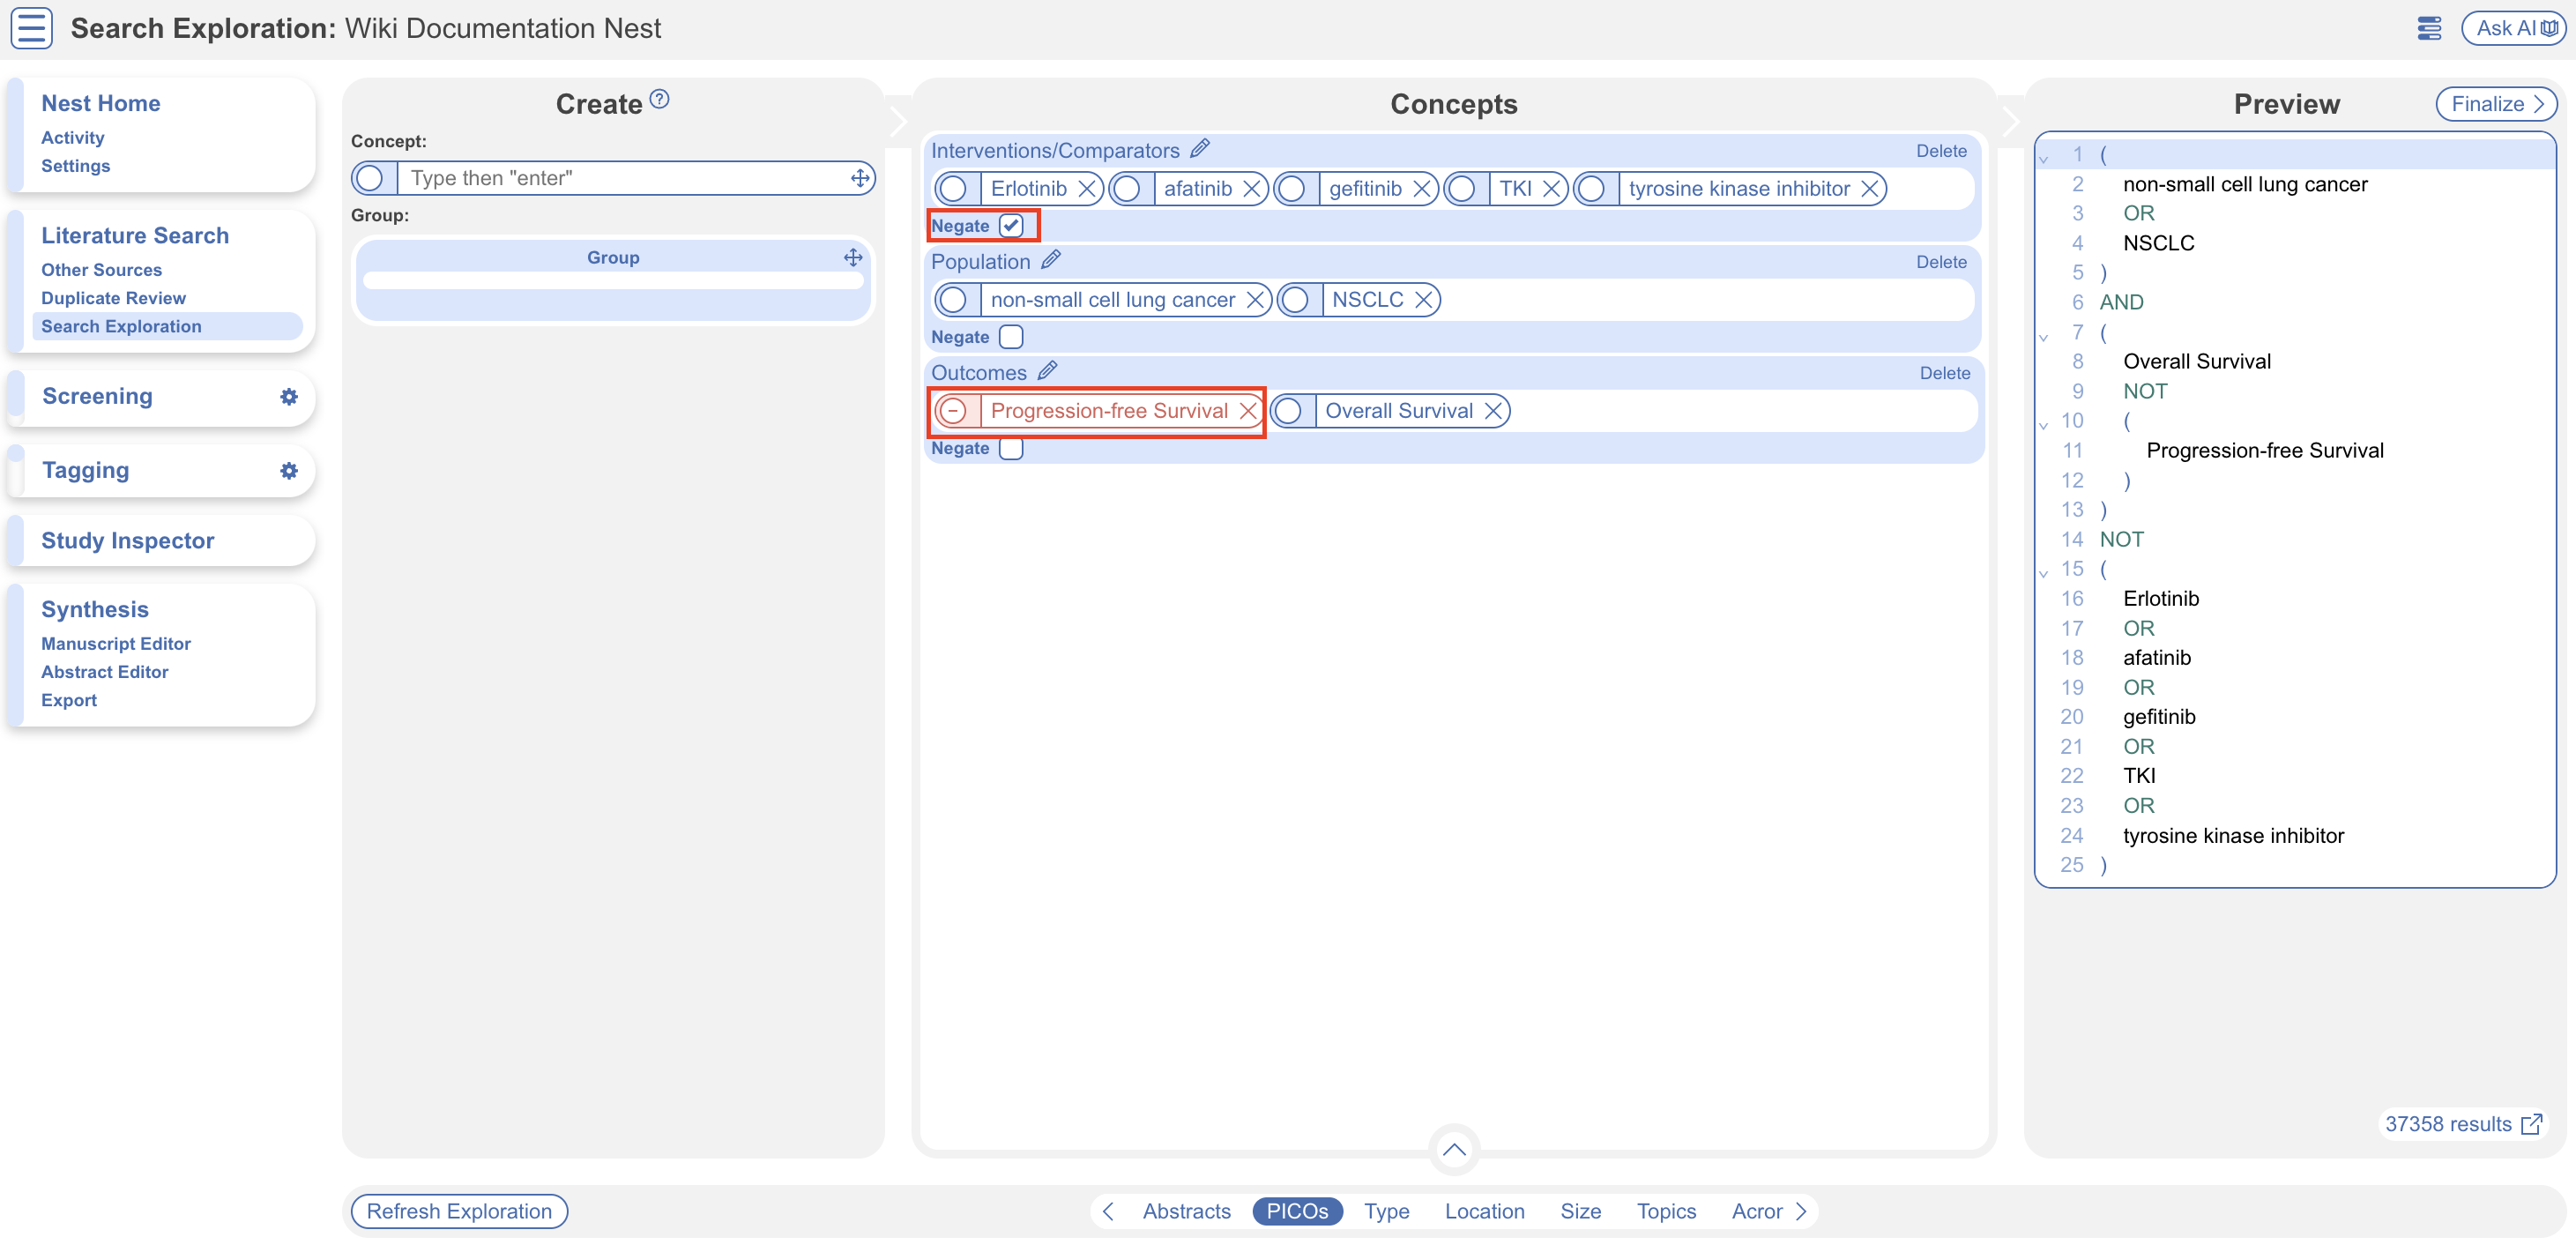
Negation: Check the negate box to exclude an entire group, or the circle to the left of a concept to negate the specific concept.
3. Refresh Exploration #
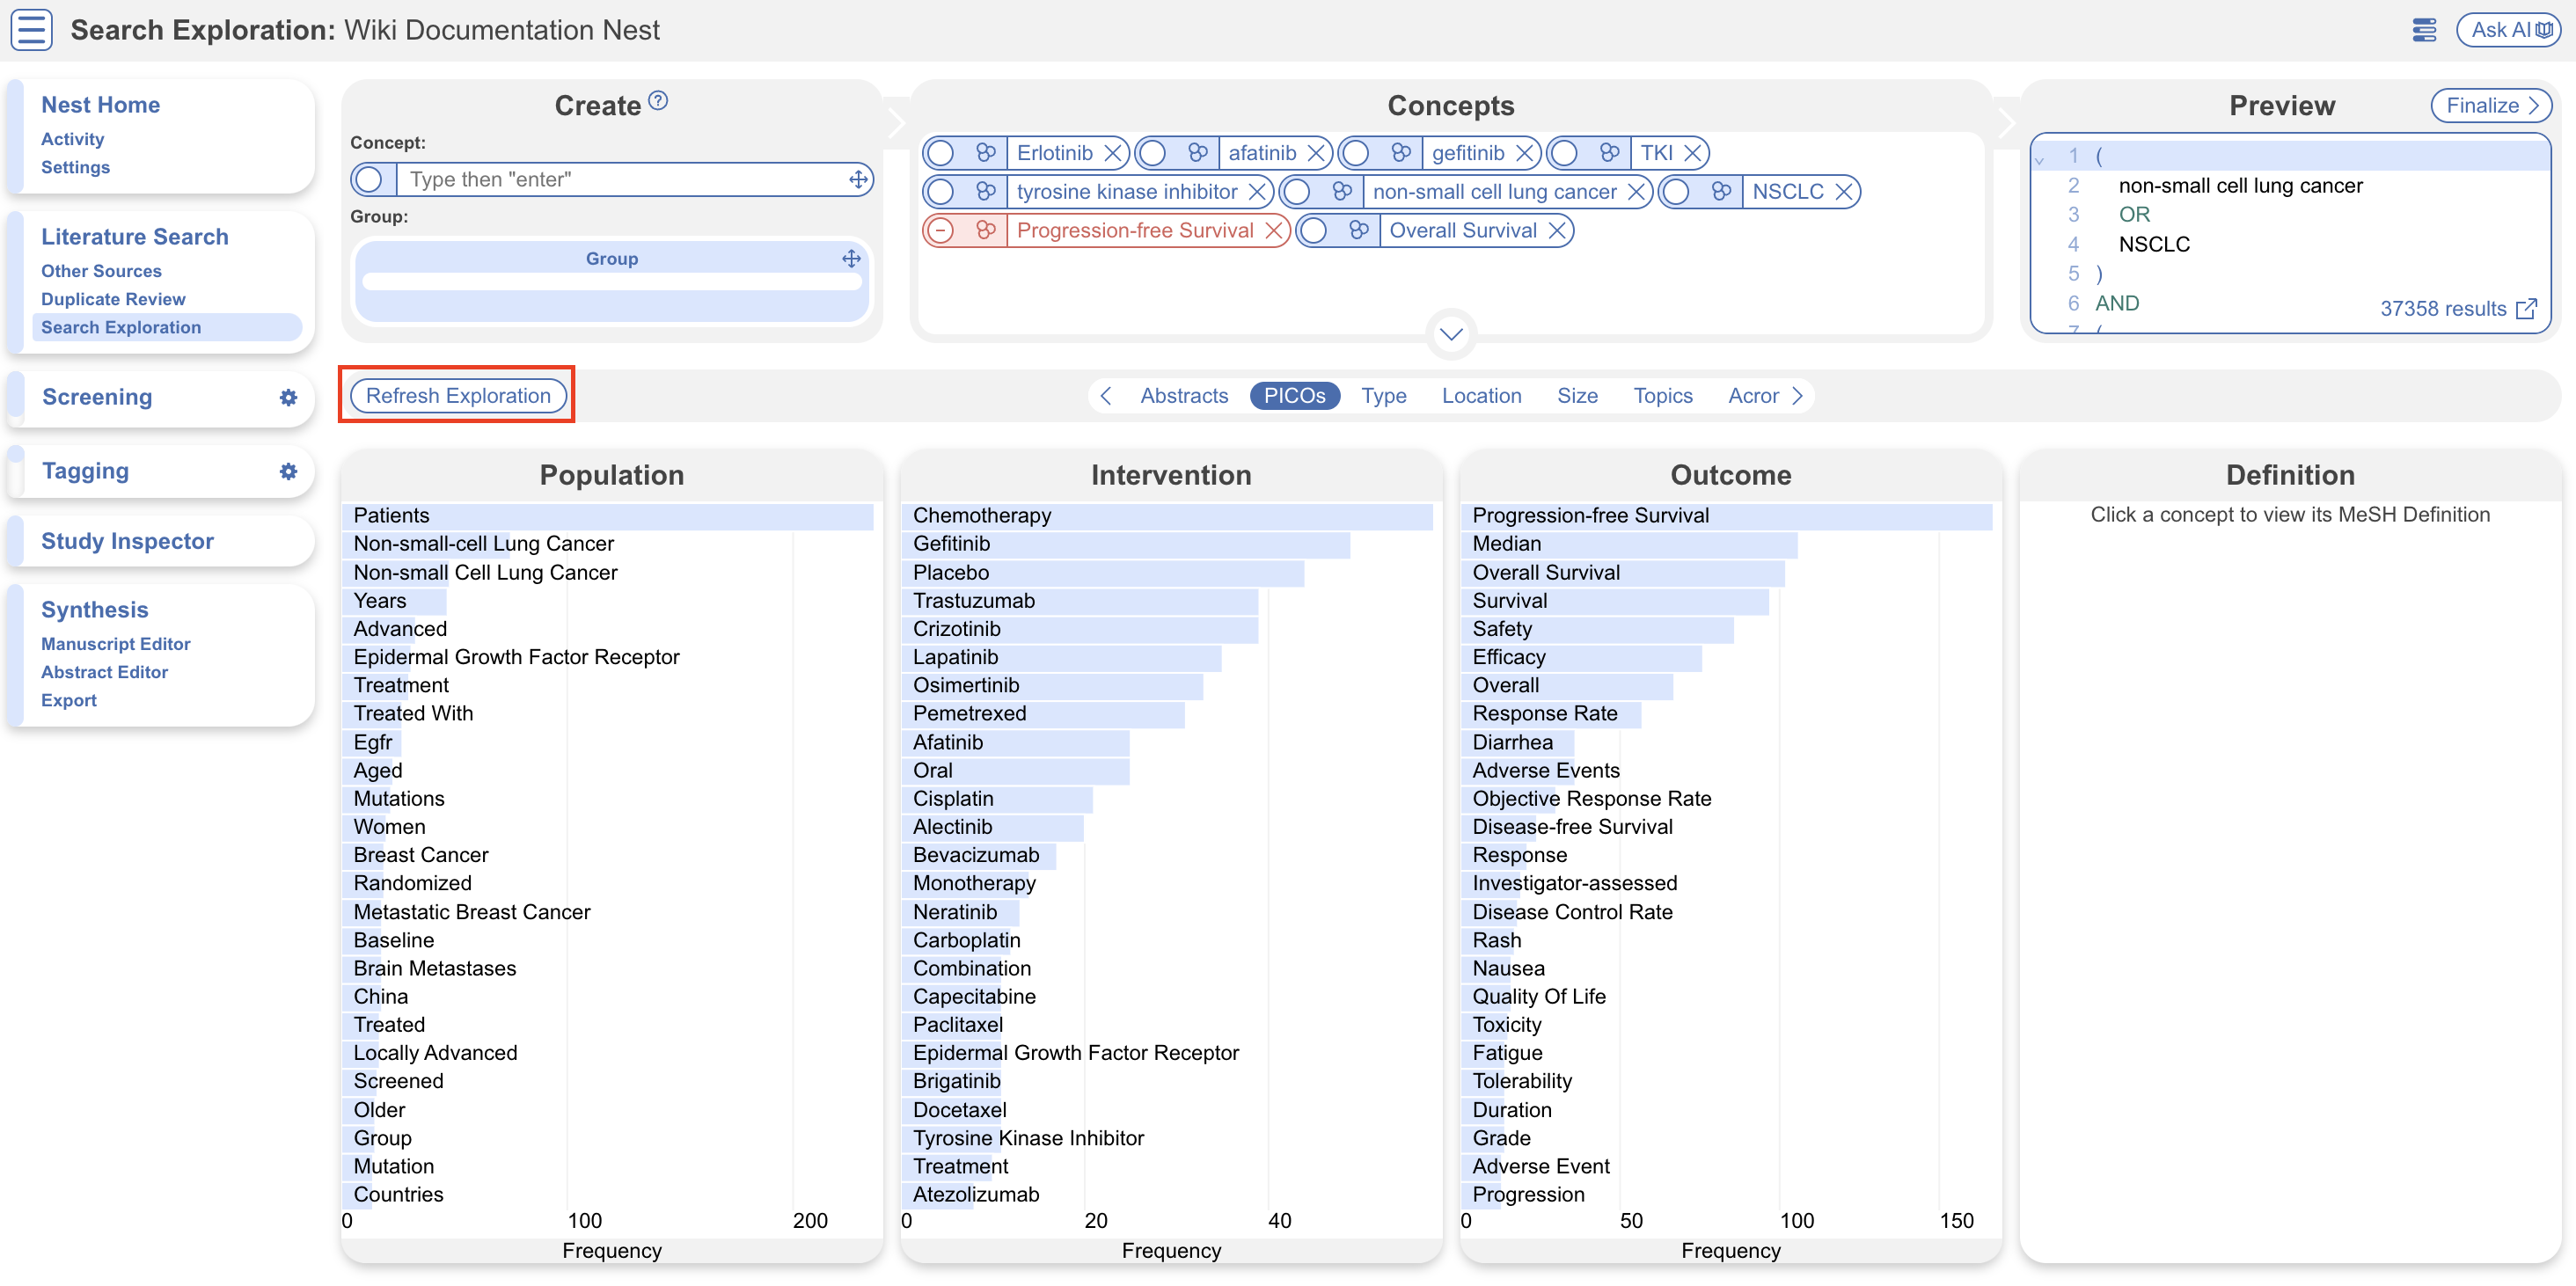
Now you’ve added, grouped, and negated a few concepts of interest, minimise the concept box and select “Refresh Exploration.” This action searches PubMed and populates the following tabs from a subset of 250 studies: Abstracts, PICOs, Study Types, Location, Size, Topics, Acronyms and Keywords.
A modal will appear while Search Exploration refreshes. This may take a minute, since this will run a pre-search of PubMed.
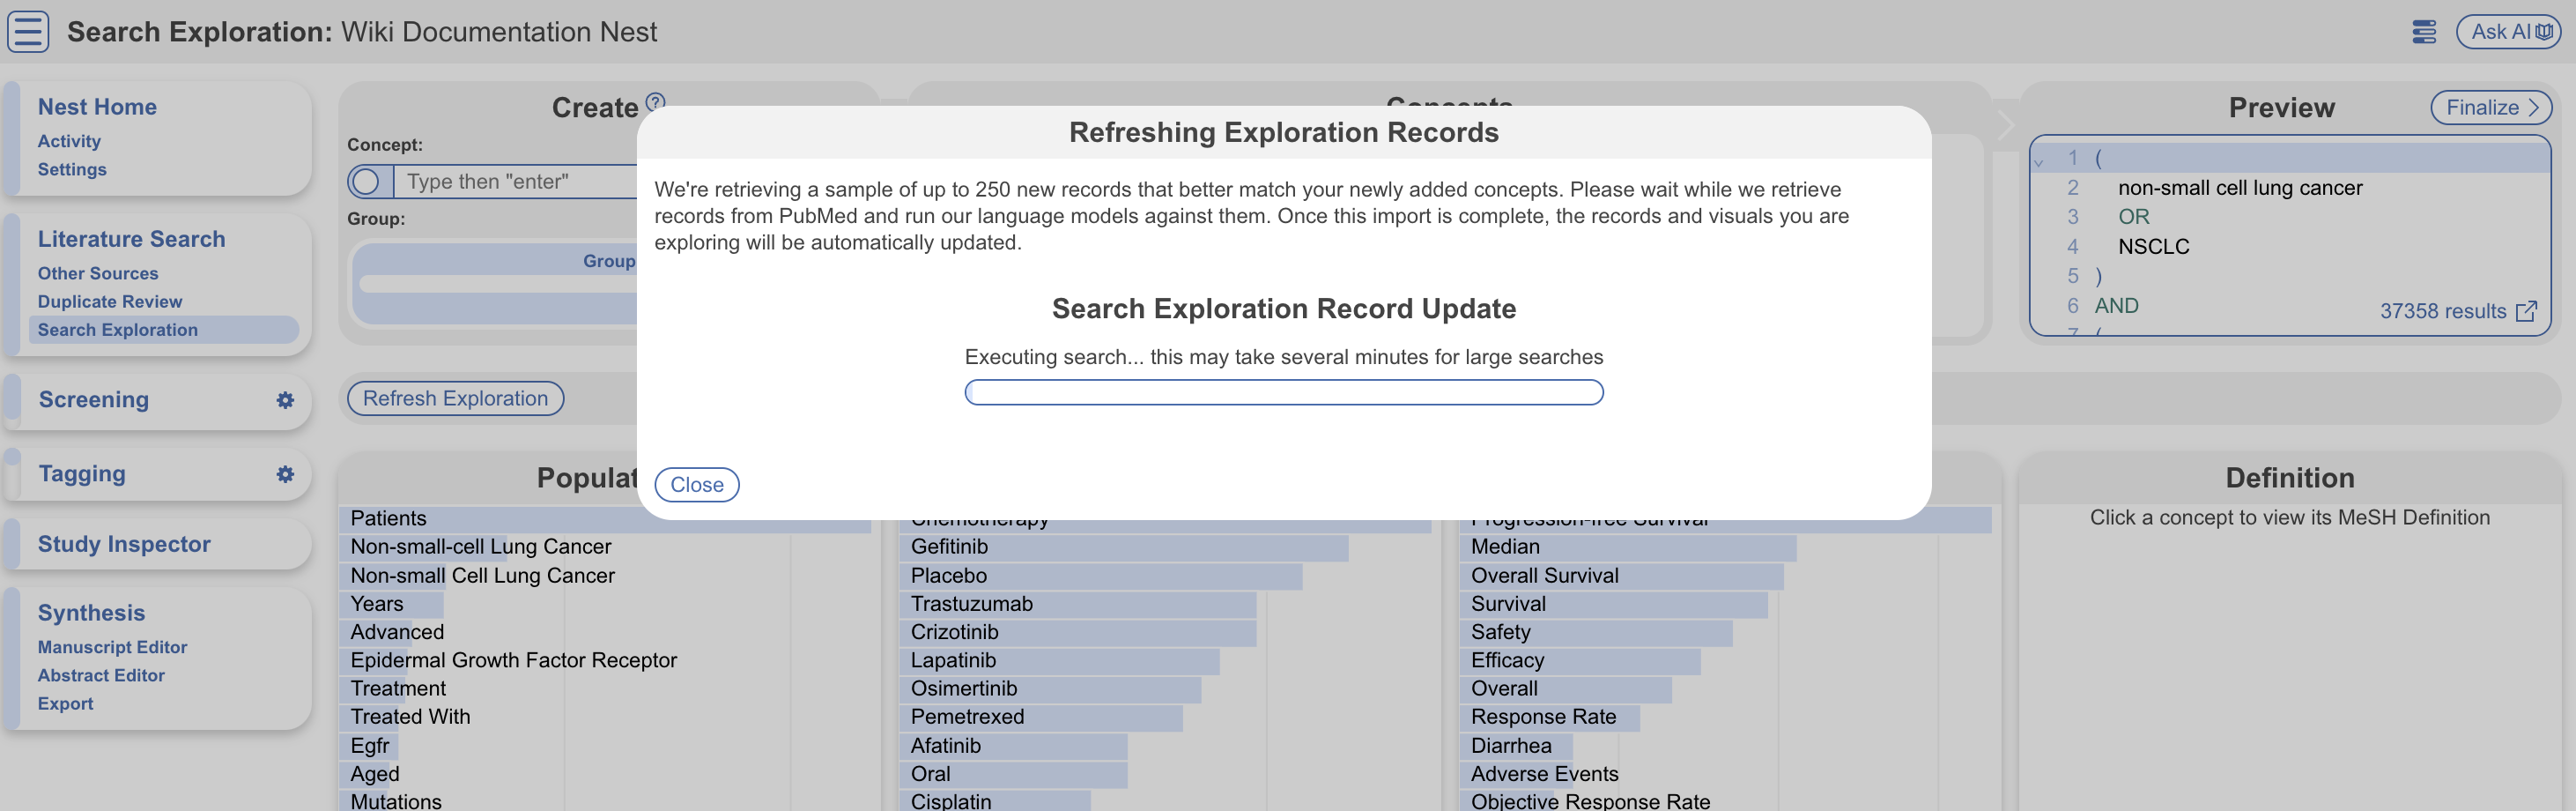
When you update search exploration, the references in your nest will not change. The records and data returned from this step will only be used for Search Exploration.
Feel free to click out of this modal and it will continue to run in the background. You can check in on its progress via the background jobs icon (three horizontal progress lines in the top right).
How to Interpret Search Exploration Findings #
There are several ways to explore the references pulled by your exploratory search. The goal of this process should be to expand or refine your search terms so that they return as many records of interest while limiting irrelevant results.
Iterative Refinement: As you use the tools outlined below to add, remove, or restructure your terms, you should periodically re-run “Update Search Exploration”, as this is only run manually, and not automatically updated.
1. Abstracts #
Skim through abstracts retrieved through your search exploration terms.
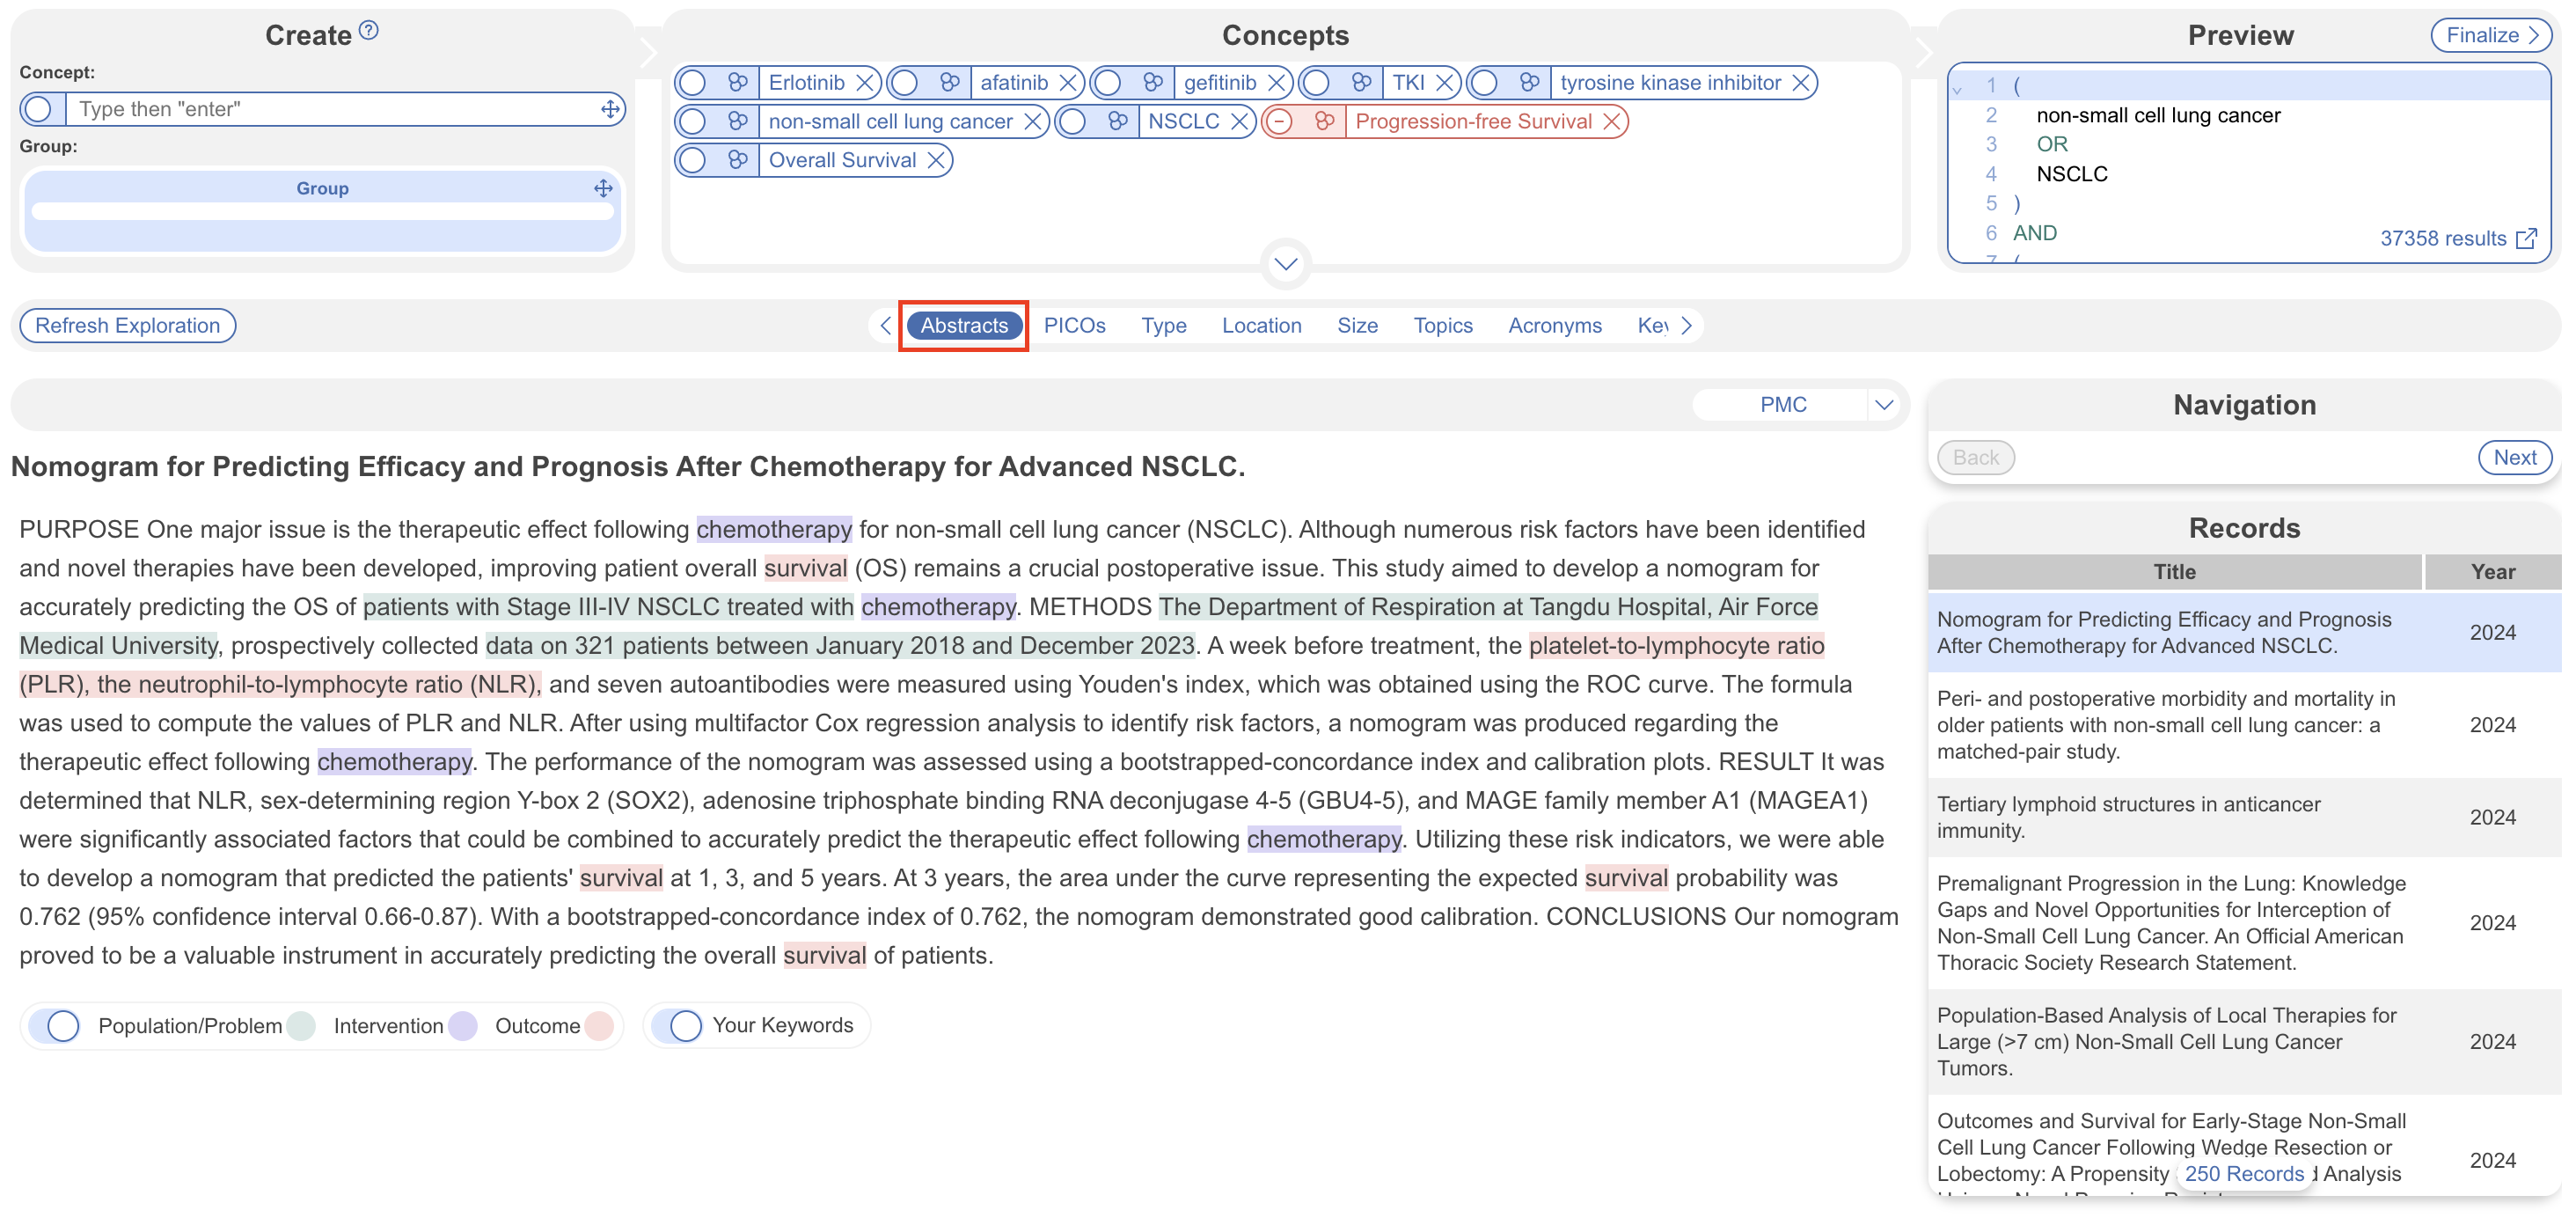
The purpose of reviewing Abstracts should be to:
- Confirm that your search is returning relevant records, and
- Identify the key terms found in relevant records and adding them to your PICO terms.
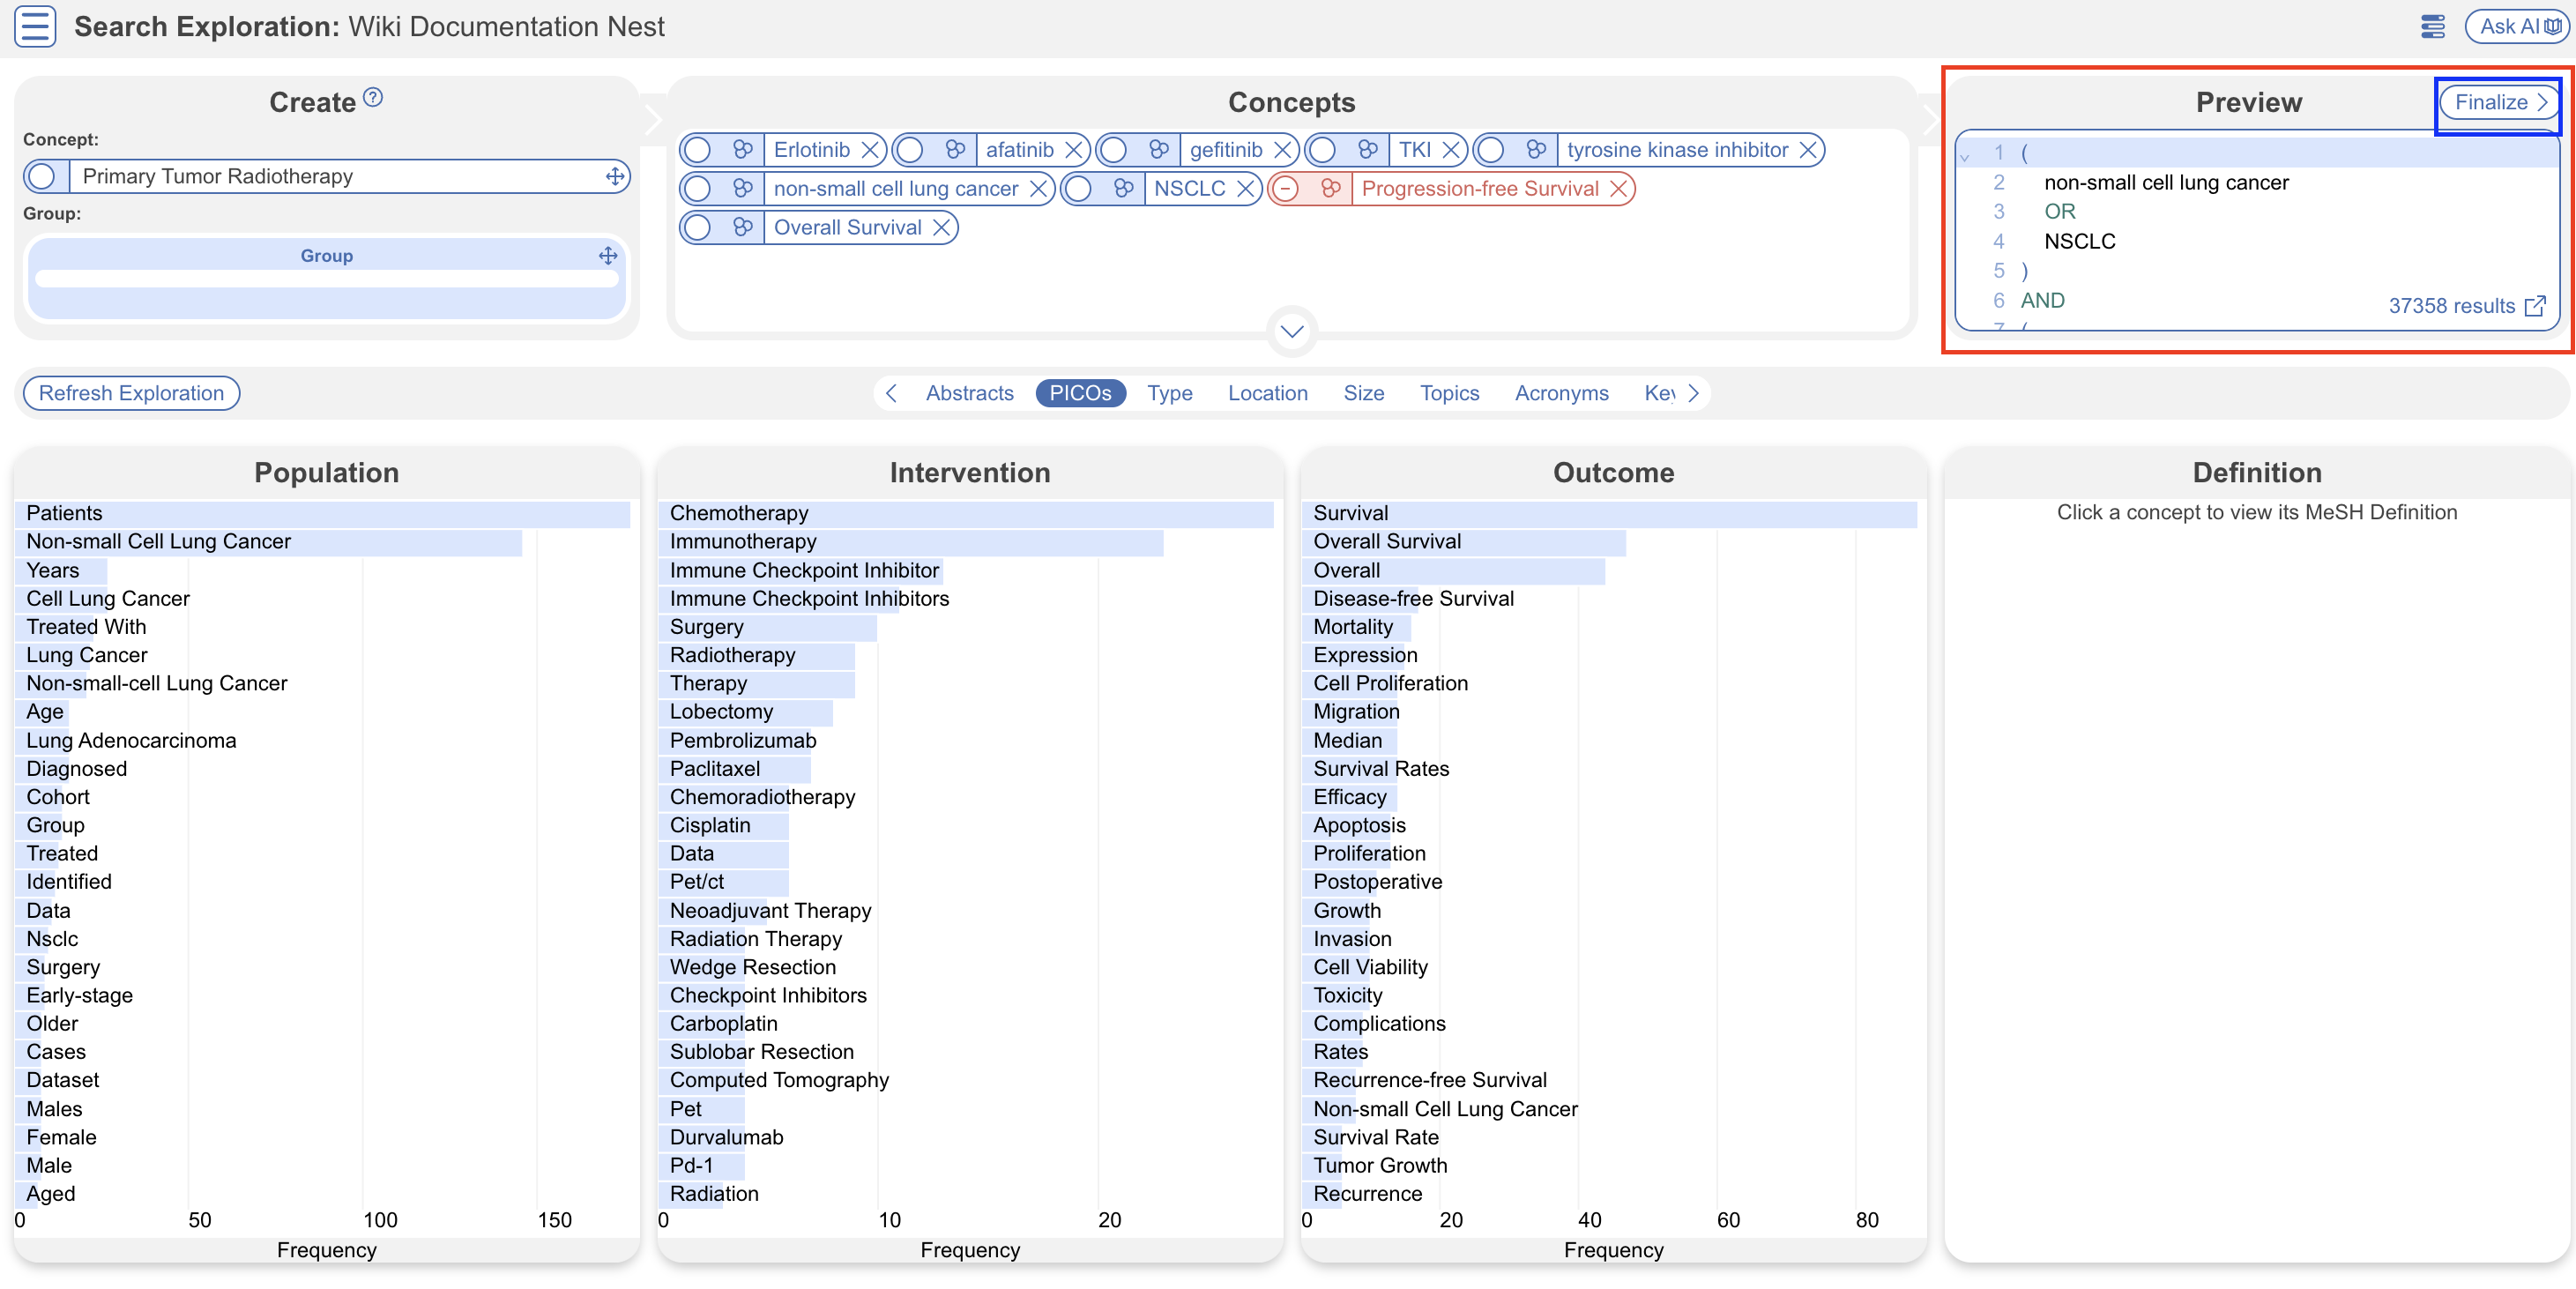
2. PICOs #
Powered by RoboPICO, browse commonly-mentioned Populations, Interventions, and Outcomes from abstracts and titles.
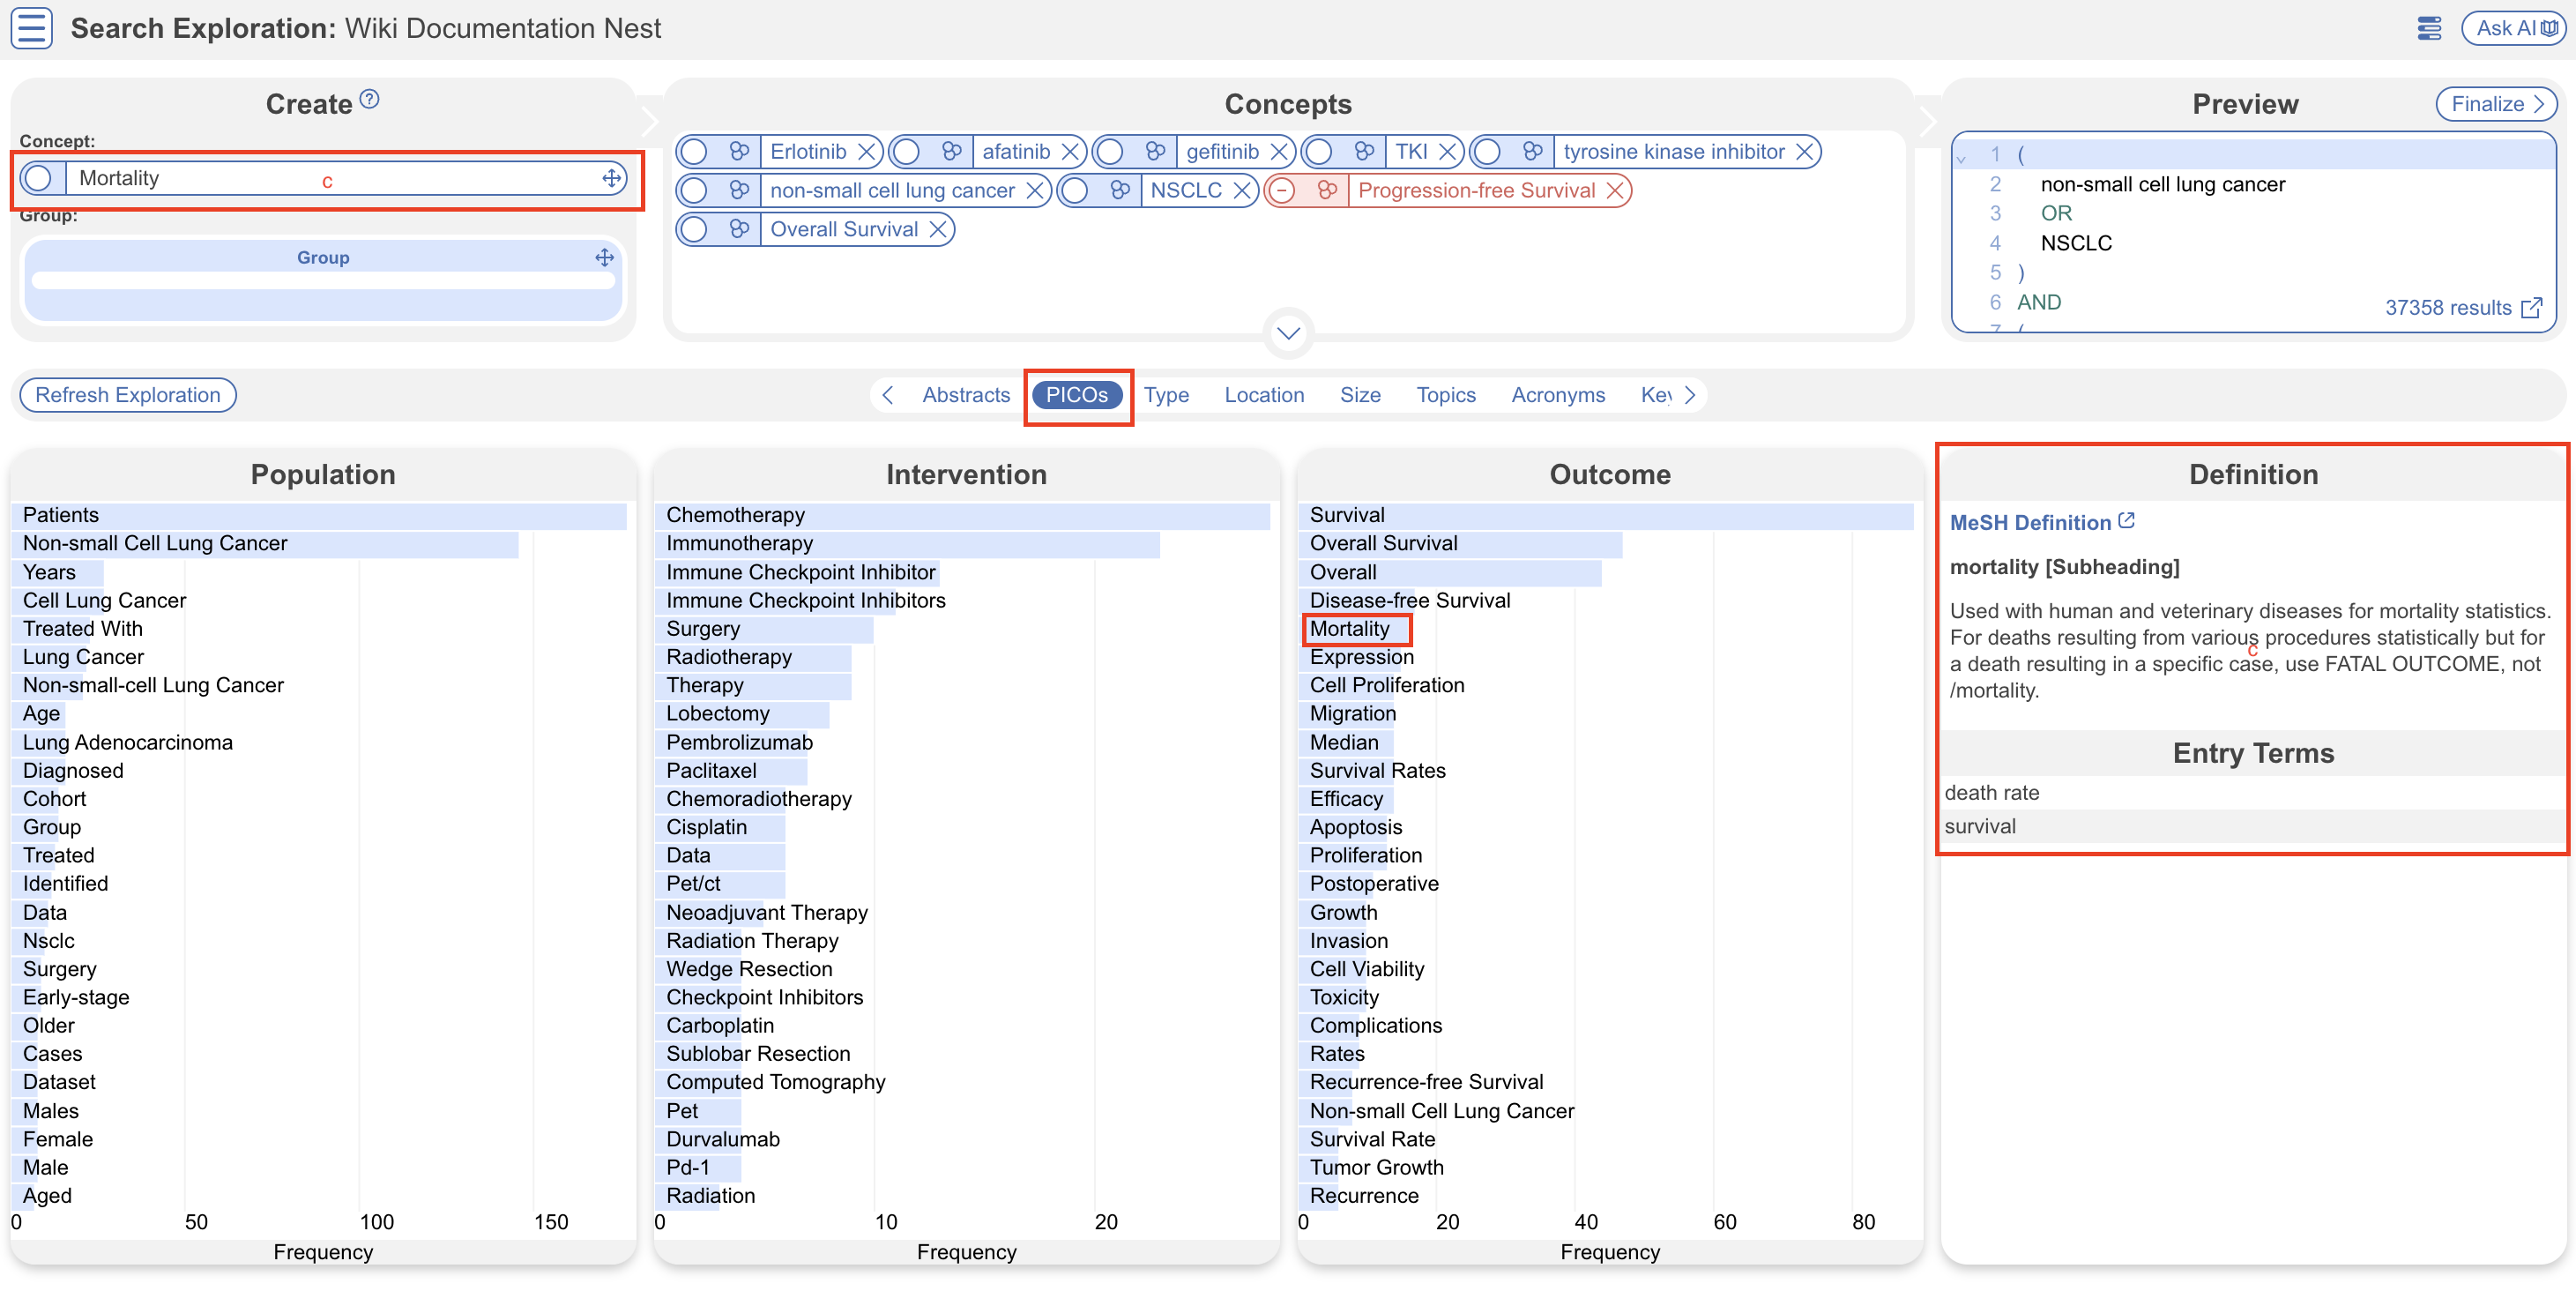
The purpose of RoboPICO should be to:
- Identify the most common topics of underlying abstracts, and
- Identify terms that you should add to your query (select term, view definition, and select enter in concept box to add)
Clicking a row in the chart also initiates a strict MeSH lookup on the PICO element; not all extracted PICOs will correspond to MeSHs, but expect approximately half of lookups to succeed. In the event of a failed lookup, MeSH and Google search linkouts are offered.
What are MeSH? Medical Subject Headings (MeSH) are terms defined by the National Library of Medicine as a way to organize and search the content of medical literature. In some ways, MeSH are similar to Nested Knowledge tags, but unlike tags, MeSH are standardized.
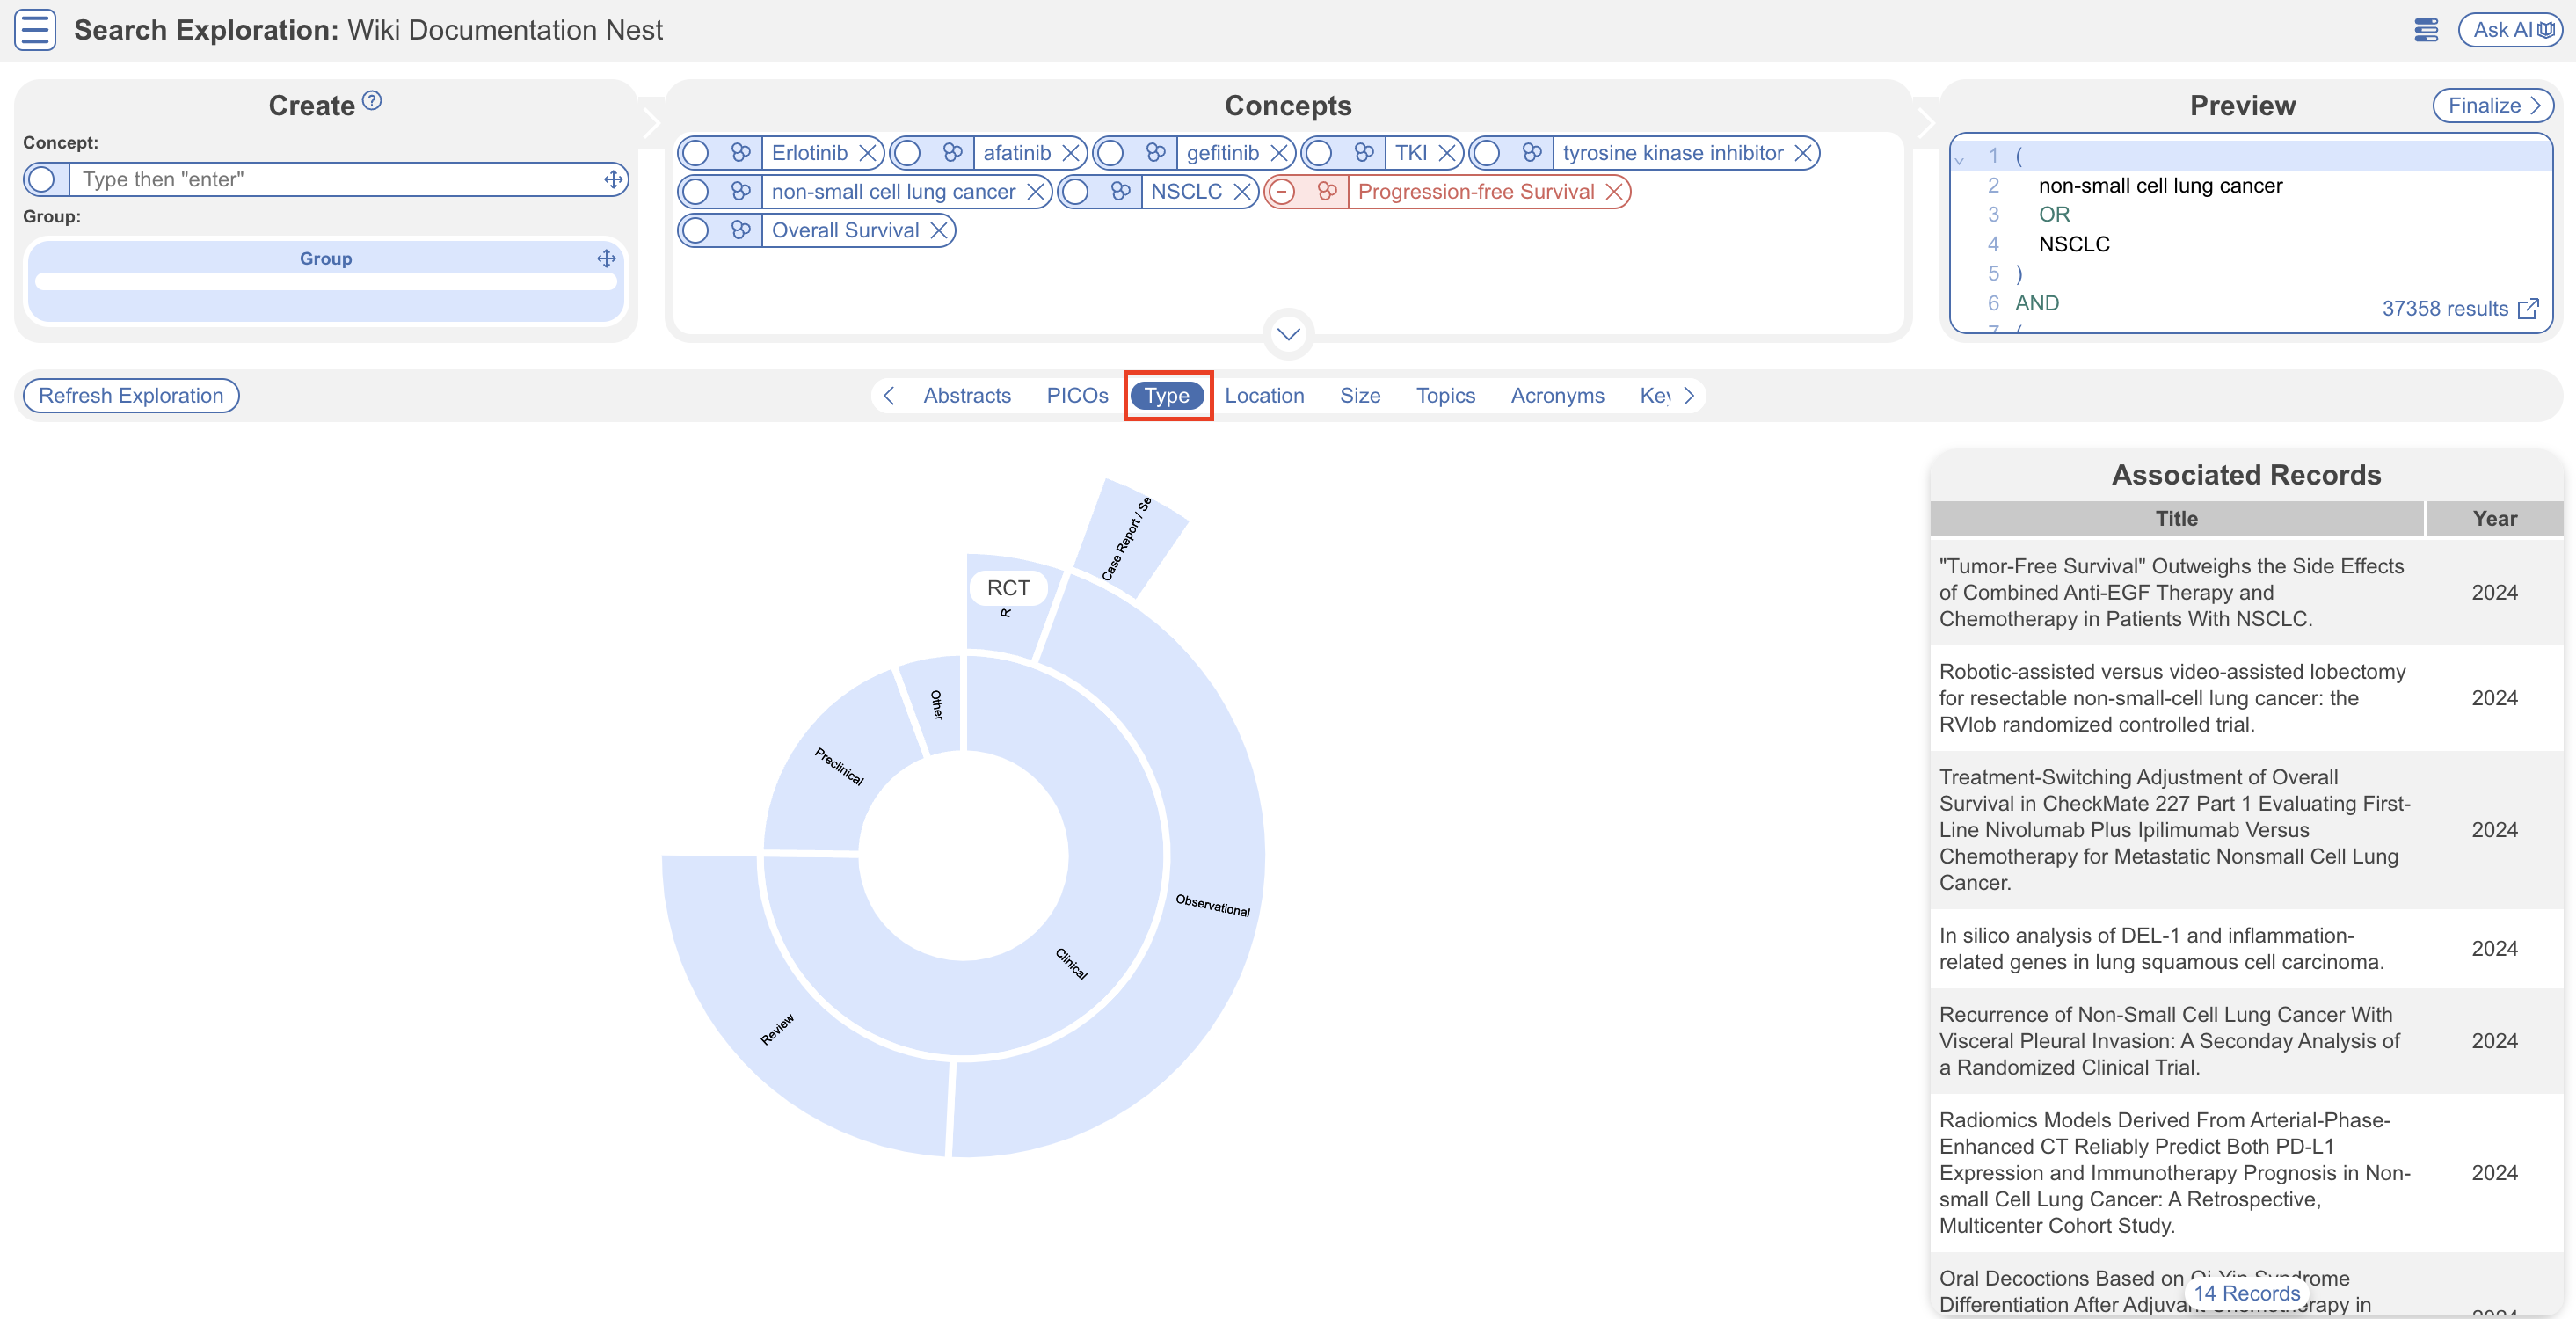
3. Study Type #
Powered by Core Smart Tags, explore a representation of reported Study Types based on your concepts via our sunburst diagram. Select different parts of the diagram to view associated references, for example, when the “RCT” tag is selected, 14 associated records are reported, which may be viewed further.
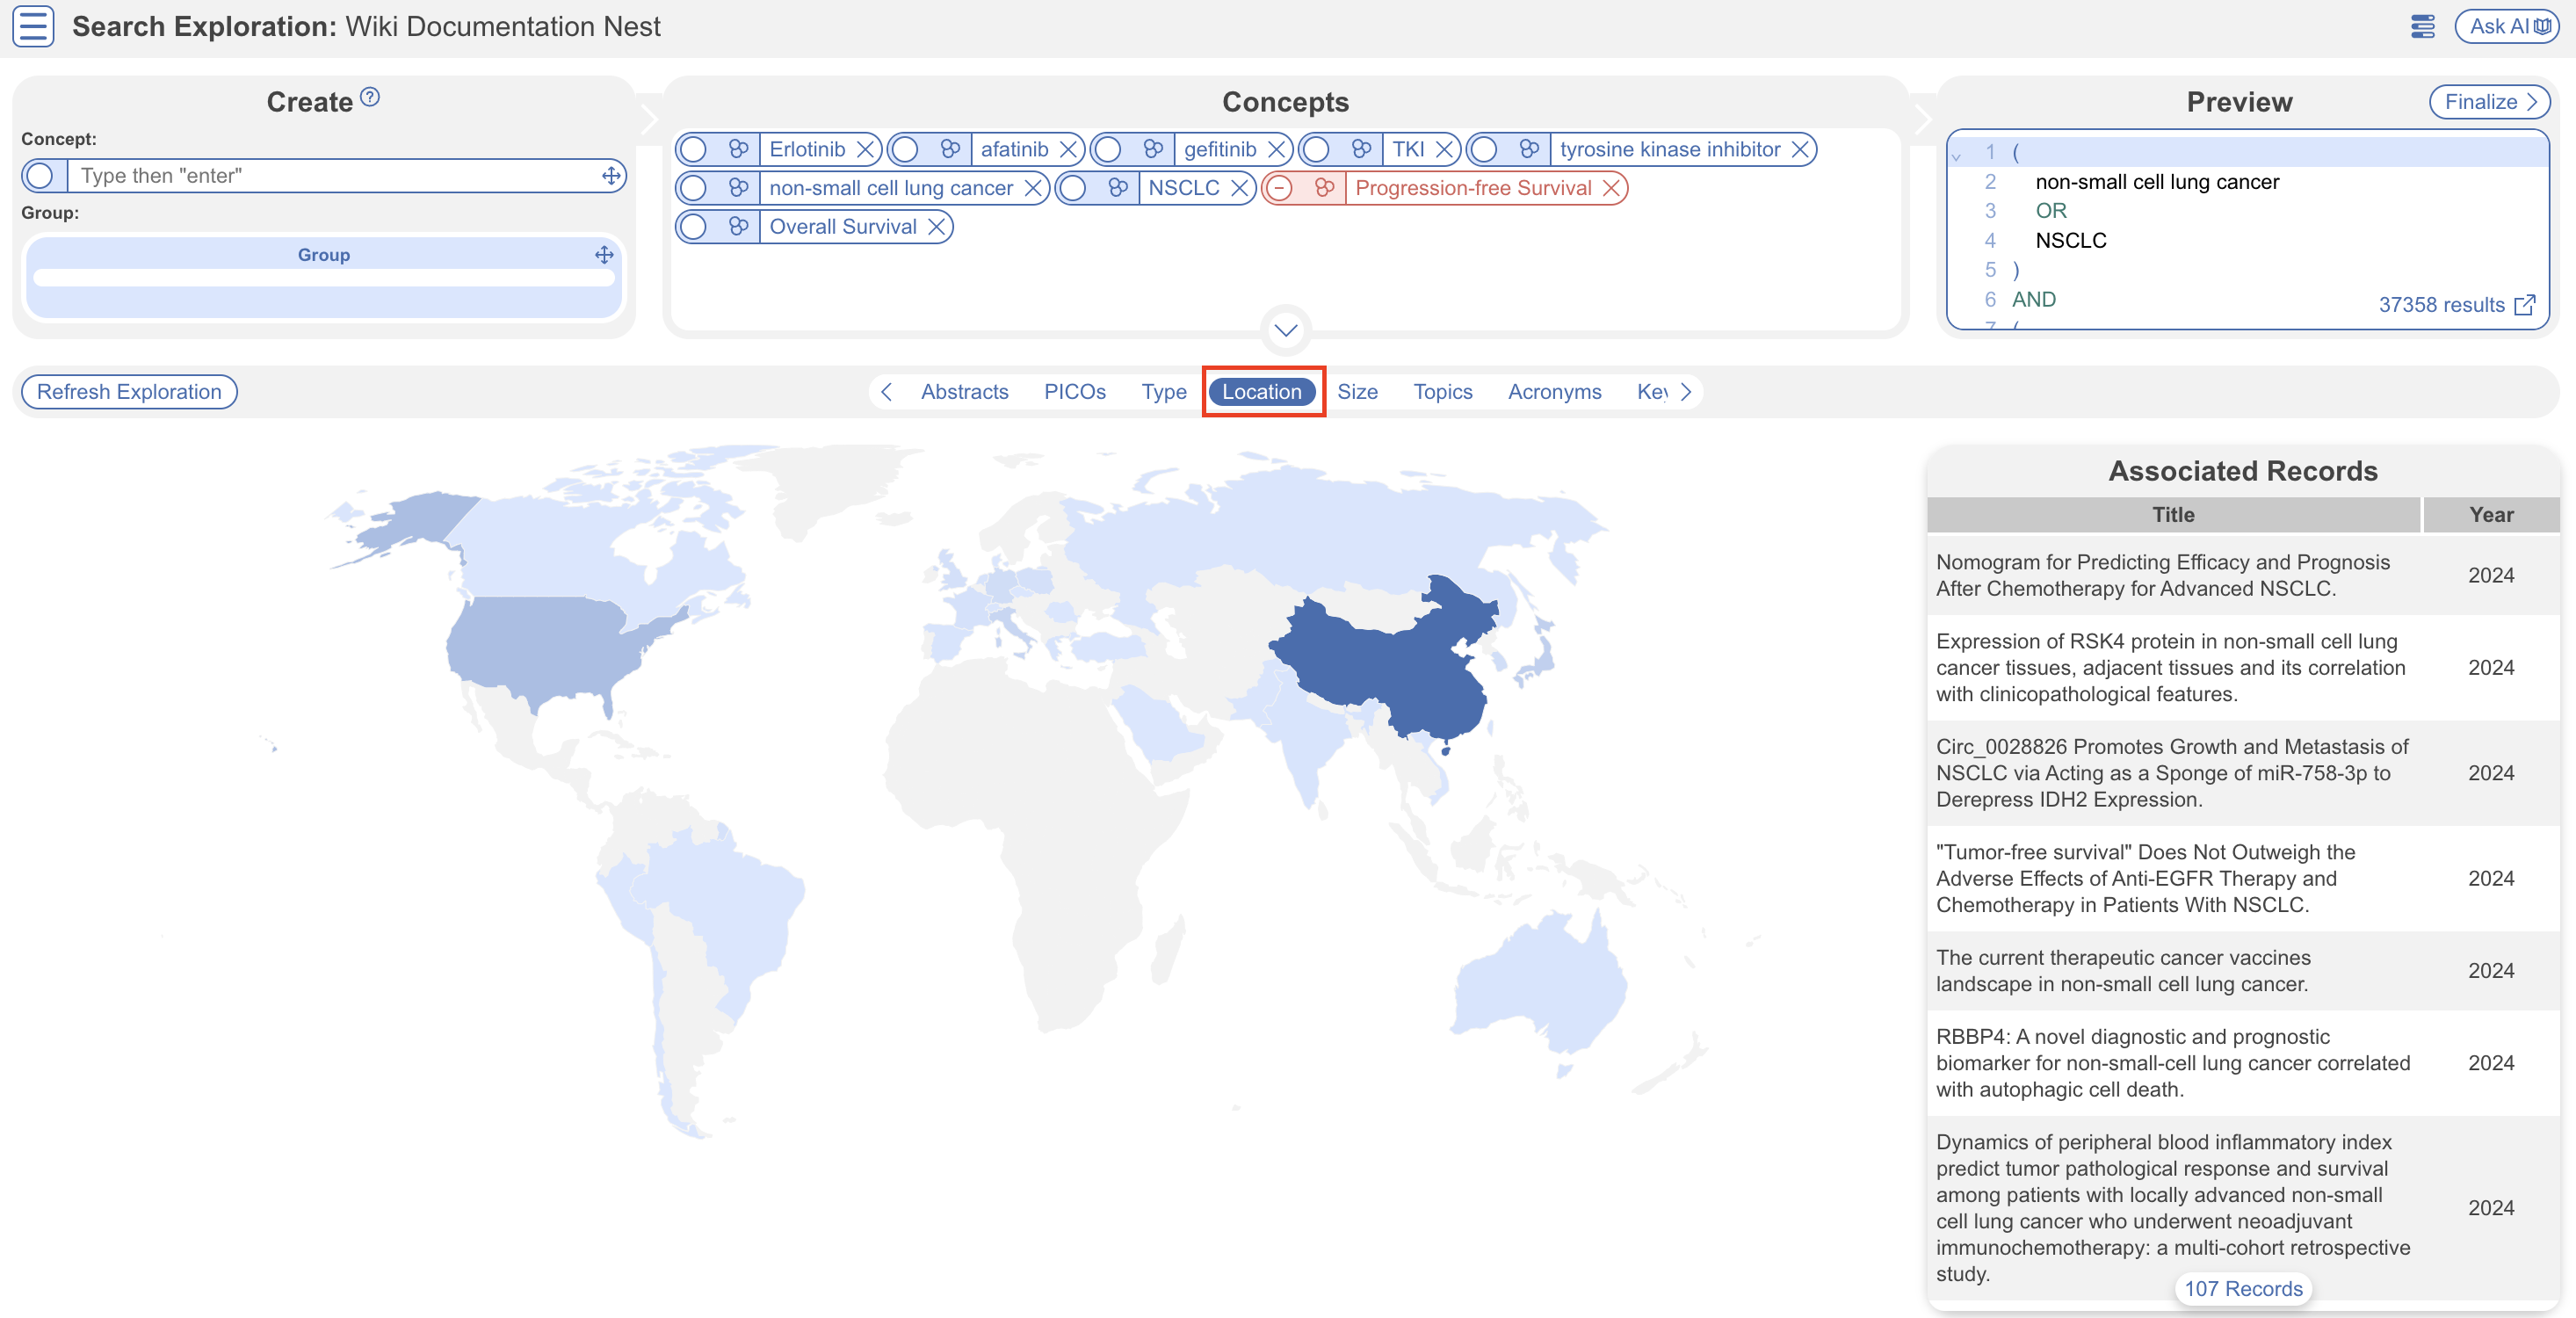
4. Location #
Powered by Core Smart Tags, view a choropleth/map of the location of reported studies. The darker the blue, the greater the number of studies reported in this region. We can see below that studies are mostly reported in China and, when selected, 107 associated records can be explored.
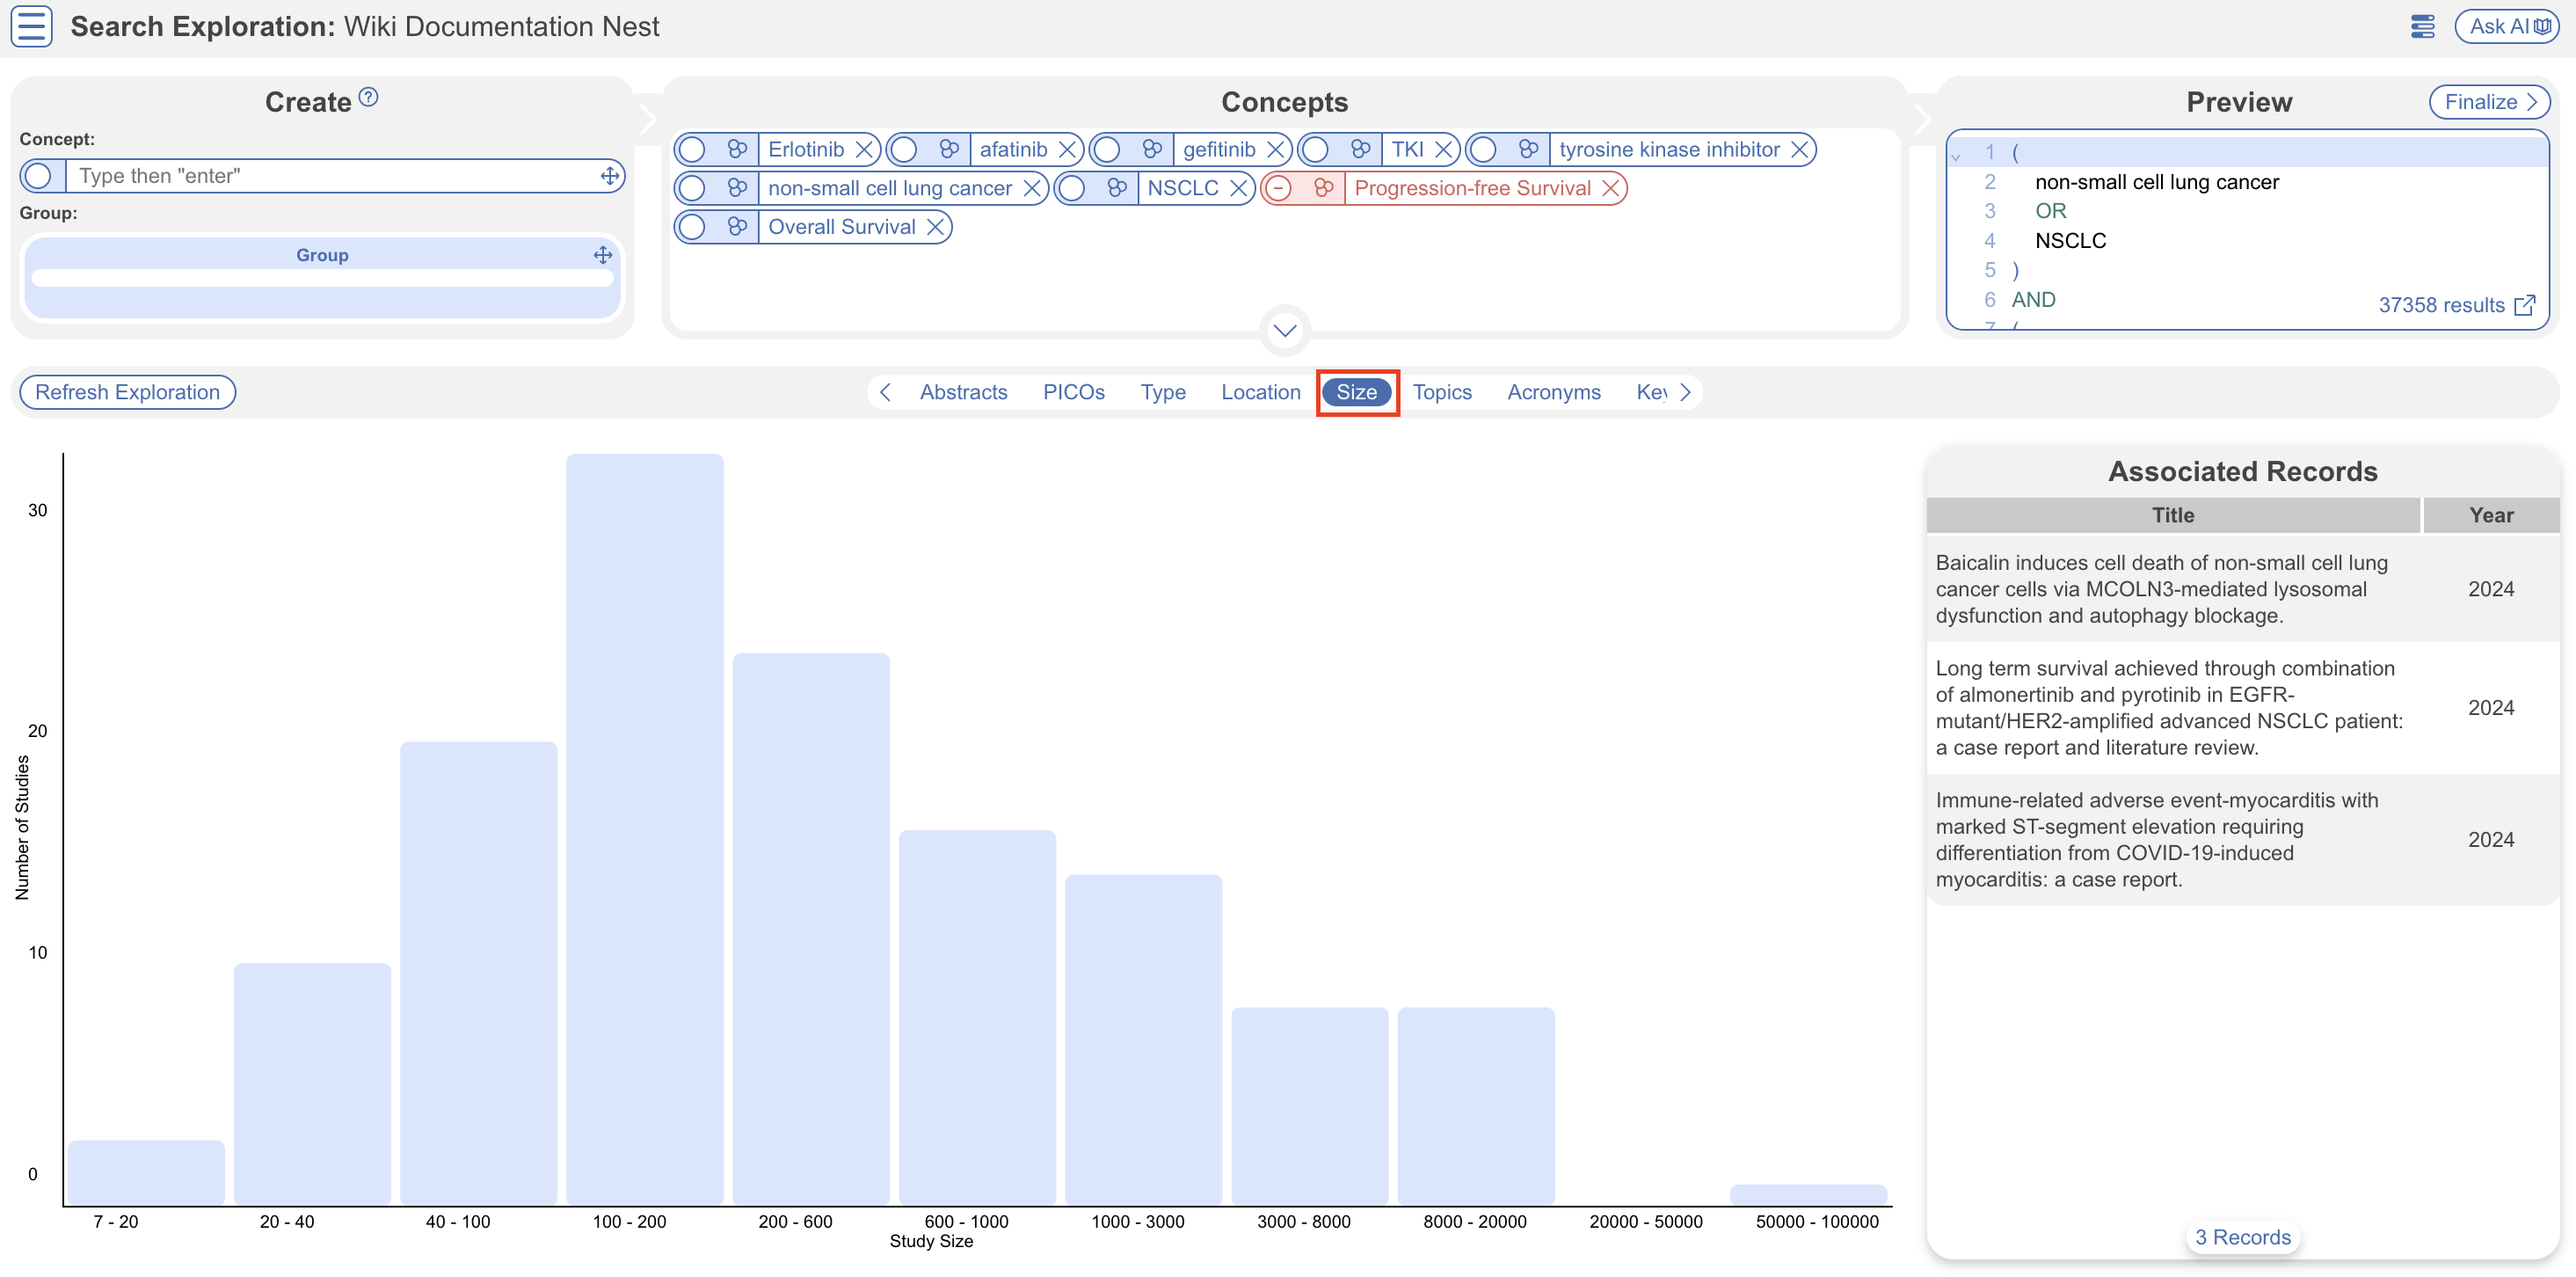
5. Study Size #
Powered by Core Smart Tags, view a histogram displaying sets of records of increasing study size ranges. We can see when Study Size 7-20 is selected, only 3 records are shown.
6. Topics #
Explore topics that appear most frequently among the references. References may belong to one or more topics, or none. Clicking a topic shows references belonging to the topic.

These topics are derived from a Carrot2 clustering of abstract text to identify semantically similar concepts and group them.
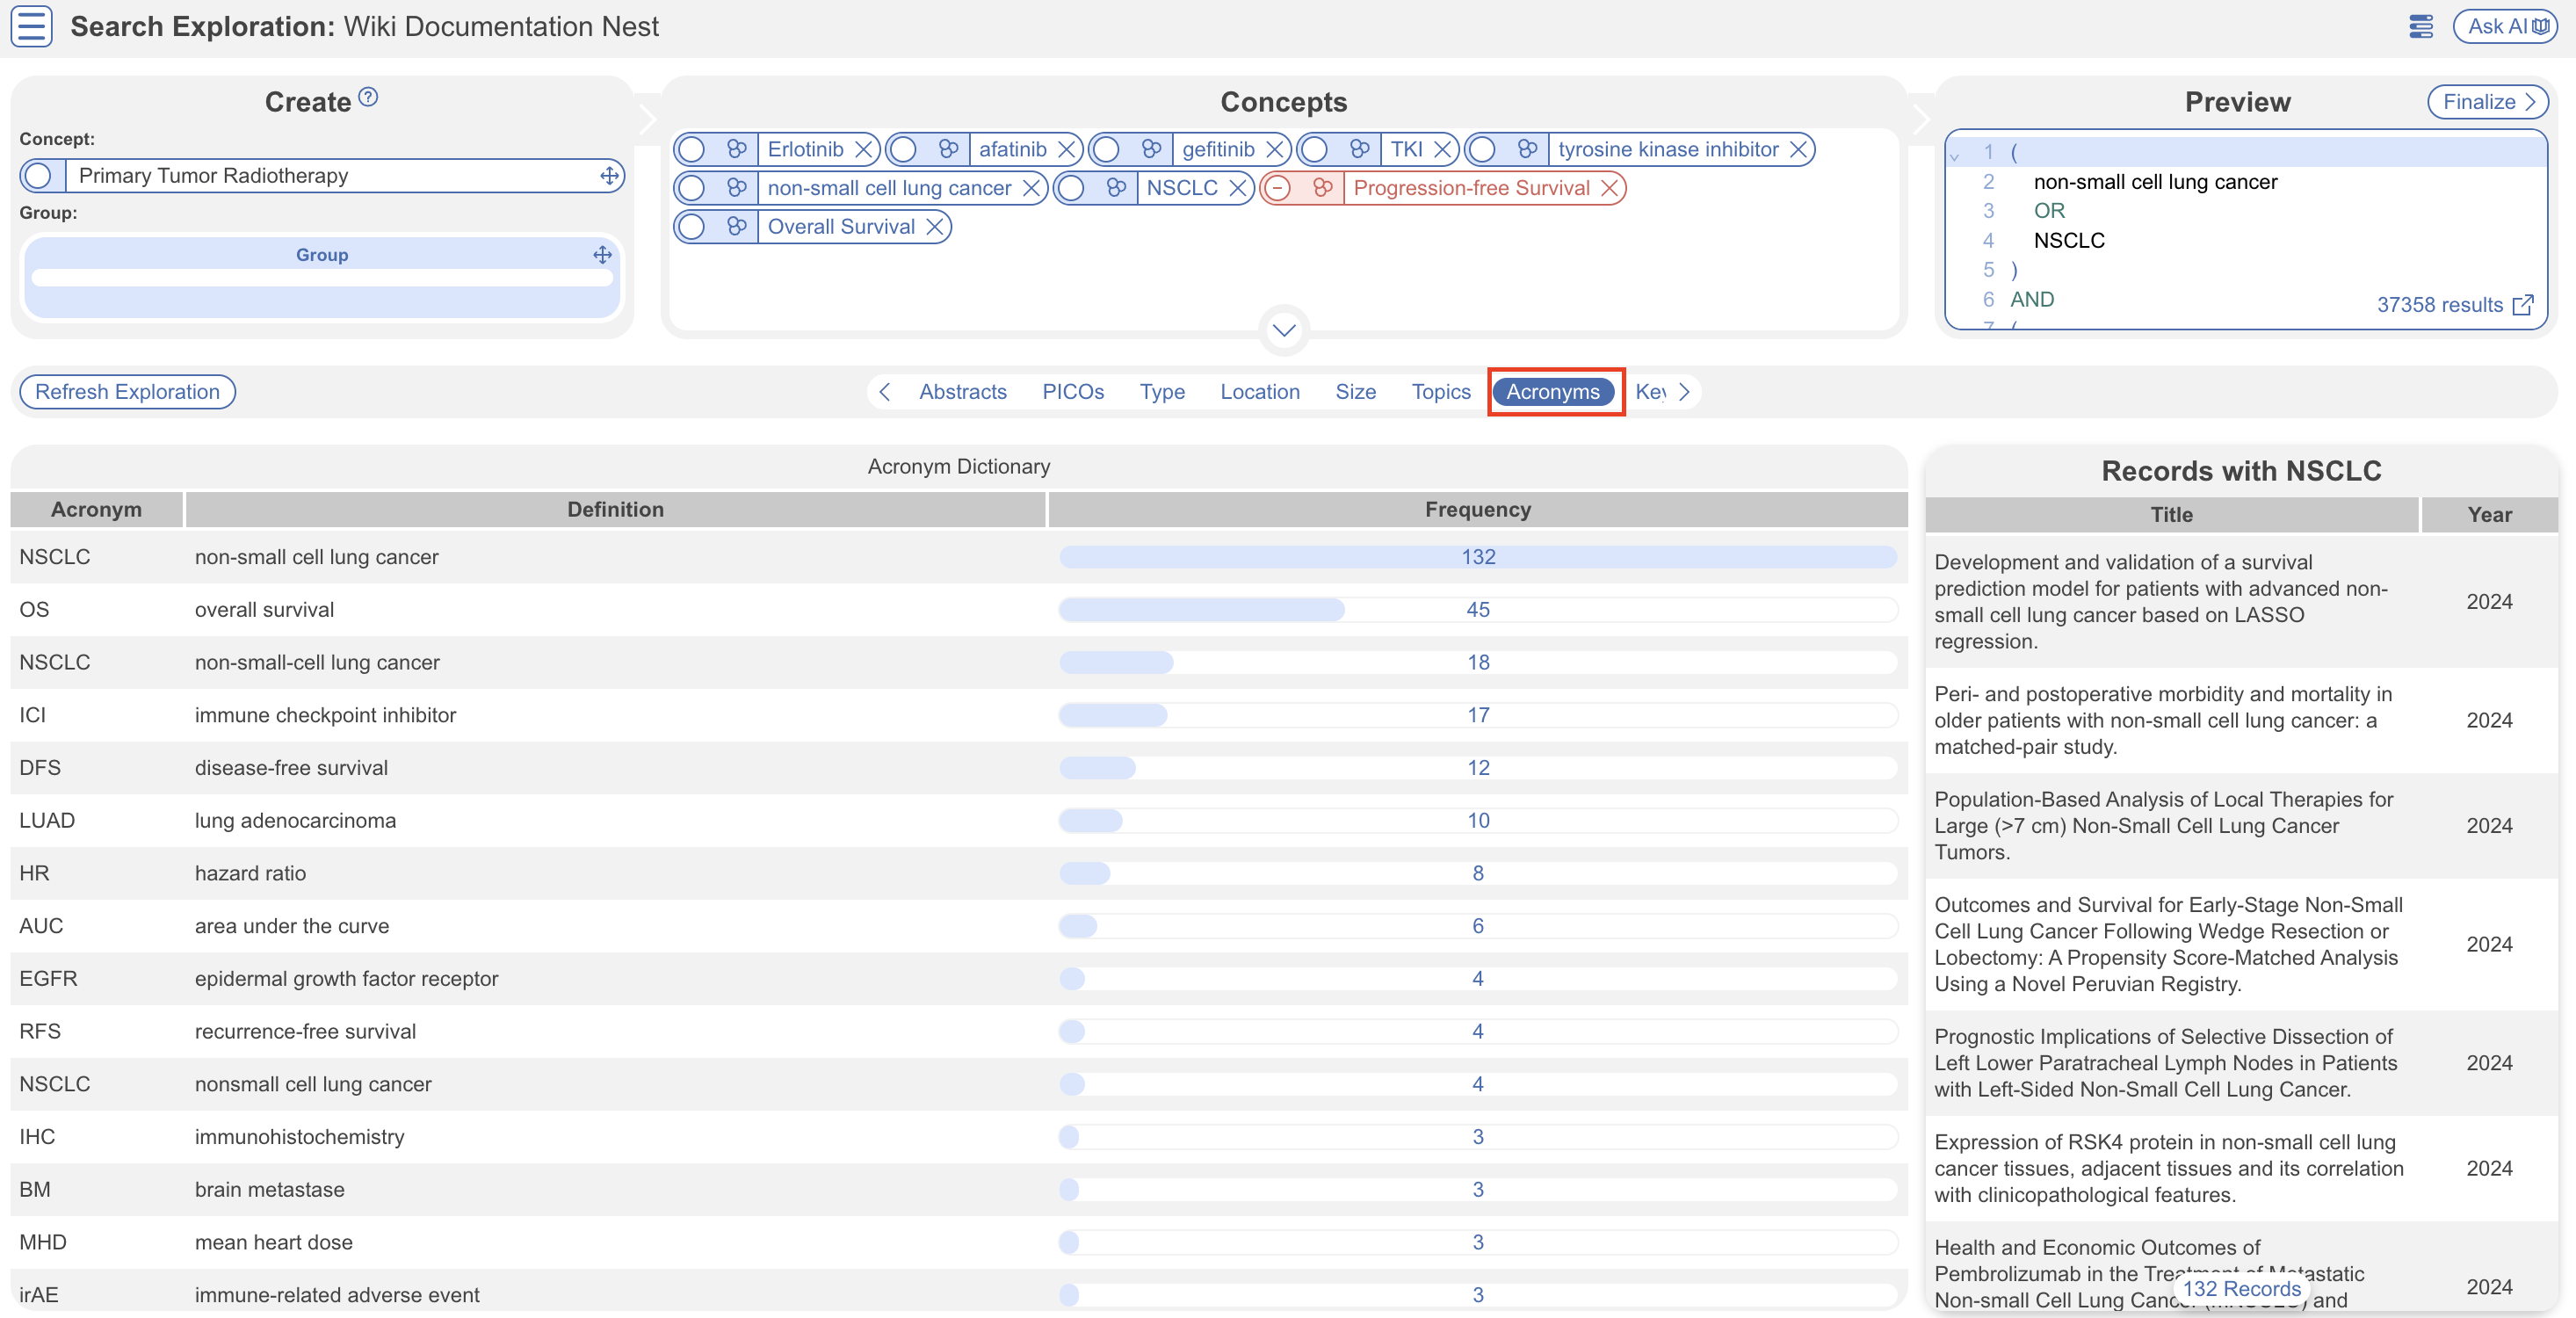
7. Acronyms #
Powered by Core Smart Tags, explore commonly reported acronyms and associated references.
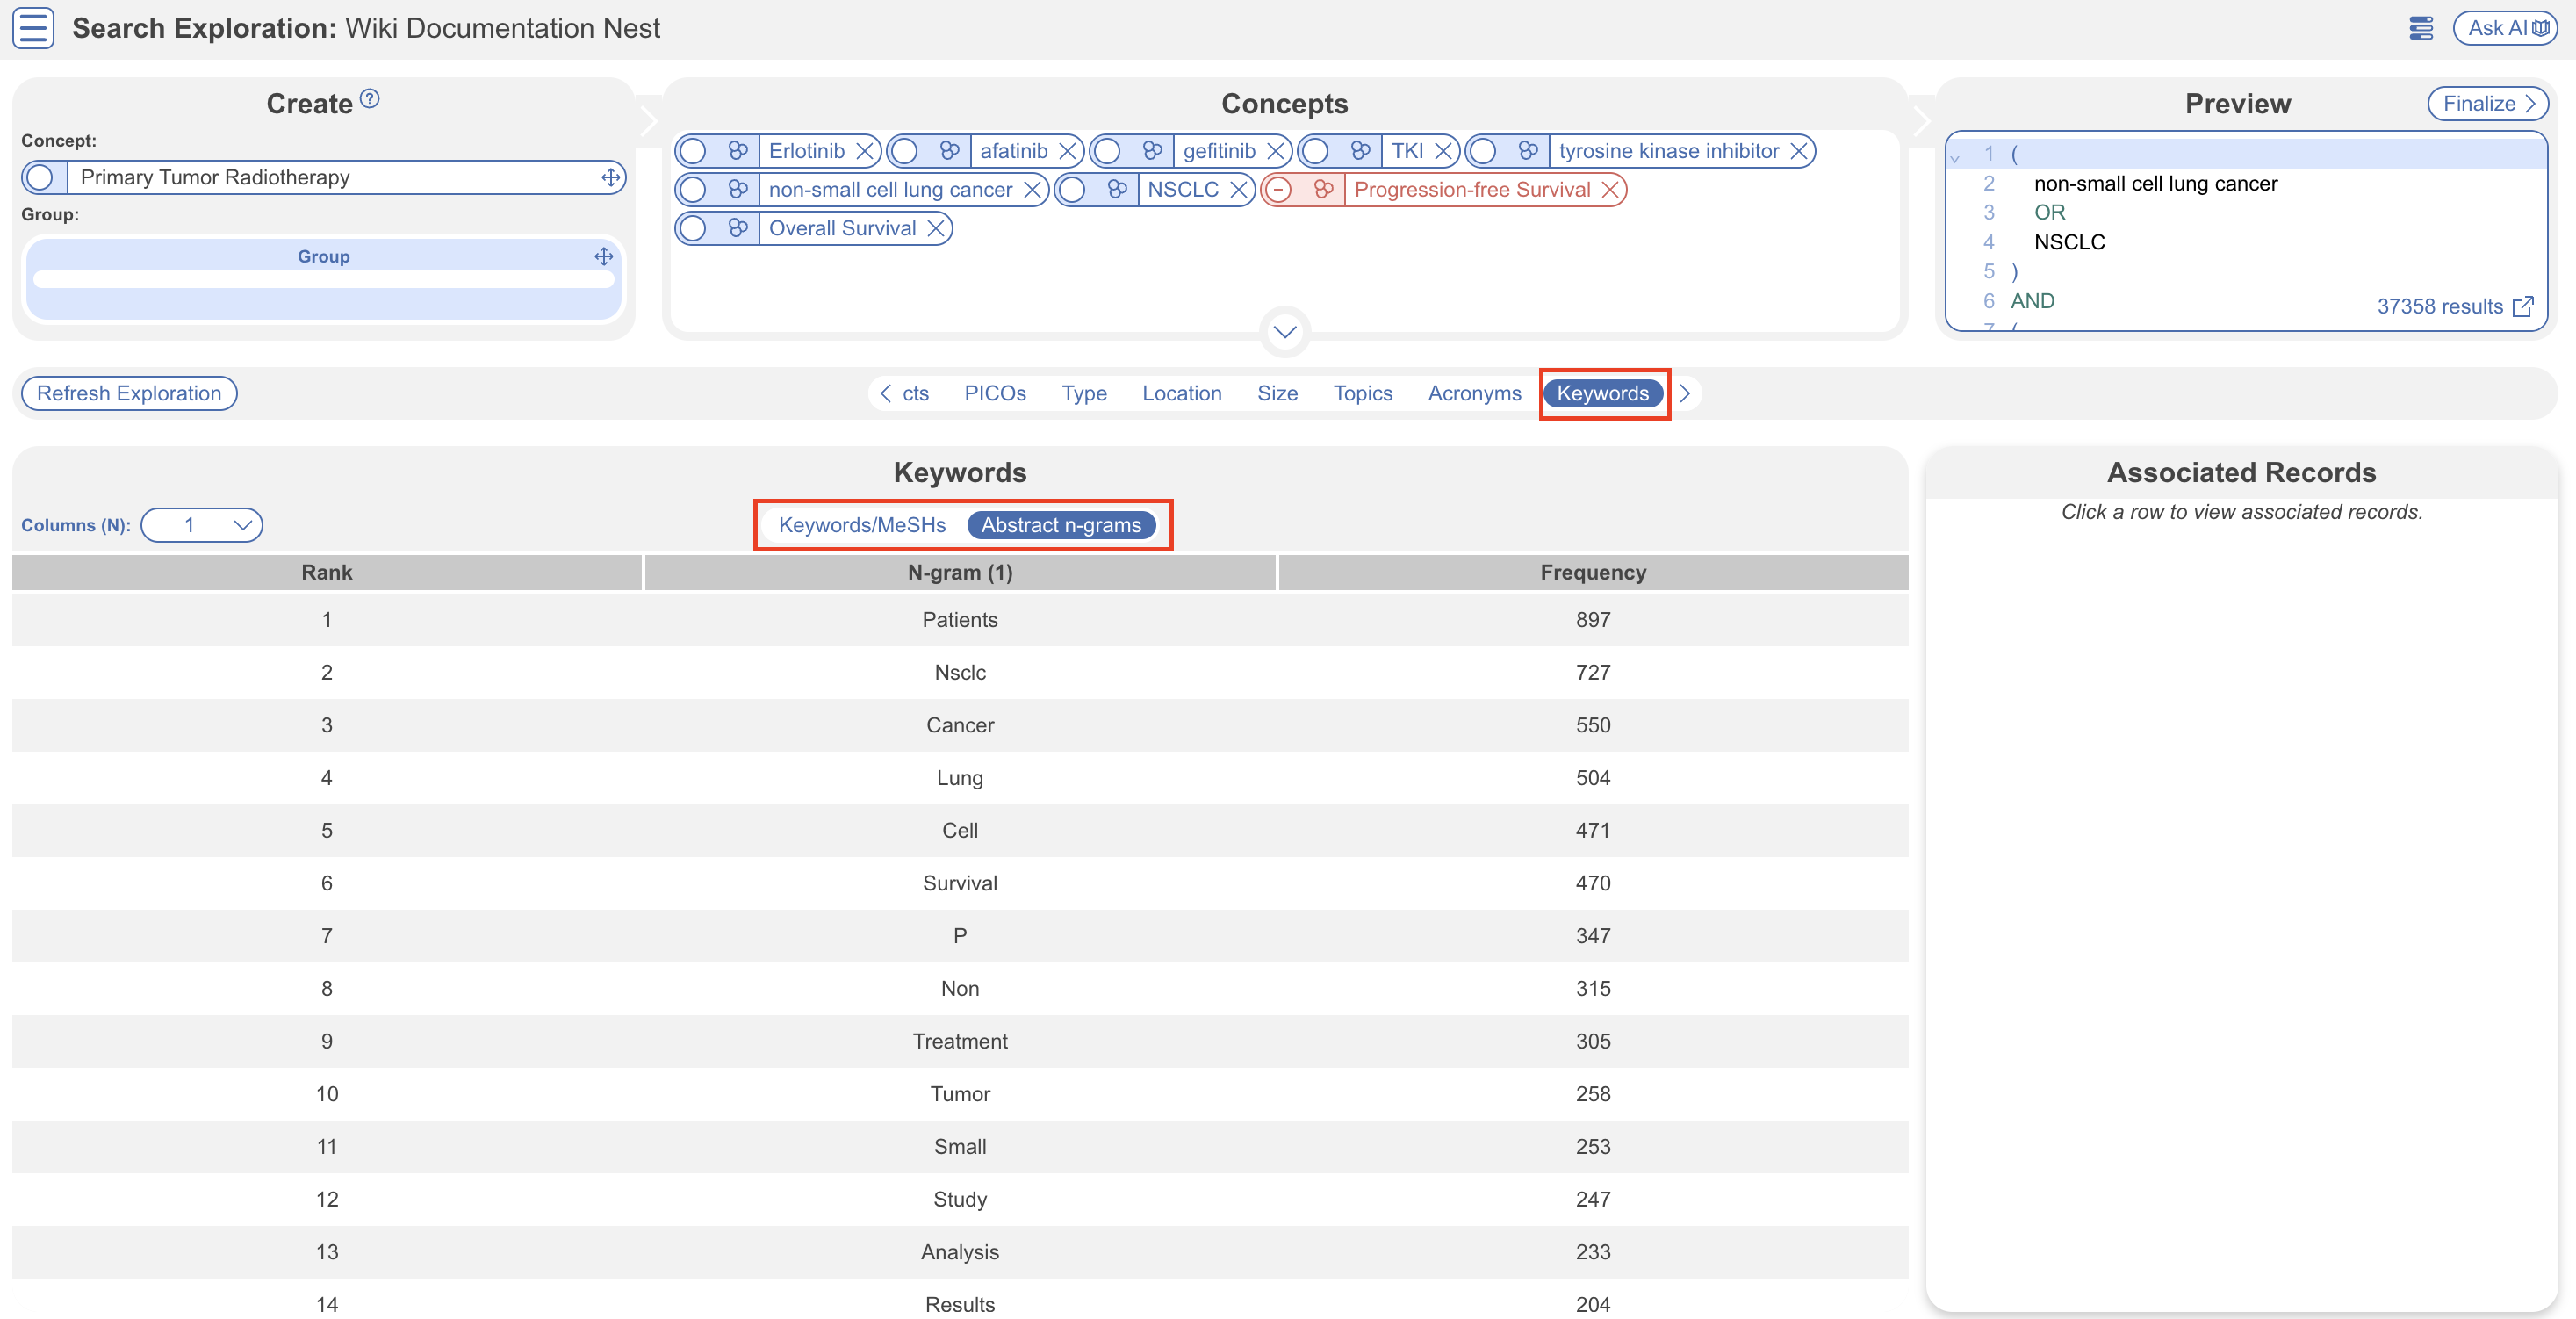
8. Keywords and N-Grams #
Explore the frequency of word combinations (n-grams) from abstracts or indexed descriptors (MeSH and/or journal keywords). While n-grams are presented in order of occurence in abstract text, descriptors are inherently unordered. Clicking a row shows unique references containing the combination.
Note: Study Type/Location/Size cannot be incorporated into the search strategy e.g. Study Type: RCT or Study Location: Germany. You must finalize the search and then a filter can be applied to view and/or bulk include! Learn more about how Core Smart Tags work after a search is finalized.
Next Steps #
When is Search Exploration finished? #
You should continue iteratively refining your query until the Exploration tabs contain mostly relevant content and minimal extraneous records or concepts.
It is useful to check the total number of records returned from your query. To do so, view the number of records in the top right of the Preview screen (red), where you can also click to view the query on PubMed. To view the full query, expand using the dropdown arrow.
There is no ‘right’ number of records, but a good rule of thumb is to return:
- A maximum of 200-300 records, with
- An anticipated inclusion rate at or above 20%.
The reasoning behind this recommendation is that you want to capture relevant records while minimizing extra work during Screening (remember, your team will need to manually Screen all results from your Search!). You can always add new/expanded Searches as you proceed, so achieving a high rate of inclusion should be prioritized over comprehensiveness.
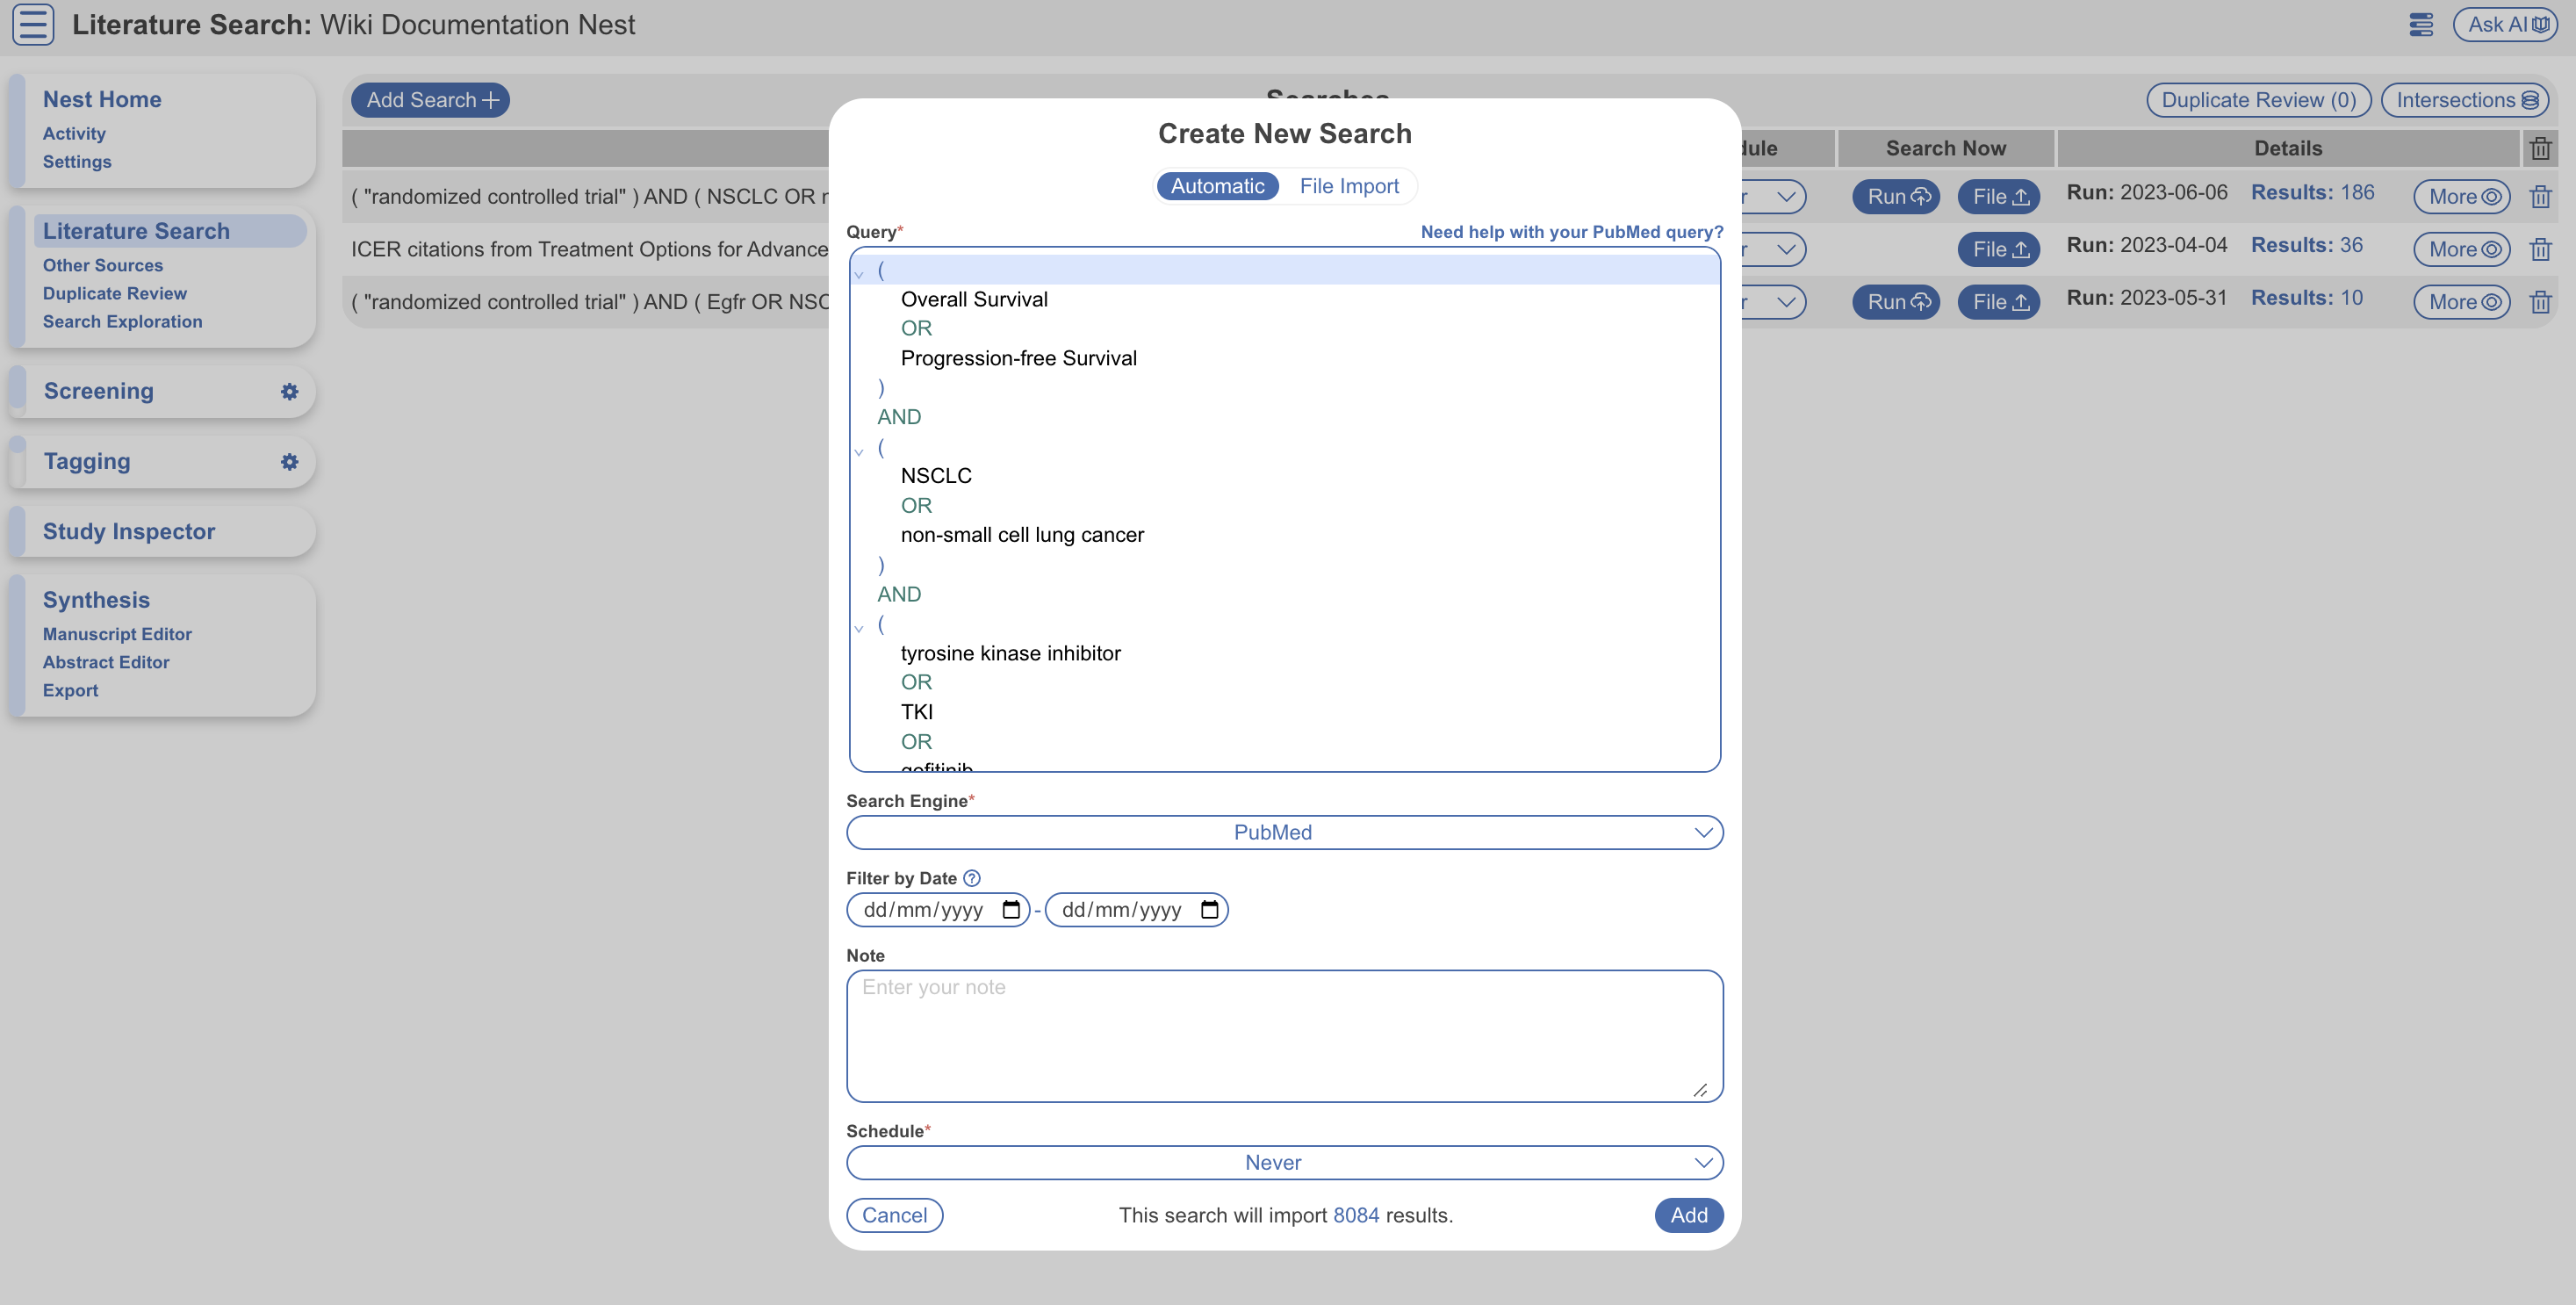
Finalize your Search Query #
To finalize your query and make edits select “Finalize” in the top right (blue). This takes you to the main Literature Search page to add an Automatic Search but is pre-populated with the query you have built. Here you can edit the query, the search engine, and notes before hitting Add. This adds the search just like a regular one.
Now you have added a search query, the next stage is Screening!