On this page, we’ll demonstrate how to conduct an Automatic Search.
1. Select Nest #
From the list on Nests, select your Nest.

2. Navigate to Literature Search #
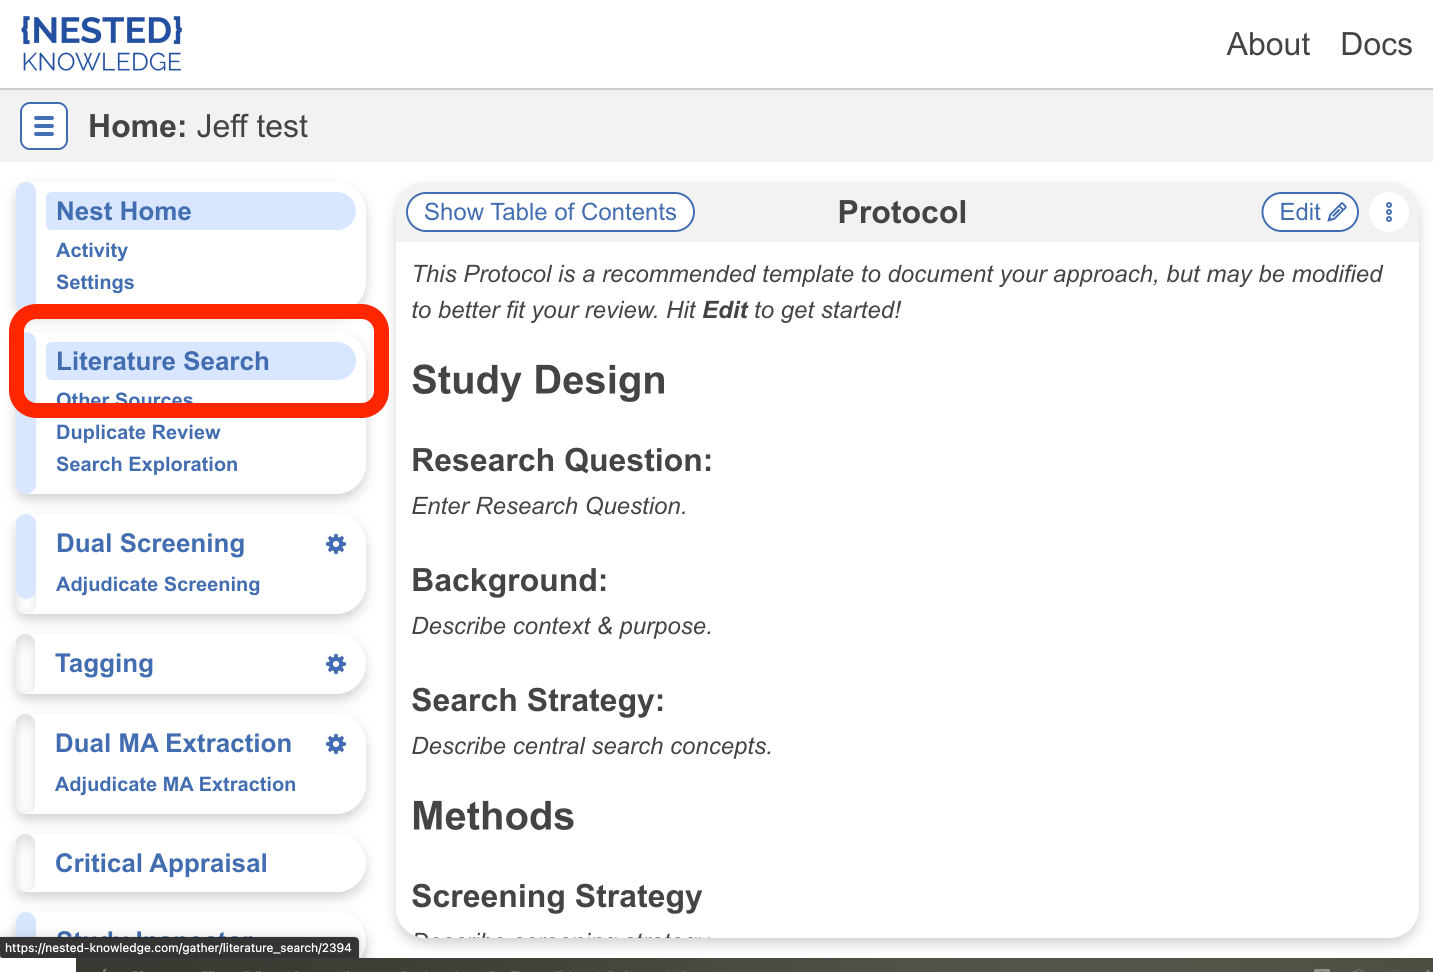
Select “Literature Search” from the left-hand menu (red).

3. Add Search #
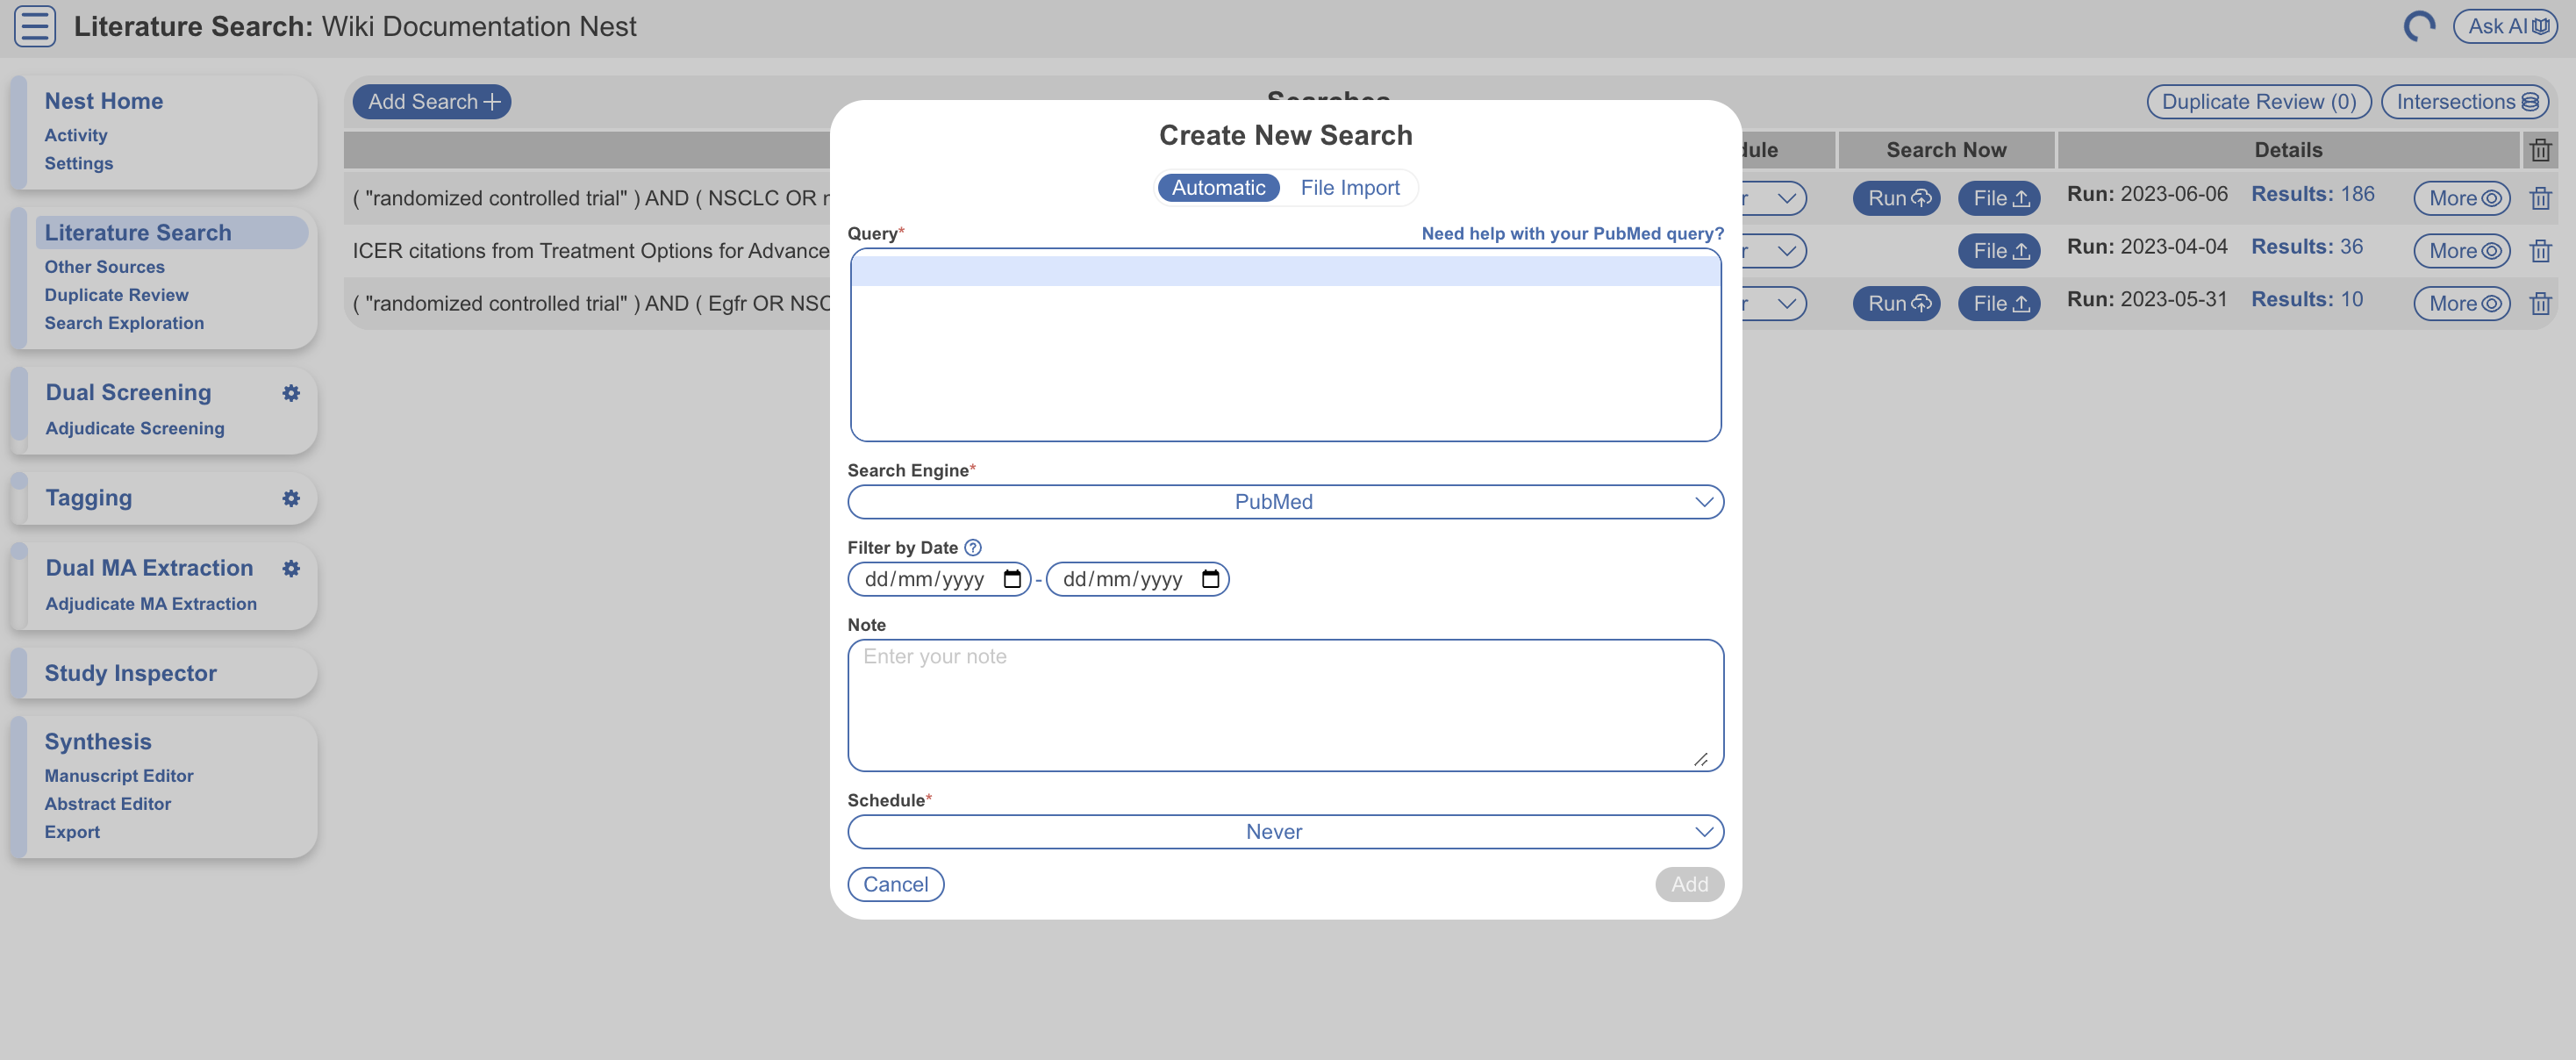
Select “Add Search” (blue).
You will be able to see any previous searches performed listed below.
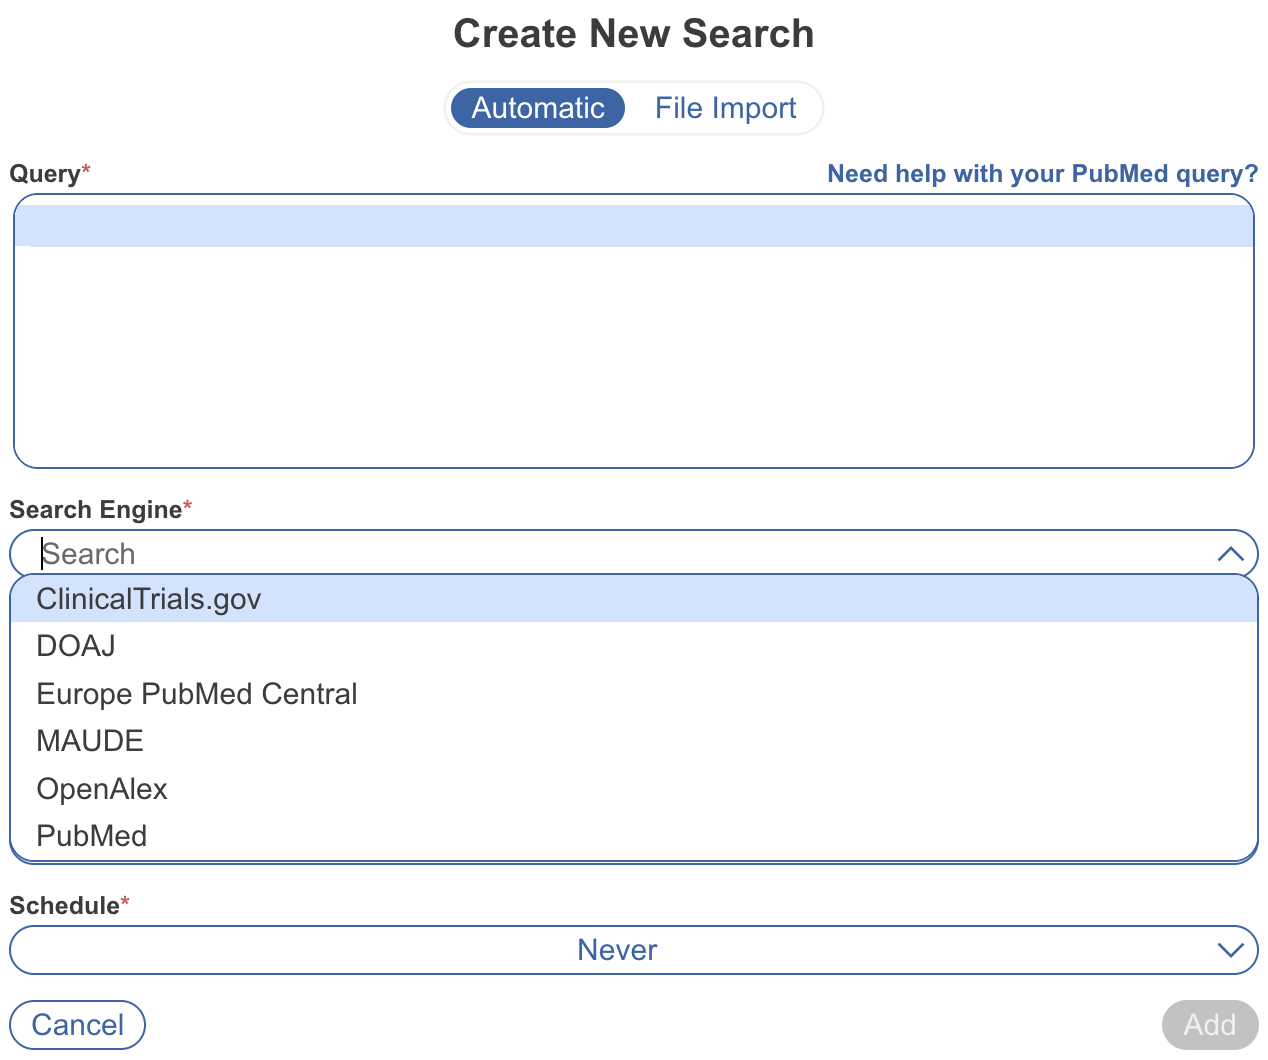
4. Select Search Engine #
From the drop-down, select the Search Engine or database you would like to set up automatic API-based search on. Nested Knowledge supports ClinicalTrials.gov, DOAJ, EuropePMC, MAUDE, and PubMed.

For any other search engine or database, you will need to import using File Import rather than running directly via API.
Each of these search engines use Boolean queries, so you can use AND, OR, NOT, and parentheses to connect different terms. For specific guidance on constructing queries, use the search-engine-specific-links here:
5. Type in your Search Terms #
Type your search terms into the “Query” box. Use parentheses and terms such as AND, OR, NOT, in between your phrases. Click HERE for tips on how to create a great literature search.
If you need assistance building a search, check out how to use Smart Search for auto-generation of a query after inputting a research question, or use Search Exploration do some deeper exploration first before query generation.
6. Filter by Date, add Notes & Schedule #
You may add a date filter, any notes and choose to run the search only once or have it repeatedly run over time (ex: monthly, etc).

7. Add Your Search #
Click “Add” in the bottom right corner of the window.
8. New Studies will be Added to Screening #
Once you add the new search, it will run and be listed at the top of your searches. The added studies will be ready to be screened in the Nest menu. To view a list of the studies generated by each individual search, under “Details” menu, click “Results: ####”. You will be taken to Study Inspector with the list of generated records for that particular search.

Search Details #
To view details of a particular search after addition, select “More”. Here you can view the full query, add any notes, view when and how the search was executed, and override Duplicate Counts (from within a search) as displayed in PRISMA if you wish.

Search Notifications #
For recurring searches, you may wish to receive an email notification when the search is rerun to keep track of updates made. To do this, navigate to Nest Settings where you can choose to have notifications sent to the Nest Owner and/or Admins. Notifications will not be sent when the search is run manually.
If no specific nest owner or admins are assigned, i.e. when the organization owns the nest, they will be sent to the owner or admins of the organization.
Next Steps #
When you have confirmed that your final search(es) represent all records you would like to review in your nest, proceed to Screening.
Note: Query, Search Engine and Date cannot be edited after the search is added; the Schedule can be edited after the search is added.

