How to Embed Synthesis on Your Website

You can add Synthesis visuals to websites and other web-based platforms by embedding them. Here’s a step-by-step guide on how to embed Synthesis in your website:

Step 1: Ensure Proper Access Level

First, you need to ensure your Nest is Public or Protected by navigating to the settings page (visible to Nest admins and above). 

Protected or public can be embedded.

Step 2: Obtaining the Embed Code

Once you have ensured the access level, navigate to the Synthesis visual you would like to embed. Click on the share button in the upper right, then select the “Embed” option. The displayed code is a snippet of HTML that you will insert into your website’s code.

Step 3: Configure the Embeddable

Using an Insight is optional. Editing the height and width is also optional, and can be accomplished by edit the associated default values once you’ve copied the code and pasted it into its destination on your website. To copy the code, either highlight the code in it’s entirety and use the keyboard shortcut ctrl + v (PC) or command + v (Mac). Alternatively, clicking “Copy Code” will copy the entire snippet of HTML exactly as it is provided, which can then be pasted into the HTML of your website.

Step 4: Embed the Code into Your Website

Now, navigate to the backend of your website where you edit the HTML or content. This could be a content management system (CMS) like Sharepoint, WordPress, Squarespace, or directly in the HTML files if you’re working with a custom-built site.

  • For HTML: Paste the embed code into the HTML of the page where you want the visual to appear. Place it in the exact spot where you want the visual to be displayed, adjusting the width and height as desired.
  • For CMS: If you’re using a Content Management System (CMS), look for an option to add custom HTML or an embed code. This is often found in the page or post editor. Paste the code into the designated area. For CMS-specific guides, see the individual guides below.

Step 5: Preview and Publish

Before making the changes live, preview your page to ensure the visual displays correctly and is fully functional. If everything looks good, go ahead and publish or update your page.

Embedding Synthesis visuals from Nested Knowledge into SharePoint not only enhances data presentation but also adds a layer of security, especially when using the “Protected” Nest Access level. Here’s a concise guide to do it:

Step 1: Access Your SharePoint Page

Log into SharePoint, navigate to the page for embedding, and ensure you have editing permissions. If you do not have editing permissions, you may need to contact your IT department or the Microsoft Administrator for your organization.

Step 2: Edit Page

Find the site and page you would like to to add the embed to, then click “Edit” on your page to enable modifications. Alternatively, create a new site and/or a new page to add your embeddable Synthesis Visual to. Once on the page, hover over a section and click on the “plus” icon in the middle of the editing interface to add a new web part.

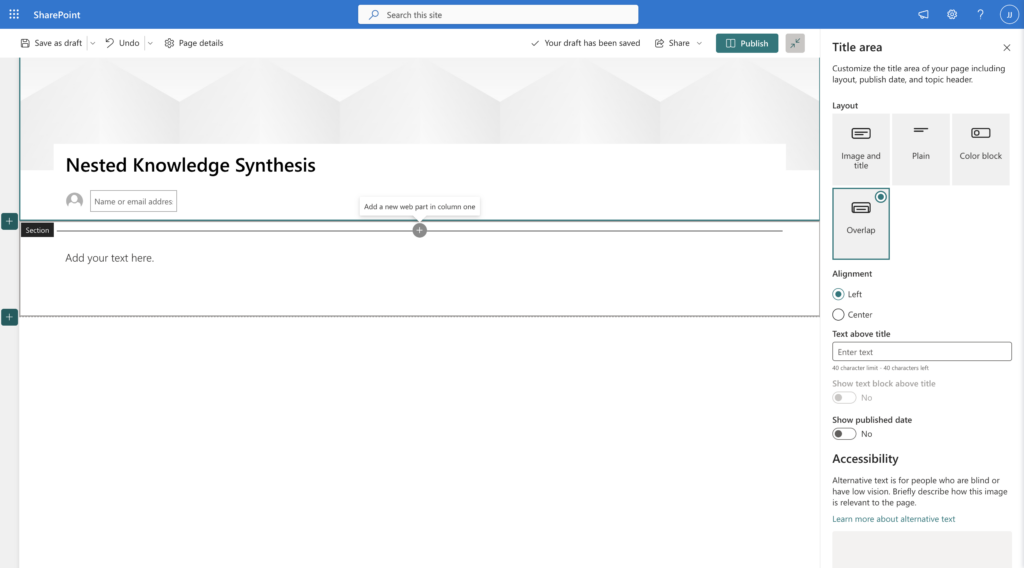
Step 3: Insert Embed Web Part

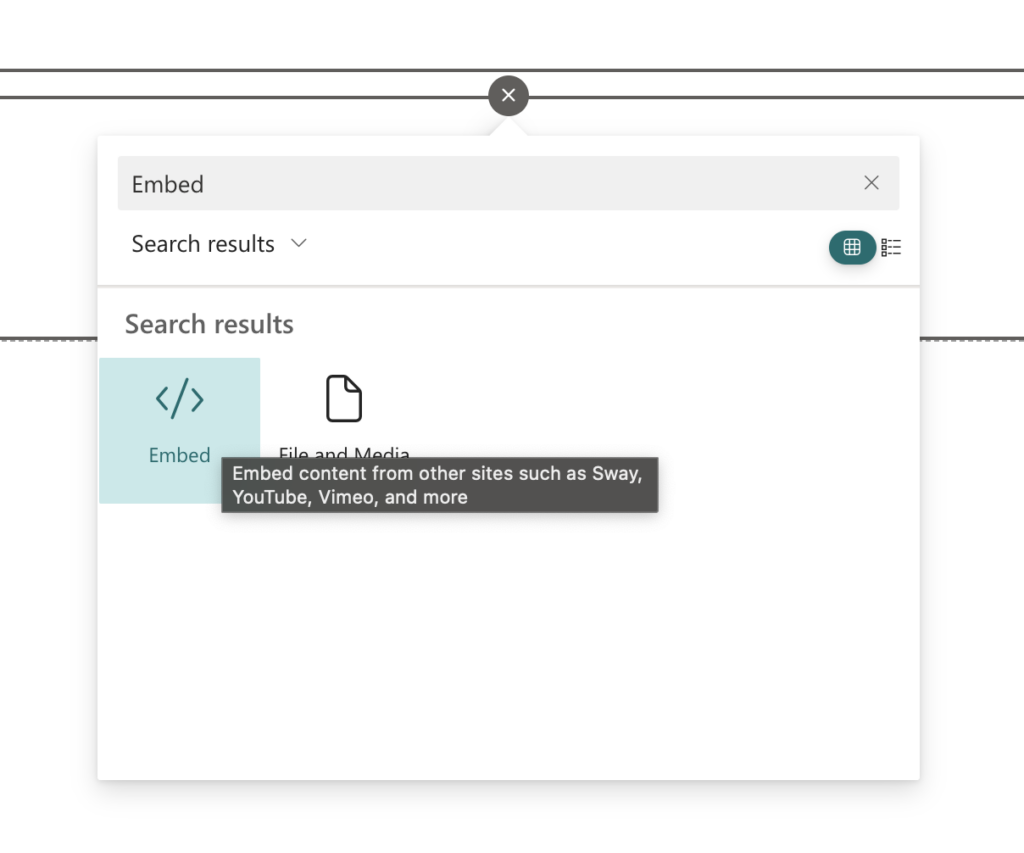
Choose the “Embed” web part from the available options to add external content.

Step 4: Embed the Visual

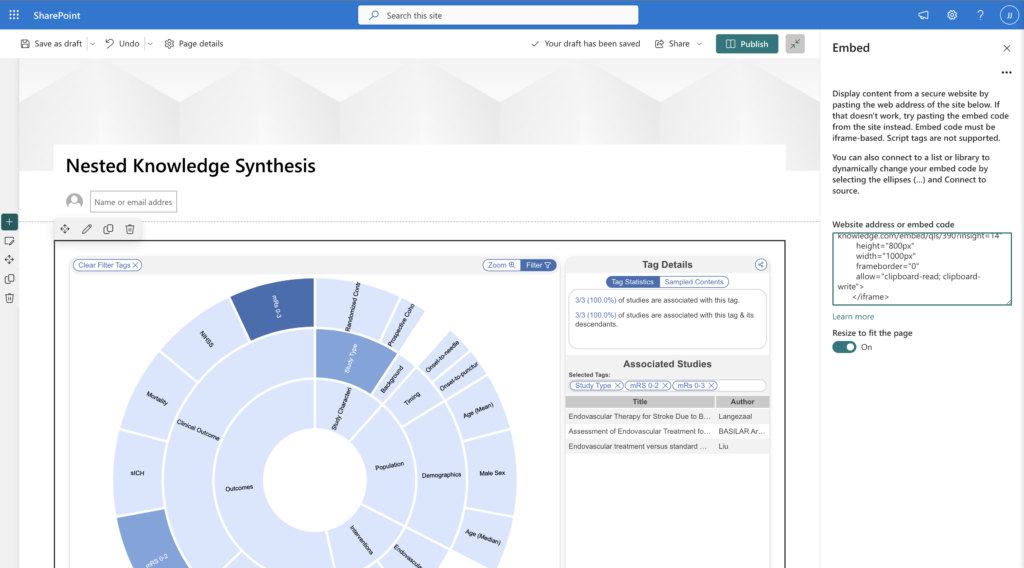
Paste the copied embed code into the Embed web part. SharePoint will preview the visual. At this step, if you don’t see a visual, you may need to add the Nested Knowledge domain to the list of allowed domains in Sharepoint. By default, this is often limited to a handful well-known video streaming services, but you can add the domain nested-knowledge.com to the allowed list easily by following these directions provided by Microsoft. Please note: you must be what’s called a “site collection administrator” to enact this change; if you do not have this permission set, please contact your IT department.

Step 5: Customize and Secure

Adjust the size and alignment as needed. Utilizing the “Protected” Nest Access level with SharePoint’s inherent security features ensures that your embedded content is not only visually integrated but also securely accessed.

Step 7: Publish

Save your changes and publish the page. The Synthesis visual is now securely embedded and accessible to your audien

Conclusion

Embedding Synthesis visuals from Nested Knowledge into your website can dramatically improve how your audience interacts with complex data. By following these steps, you can enhance your content’s value and engagement, making your website a go-to resource for information. By choosing a platform which supports SSO, you can create a secure environment to share insights privately with specific stakeholders.

Having trouble? Need help embedding in a specific platform not covered by our guides? Reach out: 
support@nested-knowledge.com

A blog about systematic literature reviews?

Yep, you read that right. We started making software for conducting systematic reviews because we like doing systematic reviews. And we bet you do too.

If you do, check out this featured post and come back often! We post all the time about best practices, new software features, and upcoming collaborations (that you can join!).

Better yet, subscribe to our blog, and get each new post straight to your inbox.